Integrate Klaviyo with LeadsBridge
Intro
Klaviyo is an email marketing platform. Powered by data, built for e-commerce and web businesses.
In this article, you'll learn how to connect your LeadsBridge account with Klaviyo.
Connect Klaviyo integration
Before you start
- Head over to the left sidebar and click on the Create new Bridge button
- Select your integrations in the selectors
- Click on the Continue button at the bottom right
Authorize Klaviyo integration
Setup your Klaviyo integration
- Click on Connect Klaviyo
- Click on Create new integration to connect your Klaviyo (or select an existing one from the dropdown if you already connected it)
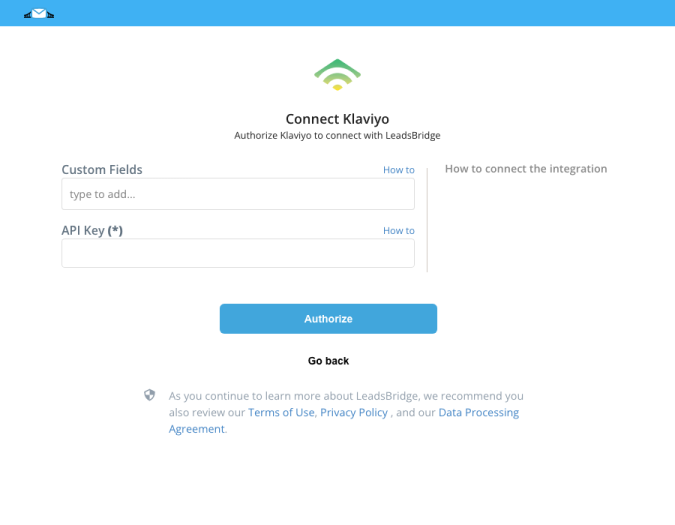
- A popup wil be opened where you can authorize the Klaviyo integration
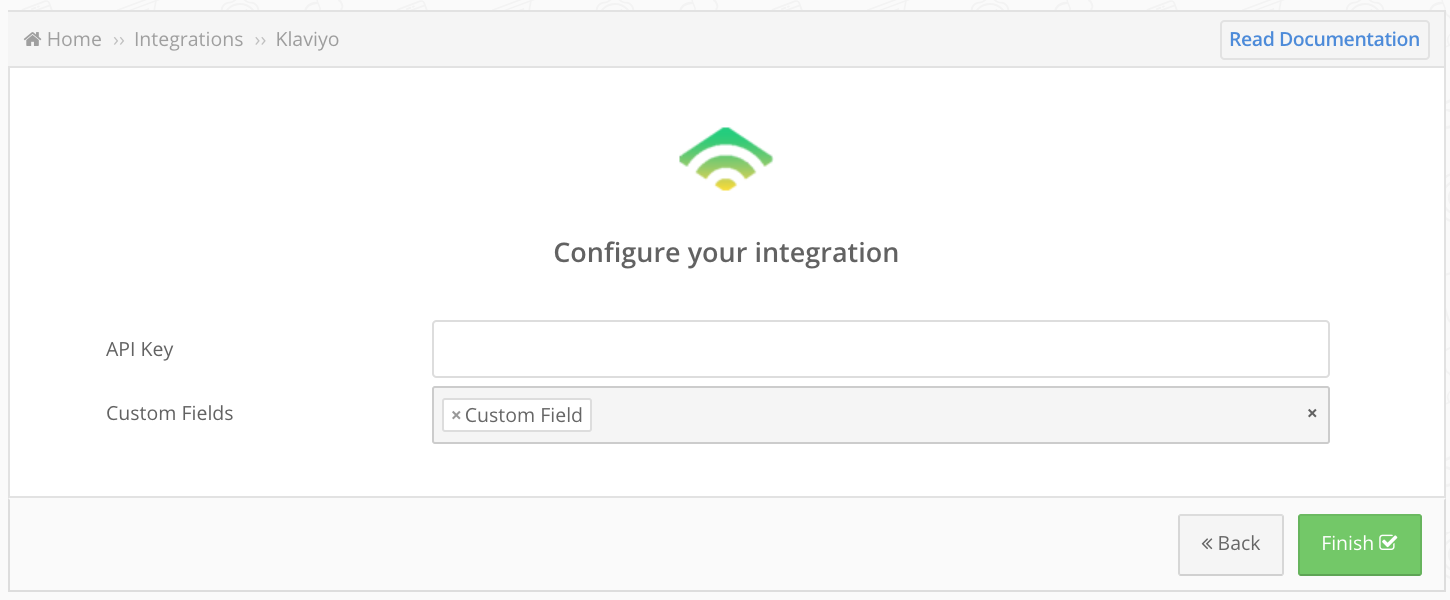
- Fill API Key field to connect Klaviyo with LeadsBridge
- Click on the Authorize button
- You can choose a name for this Klaviyo and LeadsBridge integration (you can also edit it later)
- Once done, click on Continue button and you will get back to the bridge experience where you could choose additional integration settings
- Now that your Klaviyo is connected, you can continue with the set-up of your bridge
Configuration details for Klaviyo
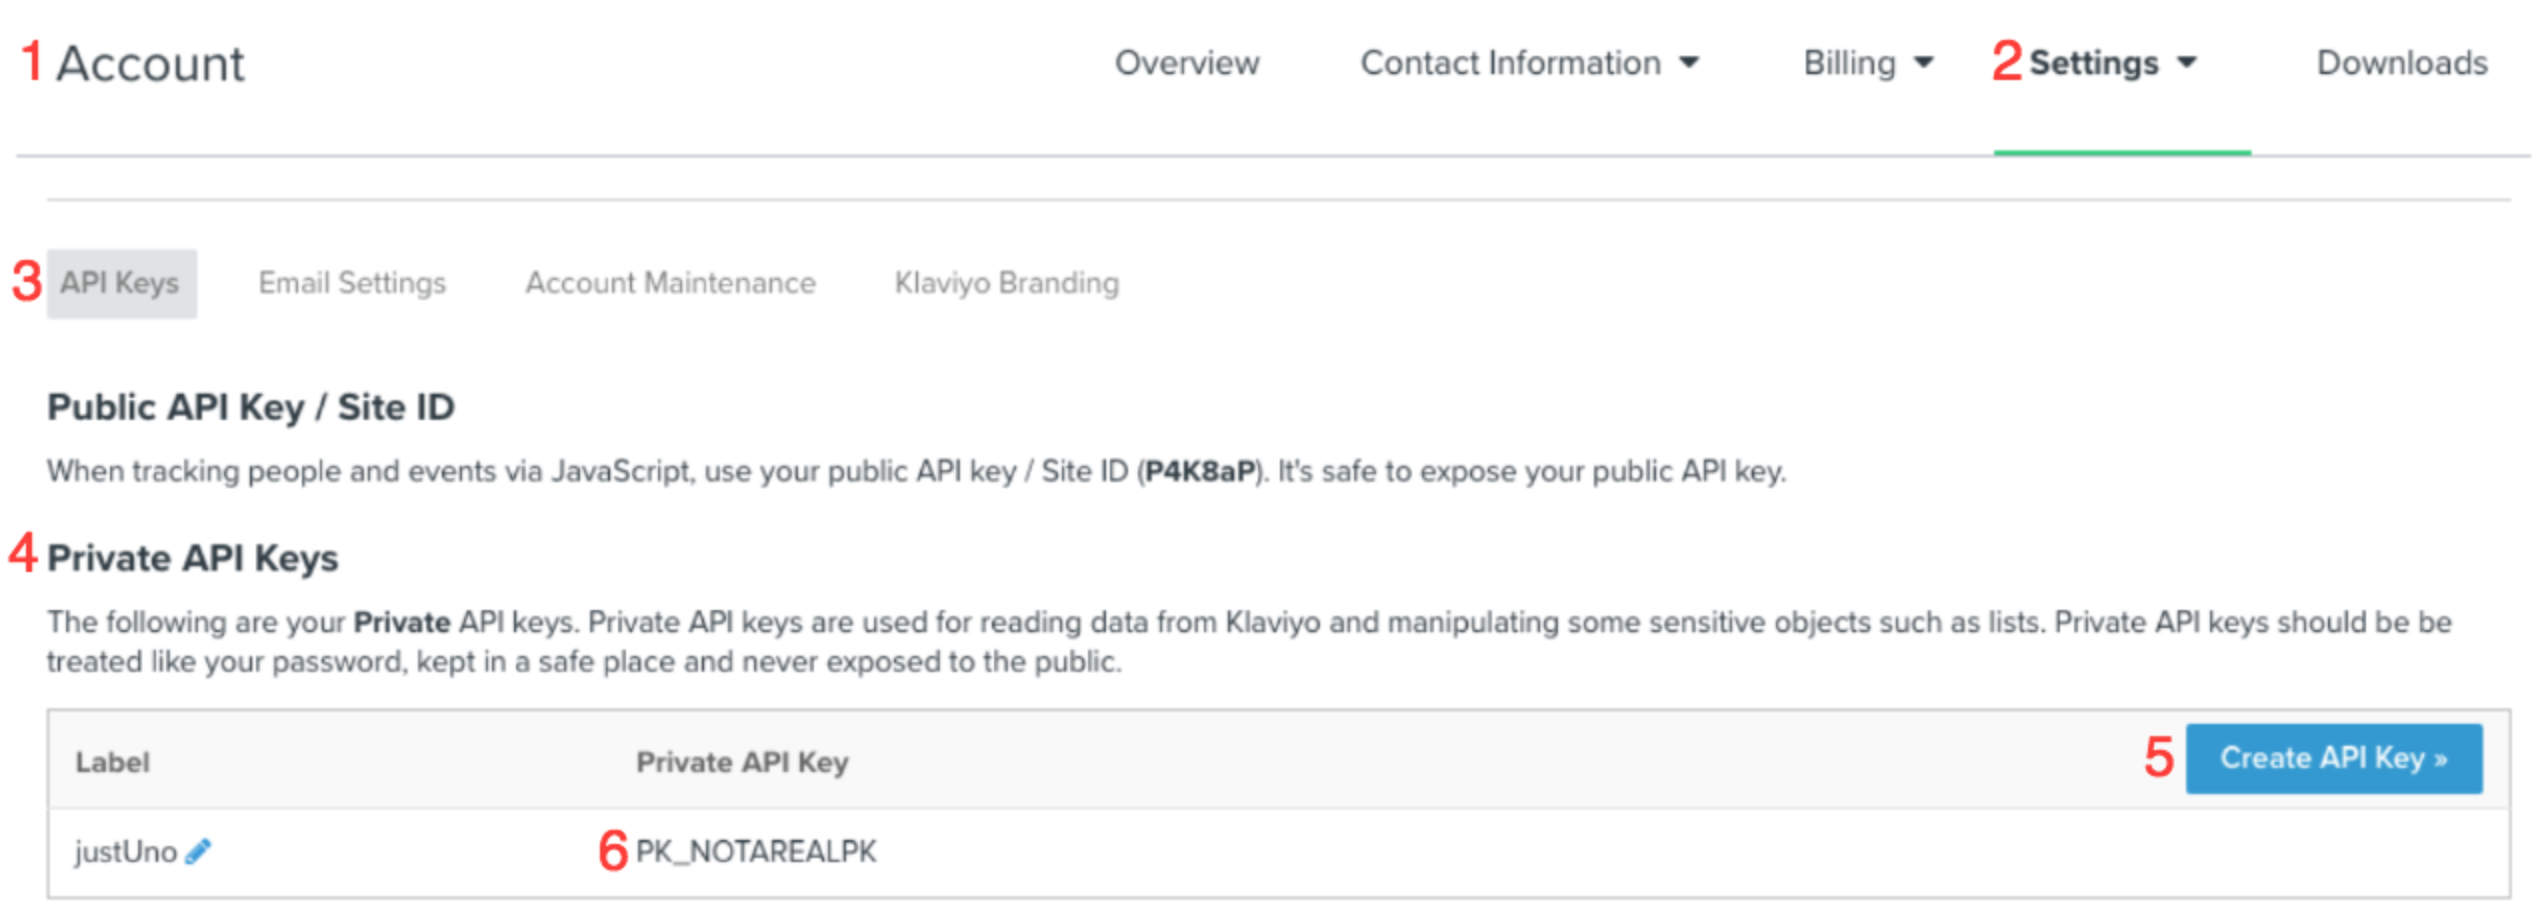
How to get API Key
1. Log into your Klaviyo account account
2. Click on Settings
3. Select API Keys option...or jump to the "API Keys" page directly: https://www.klaviyo.com/account#api-keys-ta
4. Head to the Private API Keys section
5. Click the blue Create API Key button
6. Copy the new Private API Key generated inside the integration
Which entity concepts we support for Klaviyo
With LeadsBridge you may use these entity concepts for Klaviyo.
Member
Someone that has arranged to receive or access a service.
Which segmentation concepts we support for TikTok Lead Generation
With LeadsBridge you may use these segmentation concepts for Klaviyo.
List
Lists are a collection people's email addresses grouped under an identifiable label; you can add people to a list manually, or people can join a list themselves by subscribing through a form. ( Learn more)
Common questions for Klaviyo
How do I add a Custom Field?
How to integrate Klaviyo with Facebook
Klaviyo is a versatile marketing platform that can easily integrate with other marketing tools, including Facebook Lead Ads. However, in order to collect leads successfully through Facebook advertising and send automated emails, you need to connect the two platforms.
Thankfully, LeadBridge provides an easy-to-use interface that makes integrating Klaviyo with Facebook Lead Ads a breeze. Once you have generated your leads, it's important to use the right tools to make the most of this data. This is where Klaviyo comes in - it's a powerful CRM solution that is designed to deliver personalized experiences to your customers.
By automating data transfer between Facebook Ad Manager and Klaviyo, you can streamline your data management workflows and improve efficiency. With LeadsBridge integrations, you can easily manage your data and ensure that your marketing campaigns are running smoothly.
Discover why you should integrate Klaviyo with Facebook with this guide.
( Learn more)How to connect Facebook leads to Klaviyo
LeadsBridge's Facebook Klaviyo integration links Klaviyo and Facebook Lead Ads to streamline data syncing between the two. With just a few clicks, you can set up the integration to automatically share data. This allows you to follow up with SMS and email campaigns tailored to users. The integration is free with LeadsBridge's free forever plan. Sign up here.
Learn how to connect Klaviyo to Facebook lead ads here.
( Learn more)How to connect Klaviyo lists to Facebook
To connect your Klaviyo list to Facebook, follow these steps:
- Set up a new bridge & connect your accounts: Add a new bridge and link your Facebook source with Klaviyo as the destination through LeadsBridge. Authenticate both accounts to establish the connection.
- Choose the Klaviyo list: Configure the integration details by selecting the specific Klaviyo list where you want to send your new Facebook leads.
- Map fields and finalize: Manually map the fields to ensure a smooth data transfer between the platforms. Double-check all data.
Save your settings to complete the bridge. That's all! Your Klaviyo list is now connected to Facebook.
How to connect Klaviyo to Facebook Custom Audience
Integrating Klaviyo lists with Facebook has a standout feature that can automate your retargeting efforts. By streamlining the transfer of data between the two platforms, you can create audience segments based on your Klaviyo list. This allows you to create highly targeted retargeting campaigns that resonate with your leads' preferences and behaviors.
For instance, if you have segmented your Klaviyo list based on purchase history, interests, or level of involvement, you can use these segments to build Custom Audiences. This tailored strategy increases the chances that your ads will be well-received by the target demographic. Consequently, it boosts your click-through rates, conversions, and ROI.
See how to connect Klaviyo to Facebook Custom Audience here.
( Learn more)Does LeadsBridge offer Klaviyo - TikTok integrations?
Yes, it does! By using LeadsBridge, you can connect TikTok lead generation to Klaviyo and get your incoming leads synced in real-time with your email marketing platform.
This way, you can automate the process of sending welcome emails or triggering email nurturing campaigns through Klaviyo when a lead submits a form. This ensures that you don't miss the opportunity to establish a relationship with a potential customer.
Learn how to connect Klaviyo to TikTok lead generation here.
( Learn more)What is Klaviyo?
Klaviyo is a robust marketing tool designed for email and SMS campaigns. Focused on automation, it strategically sends messages using action-based triggers. With advanced segmentation, Klaviyo enhances message personalization. It's user-friendly and caters to businesses of all skill levels.
What is Klaviyo used for?
Looking for an email marketing and SMS solution? Klaviyo is a reliable option for an email marketing and SMS solution. It offers comprehensive features that bring all the essential tools together in one place, making workflows seamless and boosting productivity.
With advanced data science, you can access smart analytics and personalized recommendations to send targeted and effective marketing emails, ultimately increasing your sales.
Klaviyo's design allows you to easily customize workflows, choosing from multiple options to suit your customers' behavior. Its user-friendly interface has a minimum learning curve, with a 3-step setup and in-app features.
Klaviyo also offers great customer support: their experienced and friendly team is available during business hours to provide assistance via email or live chat for paid plans. Additionally, Klaviyo allows third-party integrations, seamlessly connecting with numerous platforms to enable data sync to and from your systems.
How to add Klaviyo Custom Fields?
Here we will show you how to add your Klaviyo Custom Fields to your LeadsBridge account.
- In your Klaviyo account, click on the List & Segments tab from the Dashboard menu on the left side bar
- Click on the list you would like to manage, (for example, the Newsletter)
- Click on Manage List > Export List to CSV on the top right
- You will find the list of all the properties and search for the Custom Fields
- Let's add to LeadsBridge the custom field called "Last Open". Inside the integration settings, under the Custom Fields section, type the name of the Klaviyo property name.
- The name should start with the $ character and every space should be replaced with the "_" character. For example, the "Last Open" property should be written as "$Last_Open"
- When heading to the Filed Mapping step of your Bridge settings, select the "Last Open" field from Klaviyo ones.
- Click on the Map this Field option to add it to the field mapping step and you are set!
We suggest testing the connection between LeadsBridge and Klaviyo by sending a Test Lead. If the test result is successful, the lead with show up under the Profile section > Lead. The Custom Fields are displayed under the Information section.
How to find your Klaviyo API key?
In order to integrate Klaviyo with LeadsBridge, you have to add the API key in the LeadsBridge integration settings. Here we will show you where to find the API key in your Klaviyo account.
- Log into your Klaviyo account.
- Select the Account option from the top-right menu
- Click on Settings > API Keys
- If you have no key, then generate one by clicking the Create Private API Key button
- Go back to LeadsBridge and add the API key in the integration settings
Do you need help?
Here some additional resources:
- LeadsBridge KNOWLEDGE BASE
- Contact support from your account clicking on the top right Support button