Connect Google BigQuery to HTTP Request (GET/POST) with LeadsBridge
In this article, you'll learn how to set up the bridge and connect Google BigQuery to HTTP Request (GET/POST) using LeadsBridge.
How to set up your bridge step-by-step tutorial
Before you start
Step 1: Bridge's Main information
- Choose a name for your bridge (this will only be visible inside LeadsBridge)
- You may add labels to help you identify your bridge later
- Choose Google BigQuery as the source for your bridge
- Choose HTTP Request (GET/POST) as the destination
- Click on the Next button
Step 2: Setup your Google BigQuery source
- Type in the name you'd like to call your integration
- Enter GCP Authentication JSON and Dataset name to connect your Google BigQuery with LeadsBridge
![]()
- To authenticate in Google BigQuery you need to have the OAuth JSON file for your project with the right roles set. If you don't have this file yet, please follow the official guide below to generate it.
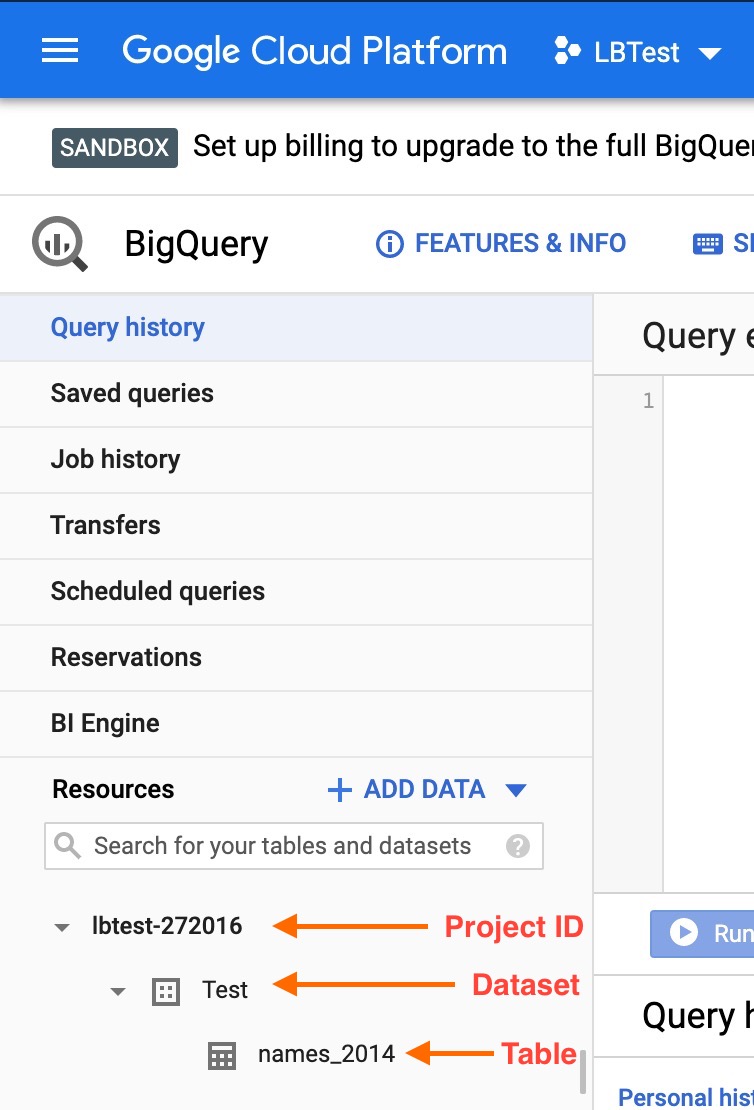
Once downloaded, open the file, select the whole content and paste it into the "GCP Authentication JSON" field.( OPEN LINK) - All the needed data can be found on your Google BigQuery dashboard on the left as shown in the picture below.
In the "Dataset name" field you have to specify the name of the database you want to use in Google BigQuery.
In the "Project ID" field you have to specify your Google Cloud Platform project id.
As entity Google BigQuery uses the single record of your database, so select "Record" from the "Manage "Entities as" dropdown.
As segmentation, you will have to select the database table to use, so select "Table" from the "Use Segment as" dropdown.![]()
- Select the segment you'd like to use as the source for your leads
- Click on the Next button

Step 3: Setup your HTTP Request (GET/POST) destination
- Type in the integration's name in the dedicated field
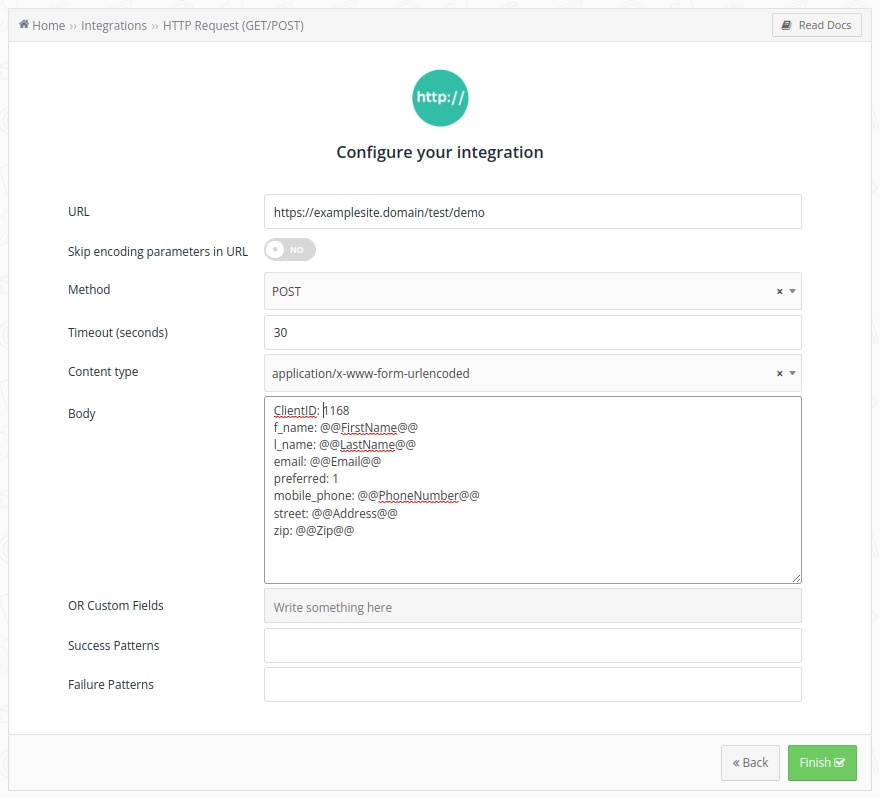
- Enter URL, Method, Content type and Body to connect HTTP Request (GET/POST) with LeadsBridge
![]()
- URL - mandatory: where the system you'd like to send information to is located.
- Method - mandatory: the request method your system may receive as the indication of the desired action to be performed.
POSTis the default value. It's used to send data to a server to create/update a resource and it's one of the most common HTTP methods. If you're unsure about what you should select, leave it as is.
- Content Type - mandatory: is used to indicate the media type of the resource. Works as the content type description for the message body.
application/x-www-form-urlencodedis the most common encoding type. Use this as long as you're not using any JSON or XML language on the request body.
- Body - mandatory: the message Body is where all the data is set to eventually form the HTTP Request that will be sent to insert each lead into your system.
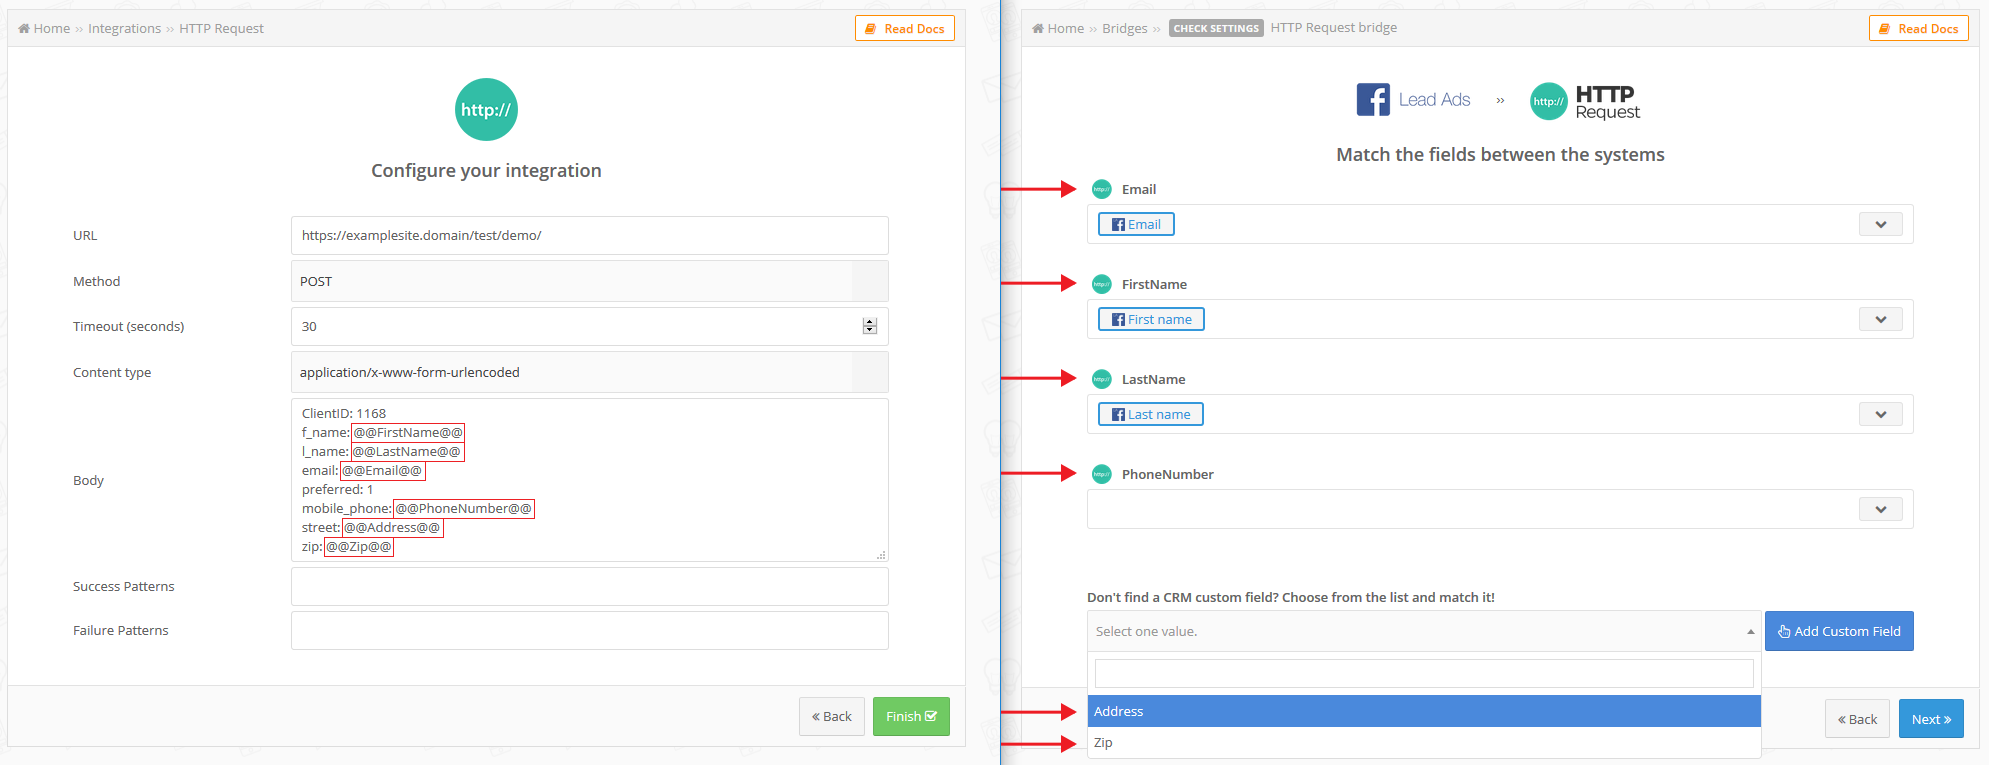
- Body syntax should be write as follows:
"field_id": "value″"field_id" is the unique identifier of the field inside your CRM/platform; "value" can be static (number or text that will be the same for every lead synced) or dynamic. - To create dynamic values just enter the field name between the double
@@symbols, that will results in a @@field_name@@ syntax. The field name can be whatever you'd like, it will help you recognize the field inside the bridge settings later.
Dynamic fields will be displayed on the Fields Matching step of the bridge, where you will be able to match them with lead's information. - That said, if we have a full_name field on our platform to store the lead's full name, we should use the following syntax:
full_name: @@FullName@@Please check HTTP common questions for code examples.
- Body syntax should be write as follows:
![]()
- Body - mandatory: the message Body is where all the data is set to eventually form the HTTP Request that will be sent to insert each lead into your system.
- Success pattern - optional: the message your system replies with once the request was received successfully.
- Failure pattern - optional: an error message your system sends when there's an issue with the request.
- Skip encoding parameters in URL - optional: if enabled prevent the encoding of special characters in the URL parameters
- Click on the Next button
- You'll now be able to select the destination segment to send your leads to
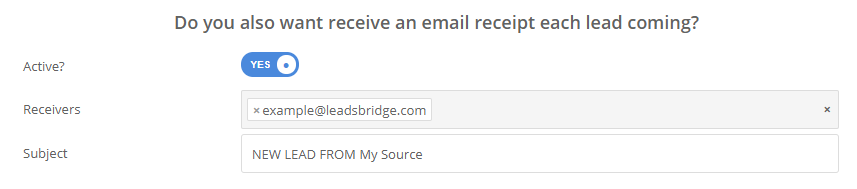
- You may choose to receive an email receipt for each incoming lead.
![]()
- Type the address(es) where you'd like to receive the receipt
- You may also modify the Subject line of the email
- Click on the Next button
Step 4: Fields Mapping
Here you'll be able to map your source information with your destination fields.
You'll see a field name with the destination integration's logo at the top, this indicates the name of the field on HTTP Request (GET/POST).
Underneath there's a box where you may add the information you'd like to send.
- Check each of the HTTP Request (GET/POST) fields available
- Match the information you wish to pass along from Google BigQuery
- You may type the information manually and pass them as a static value
- Use the functions to customize information like reformatting dates and times or modifying text, phone numbers and so on
- You may also leave blank the box of a field's information you don't want to send through
Custom Fields
- If you'd like to add more fields, just look at the bottom of the page
- Head over the "Don't find a CRM custom field?" box
- Select the field you'd like to add from the dropdown list
- Click the Add Custom Field button
![]()
- The field will appear above
- Add the desired information, as you did with the other ones

Once accomplished your desired outcome, just click Next and head to the last step.
Step 5: Test
In this final step, you'll be able to send a lead from LeadsBridge to test if the configuration works properly.
- To create a new test lead, fill in the required information when prompted
- Click Test Now
- To test with a real lead, switch the toogle to "Test with existing lead".
- Click Sync Now along the lead you'd like to send
- If you did everything right the button will turn green, meaning your lead was synced successfully and the integration is ready
- Click Finish to save your settings and turn active your bridge
That's all! Congratulations.
You'll be redirected to the bridges section of your account with a green success message at the top right of the page and your bridge will now be active.
Have you got some questions?
You may want to take a look at the common questions on the respective integration's documentation.
- Source: Google BigQuery
- Destination: HTTP Request (GET/POST)
If you have any other questions, or need help to configure your bridge from Google BigQuery to HTTP Request (GET/POST) with LeadsBridge, do not hesitate to contact our Support!