Integrate Sendy with LeadsBridge
Intro
Sendy is a self-hosted newsletter application that lets you send trackable emails via Amazon Simple Email Service (SES) at cheaper rates.
In this article, you'll learn how to connect your LeadsBridge account with Sendy.
Connect Sendy integration
Before you start
- Head over to the left sidebar and click on the Create new Bridge button
- Select your integrations in the selectors
- Click on the Continue button at the bottom right
Authorize Sendy integration
Setup your Sendy integration
- Click on Connect Sendy
- Click on Create new integration to connect your Sendy (or select an existing one from the dropdown if you already connected it)
- A popup wil be opened where you can authorize the Sendy integration
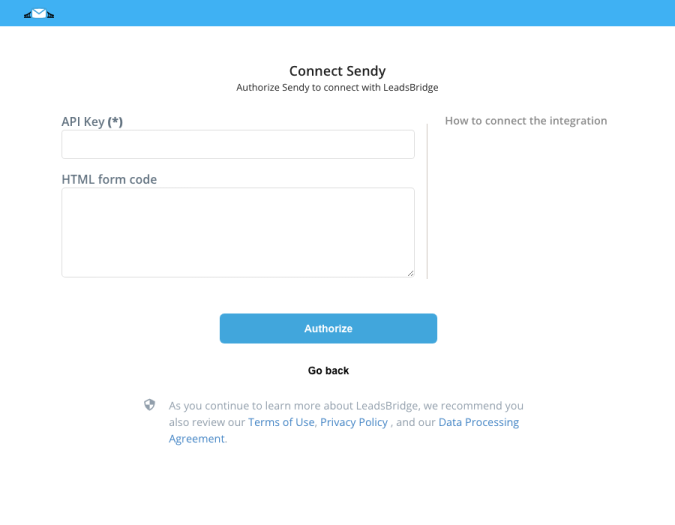
- Fill API Key, HTML form code field to connect Sendy with LeadsBridge
- Click on the Authorize button
- You can choose a name for this Sendy and LeadsBridge integration (you can also edit it later)
- Once done, click on Continue button and you will get back to the bridge experience where you could choose additional integration settings
- Now that your Sendy is connected, you can continue with the set-up of your bridge
Configuration details for Sendy
How to get API Key, HTML form code
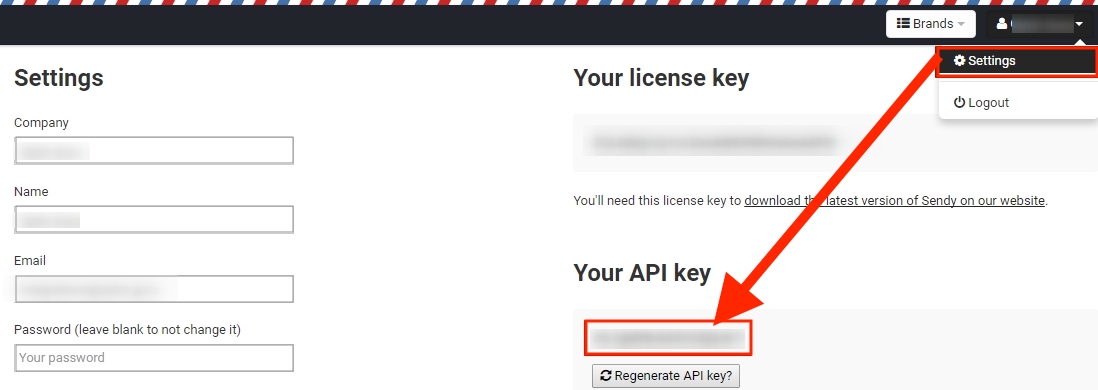
Log into your Sendy account and go to the main menu under your account name, click on Settings.
There you'll see the API Key, you should copy it and paste it into the integration set up inside LeadsBridge.
There you'll see the API Key, you should copy it and paste it into the integration set up inside LeadsBridge.
Other Info
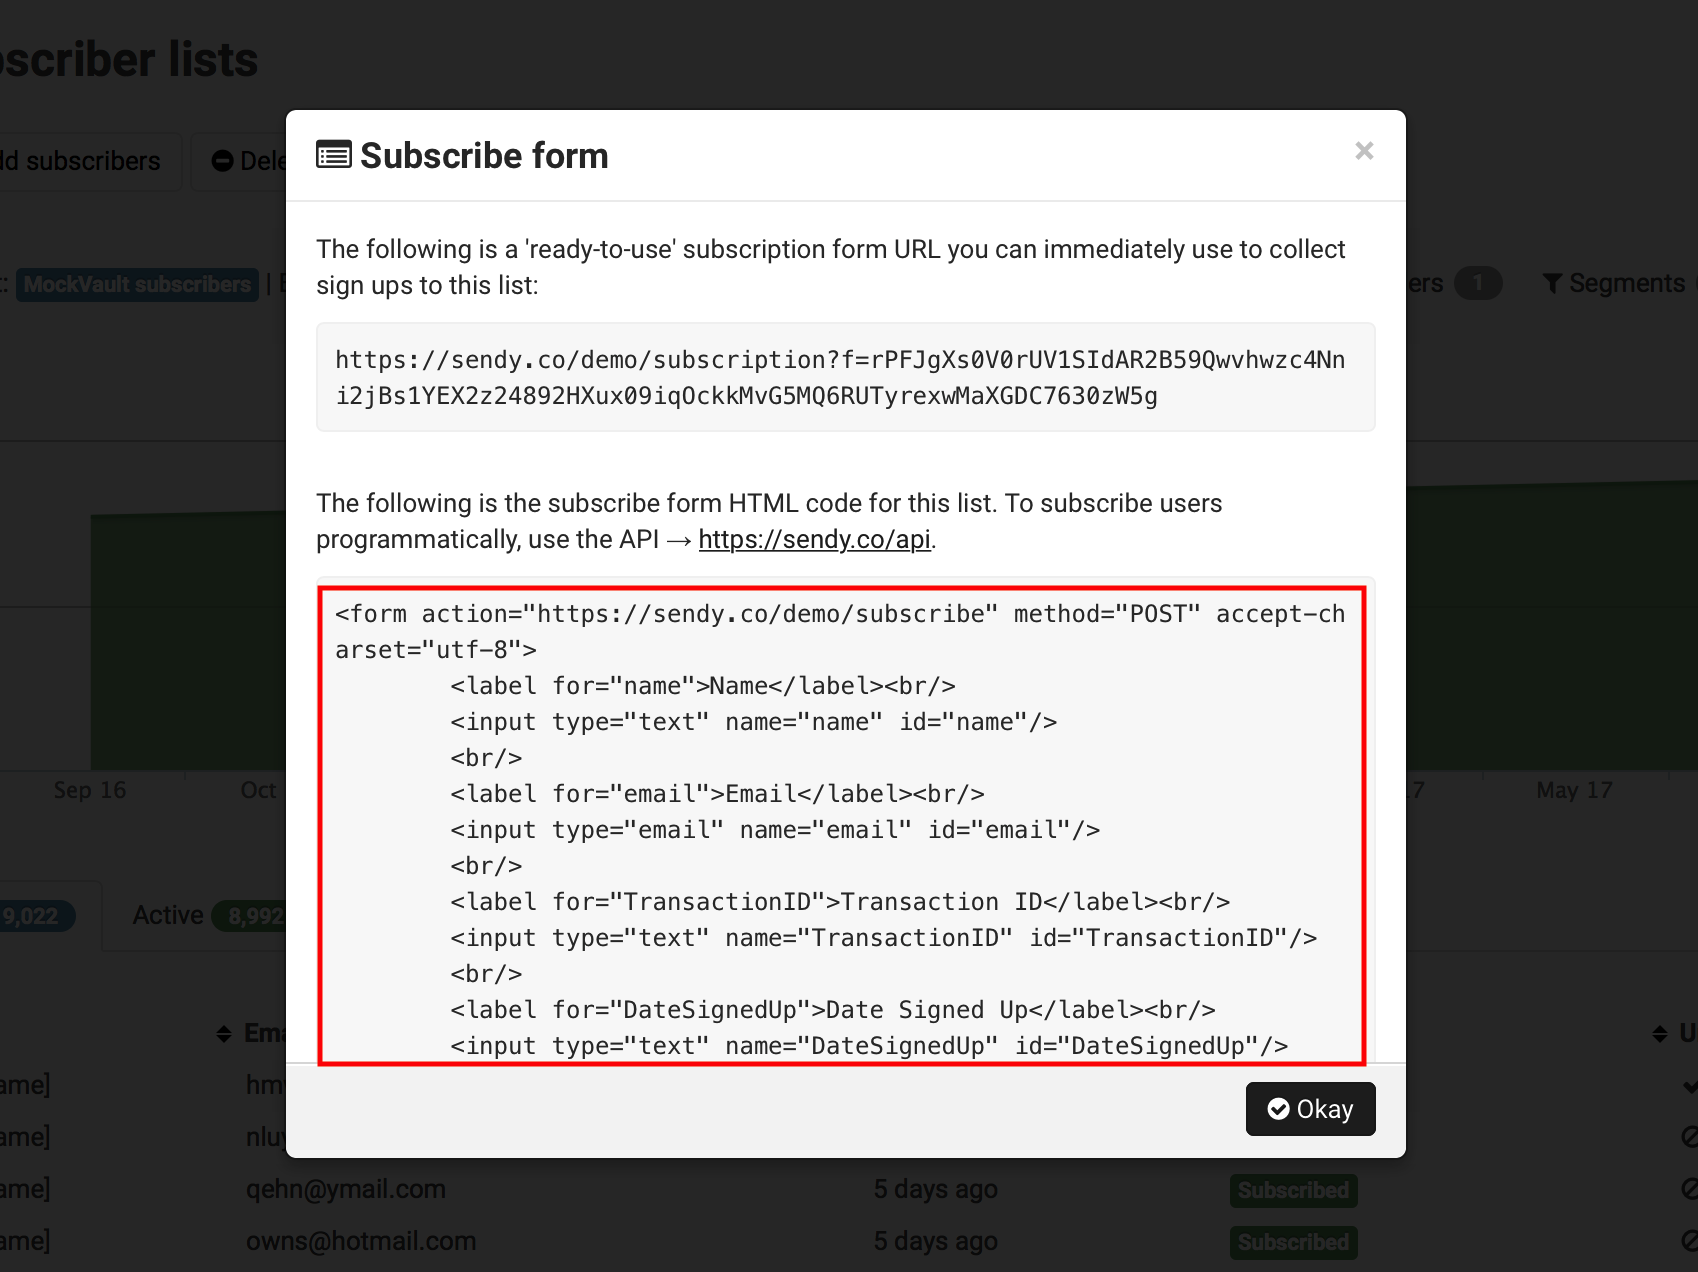
Go to your Subscriber lists and select the "Subscribe form", you'll see the form HTML code which should be copied in its entirety and pasted in your LeadsBridge integration set up.
Which entity concepts we support for Sendy
With LeadsBridge you may use these entity concepts for Sendy.
Lead
Which segmentation concepts we support for Sendy
With LeadsBridge you may use these segmentation concepts for Sendy.
List
Common questions for Sendy
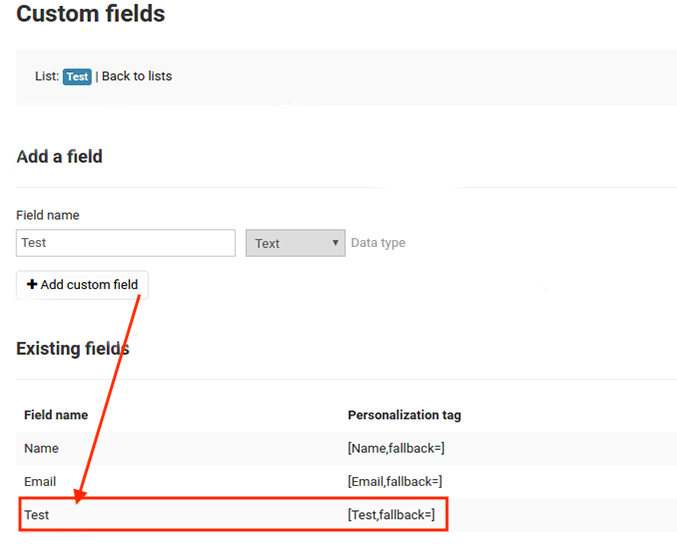
How can I create a Custom Field inside Sendy?
To create a new custom field inside your Sendy account you should follow these steps:
1. Log into Sendy
2. Go to Custom Fields and select "Add a custom field >> Custom Fields >> Add custom field
3. Type the name of your new field
4. Select the type of field you want to create, we suggest using text.
5. Click on Save
Why am I missing some leads in Sendy even if I see them correctly synced in LeadsBridge?
When the Double Opt-In feature is active you may not see leads inside Sendy, even after LeadsBridge sends it to their system, this is because Sendy sends a confirmation email and it'll show you the lead once they confirm their subscription.
Do you need help?
Here some additional resources:
- LeadsBridge KNOWLEDGE BASE
- Contact support from your account clicking on the top right Support button