Integrate CalDav with LeadsBridge
Intro
CalDAV, is an Internet standard allowing a client to access scheduling information on a remote server. It extends WebDAV (HTTP-based protocol for data manipulation) specification and uses iCalendar format for the data.
In this article, you'll learn how to connect your LeadsBridge account with CalDav.
Connect CalDav integration
Before you start
- Head over to the left sidebar and click on the Create new Bridge button
- Select your integrations in the selectors
- Click on the Continue button at the bottom right
Authorize CalDav integration
Setup your CalDav integration
- Click on Connect CalDav
- Click on Create new integration to connect your CalDav (or select an existing one from the dropdown if you already connected it)
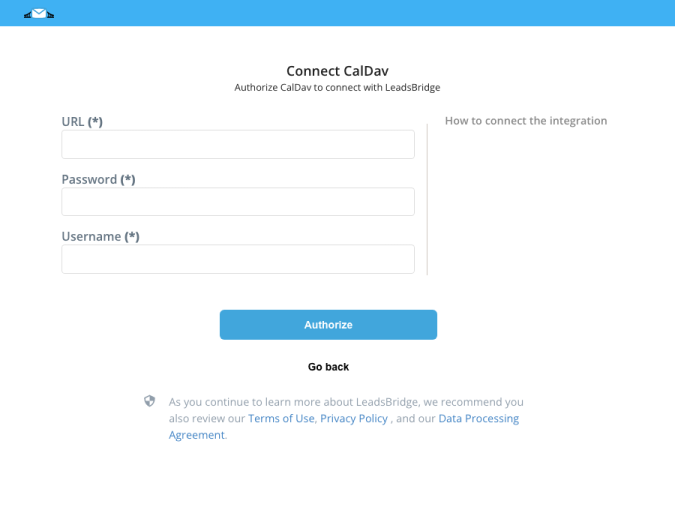
- A popup wil be opened where you can authorize the CalDav integration
- Fill URL, Username, Password field to connect CalDav with LeadsBridge
- Click on the Authorize button
- You can choose a name for this CalDav and LeadsBridge integration (you can also edit it later)
- Once done, click on Continue button and you will get back to the bridge experience where you could choose additional integration settings
- Now that your CalDav is connected, you can continue with the set-up of your bridge


Configuration details for CalDav
How to get URL, Username, Password
In the Url field provide your complete CalDAV server URL. Outlook CalDav Synchronizer supports discovery. In the Username and Password fields provide your credentials.
Which entity concepts we support for CalDav
With LeadsBridge you may use these entity concepts for CalDav.
Attendee
Which segmentation concepts we support for CalDav
With LeadsBridge you may use these segmentation concepts for CalDav.
Calendar
Do you need help?
Here some additional resources:
- LeadsBridge KNOWLEDGE BASE
- Contact support from your account clicking on the top right Support button

