Connect Webhook to SMS Notification with LeadsBridge
In this article, you'll learn how to set up the bridge and connect Webhook to SMS Notification using LeadsBridge.
How to set up your bridge step-by-step tutorial
Before you start
Step 1: Bridge's Main information
- Choose a name for your bridge (this will only be visible inside LeadsBridge)
- You may add labels to help you identify your bridge later
- Choose Webhook as the source for your bridge
- Choose SMS Notification as the destination
- Click on the Next button
Step 2: Setup your Webhook source
You may send lead's information from Webhook to LeadsBridge through the Webhook feature.
Copy the Webhook address that you see in this step and set this endpoint as the data receiver inside your Webhook settings.
How to setup the Webhook on Webhook
In order to correctly recognize incoming data when the Webhook Integration is used as Source you should do the following:
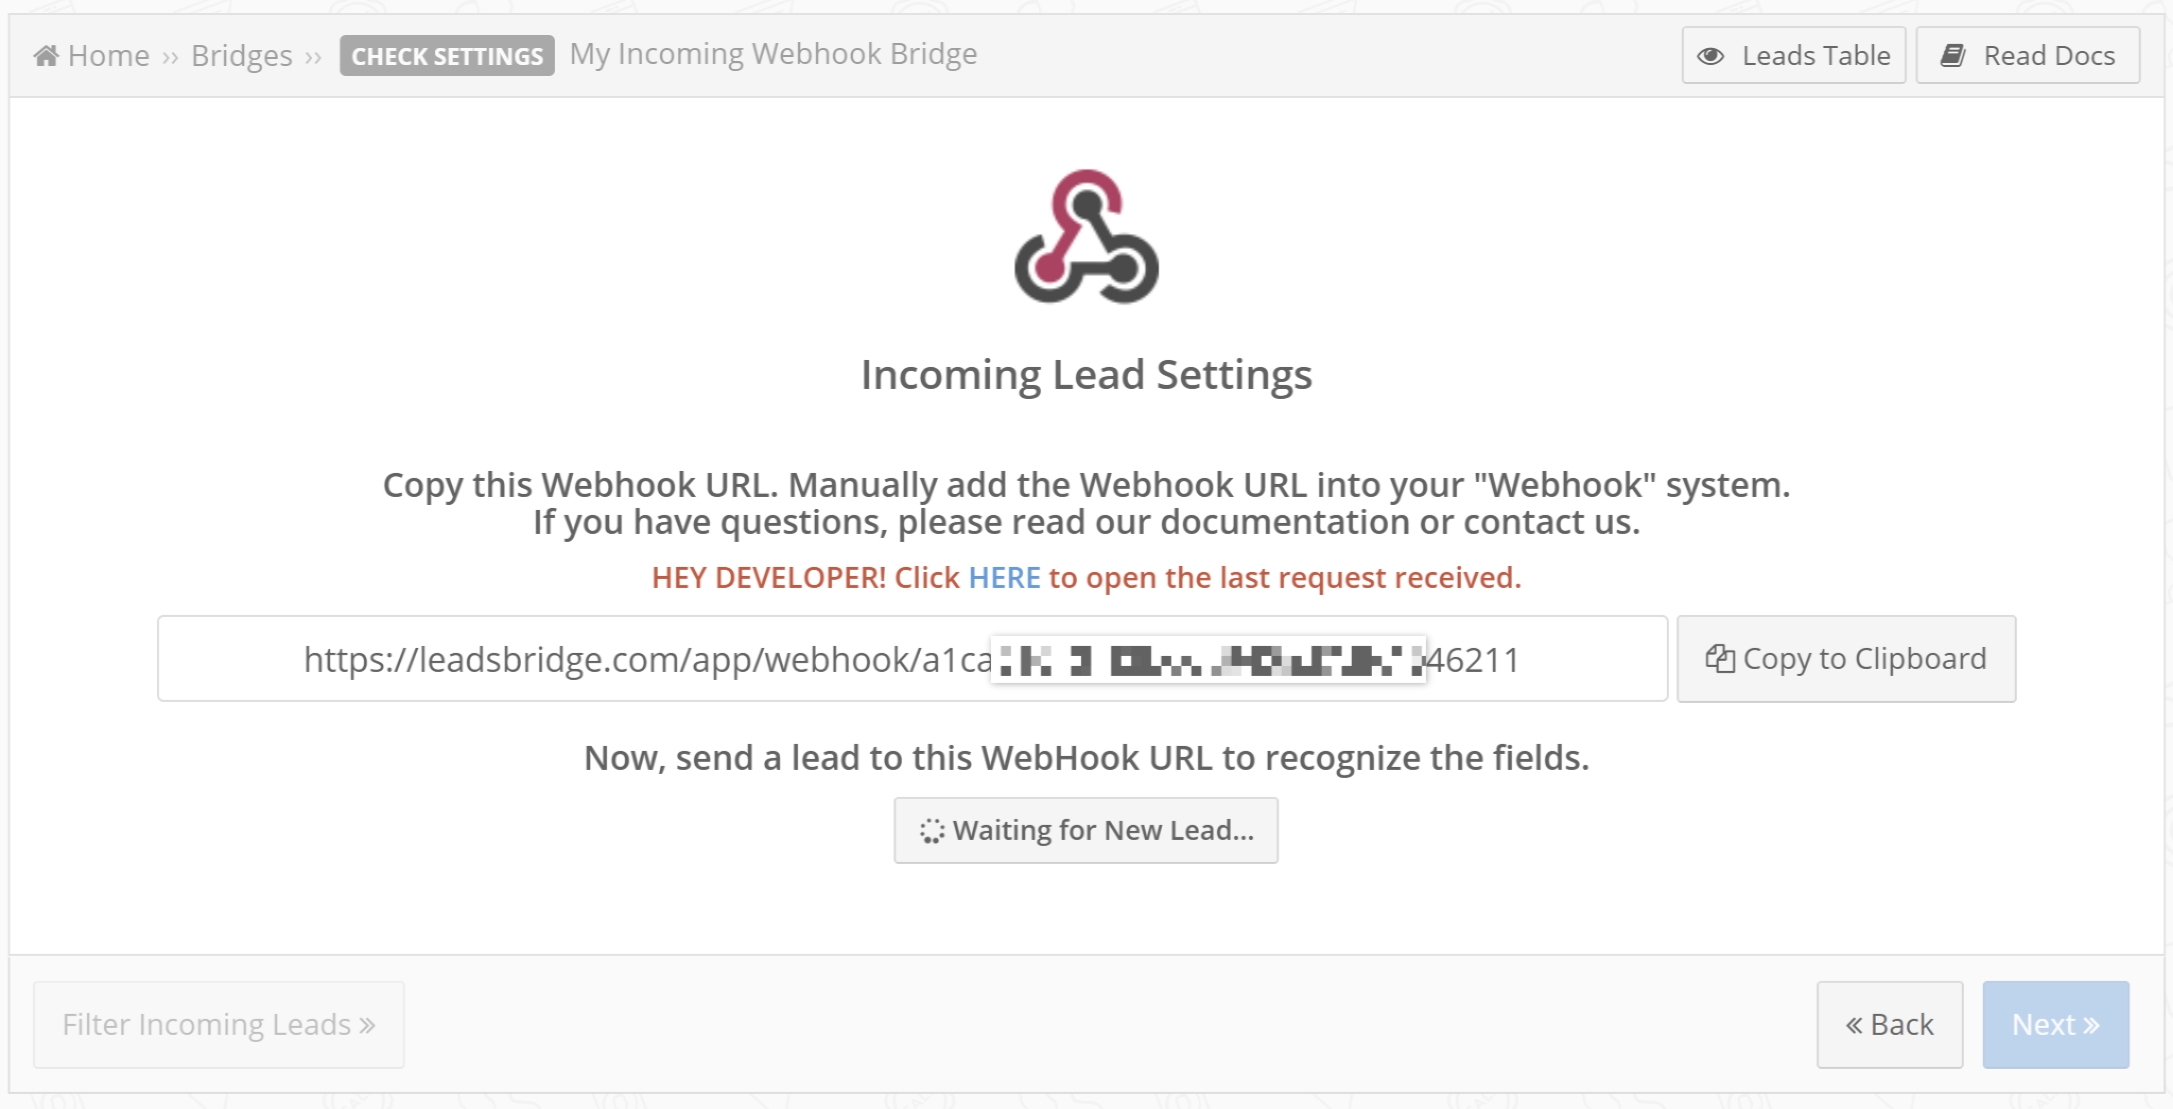
- Go into the Source step of your Incoming Webhook Bridge
- If the Bridge says Waiting for New Lead… means that is on Listening Mode and that any data you submit to the Webhook URL will be read by the LeadsBridge as soon as it arrives into the system
![]()
- You should leave this page open and submit data from the Source in which you have assigned the Webhook URL provided by LeadsBridge. In case you need to close the page and go back later to the Bridge configuration, make sure to set the Bridge on Listening Mode by clicking on the Recognize Other Fields button
![]()
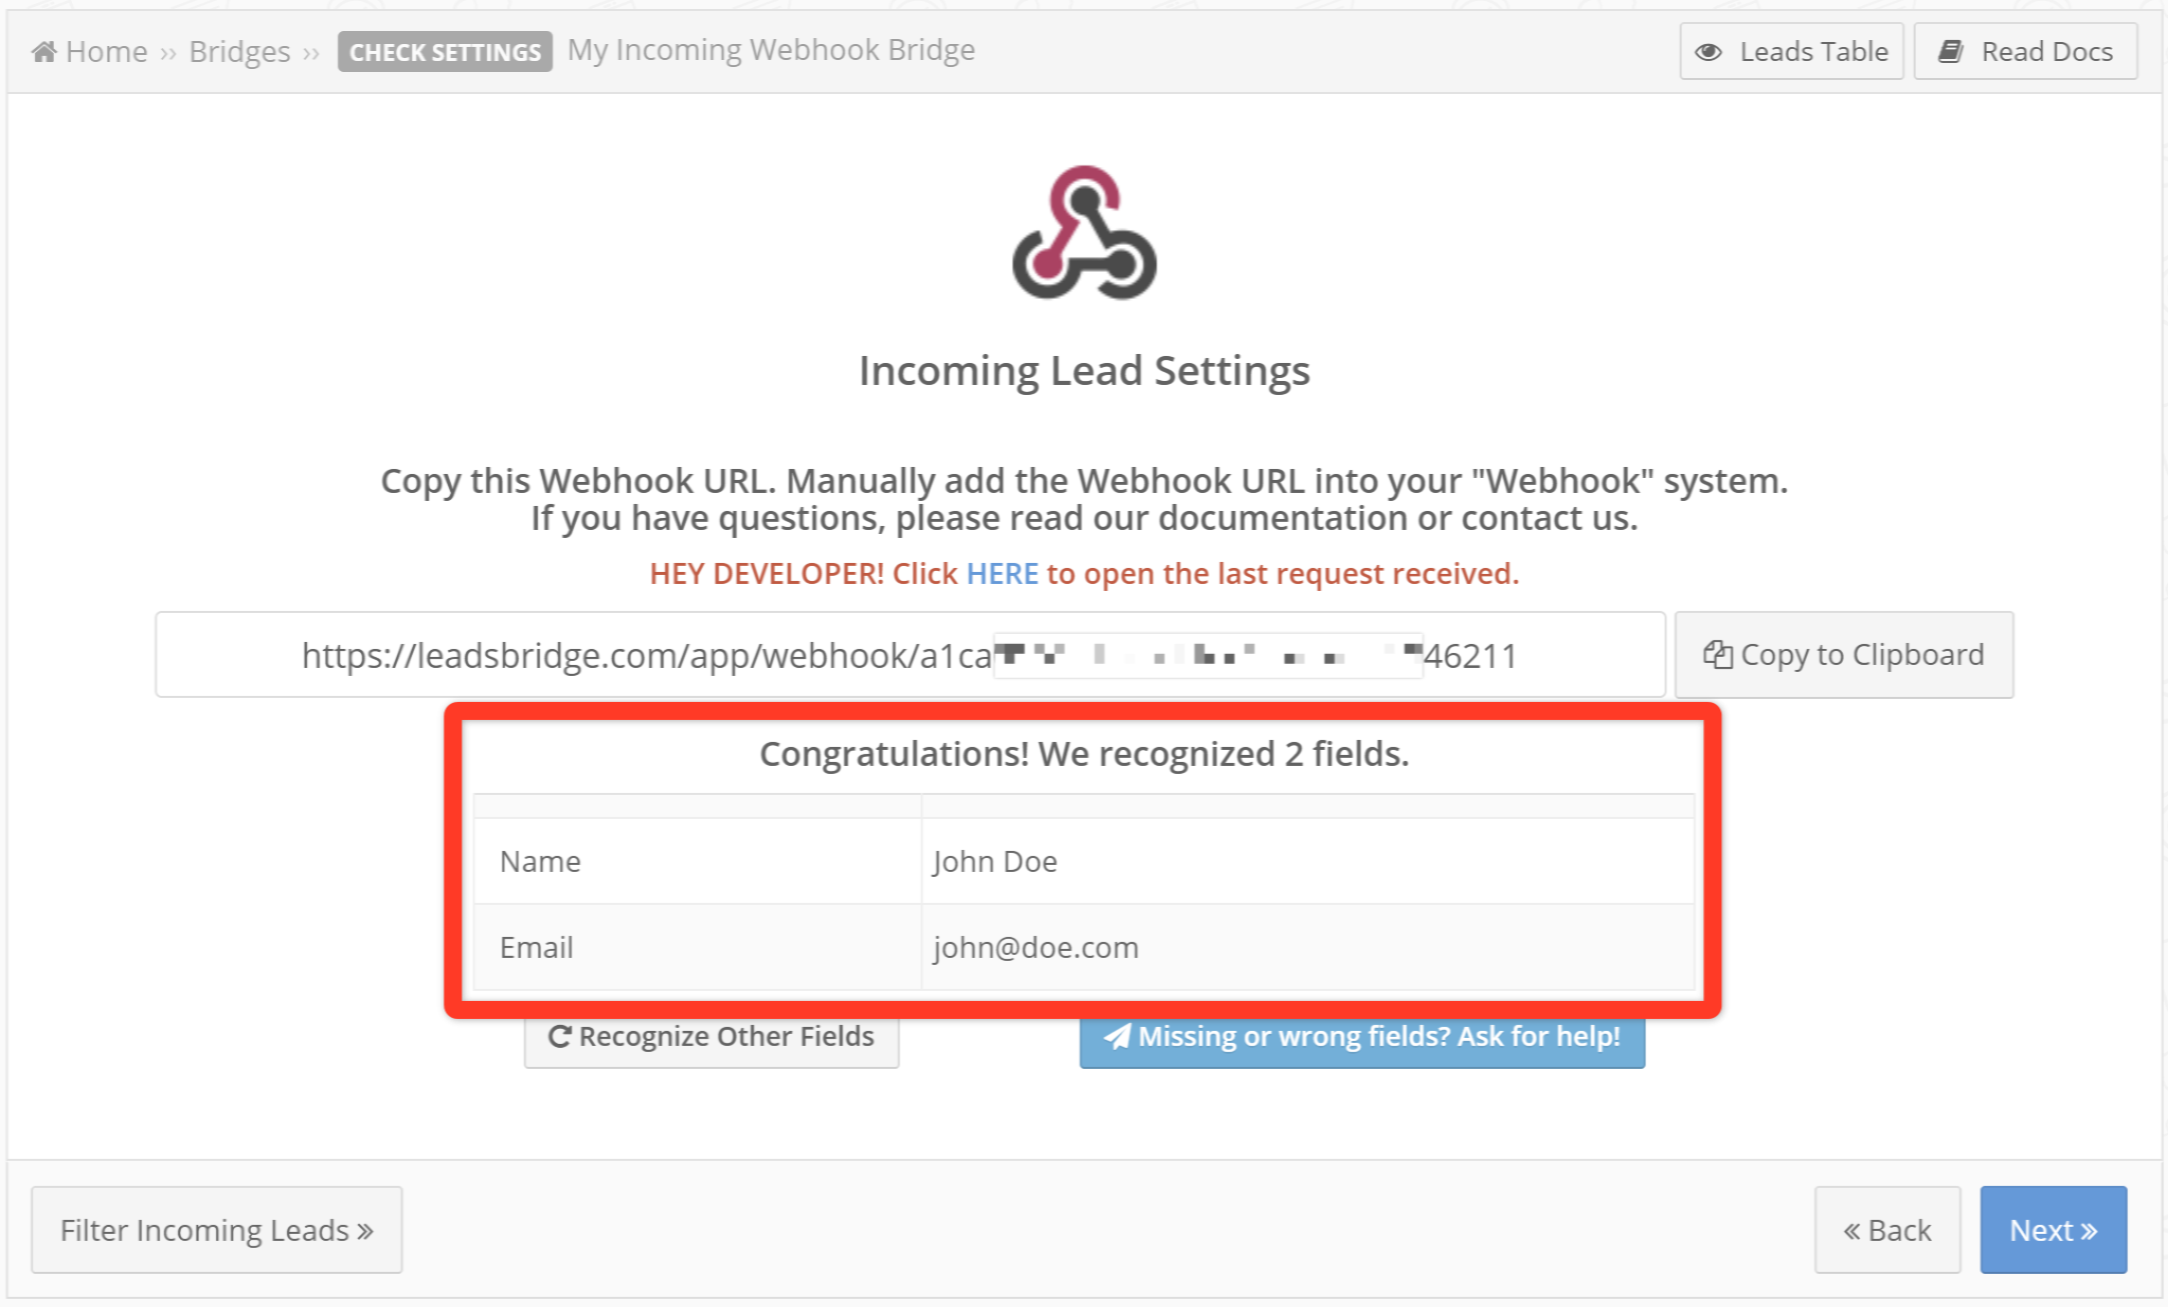
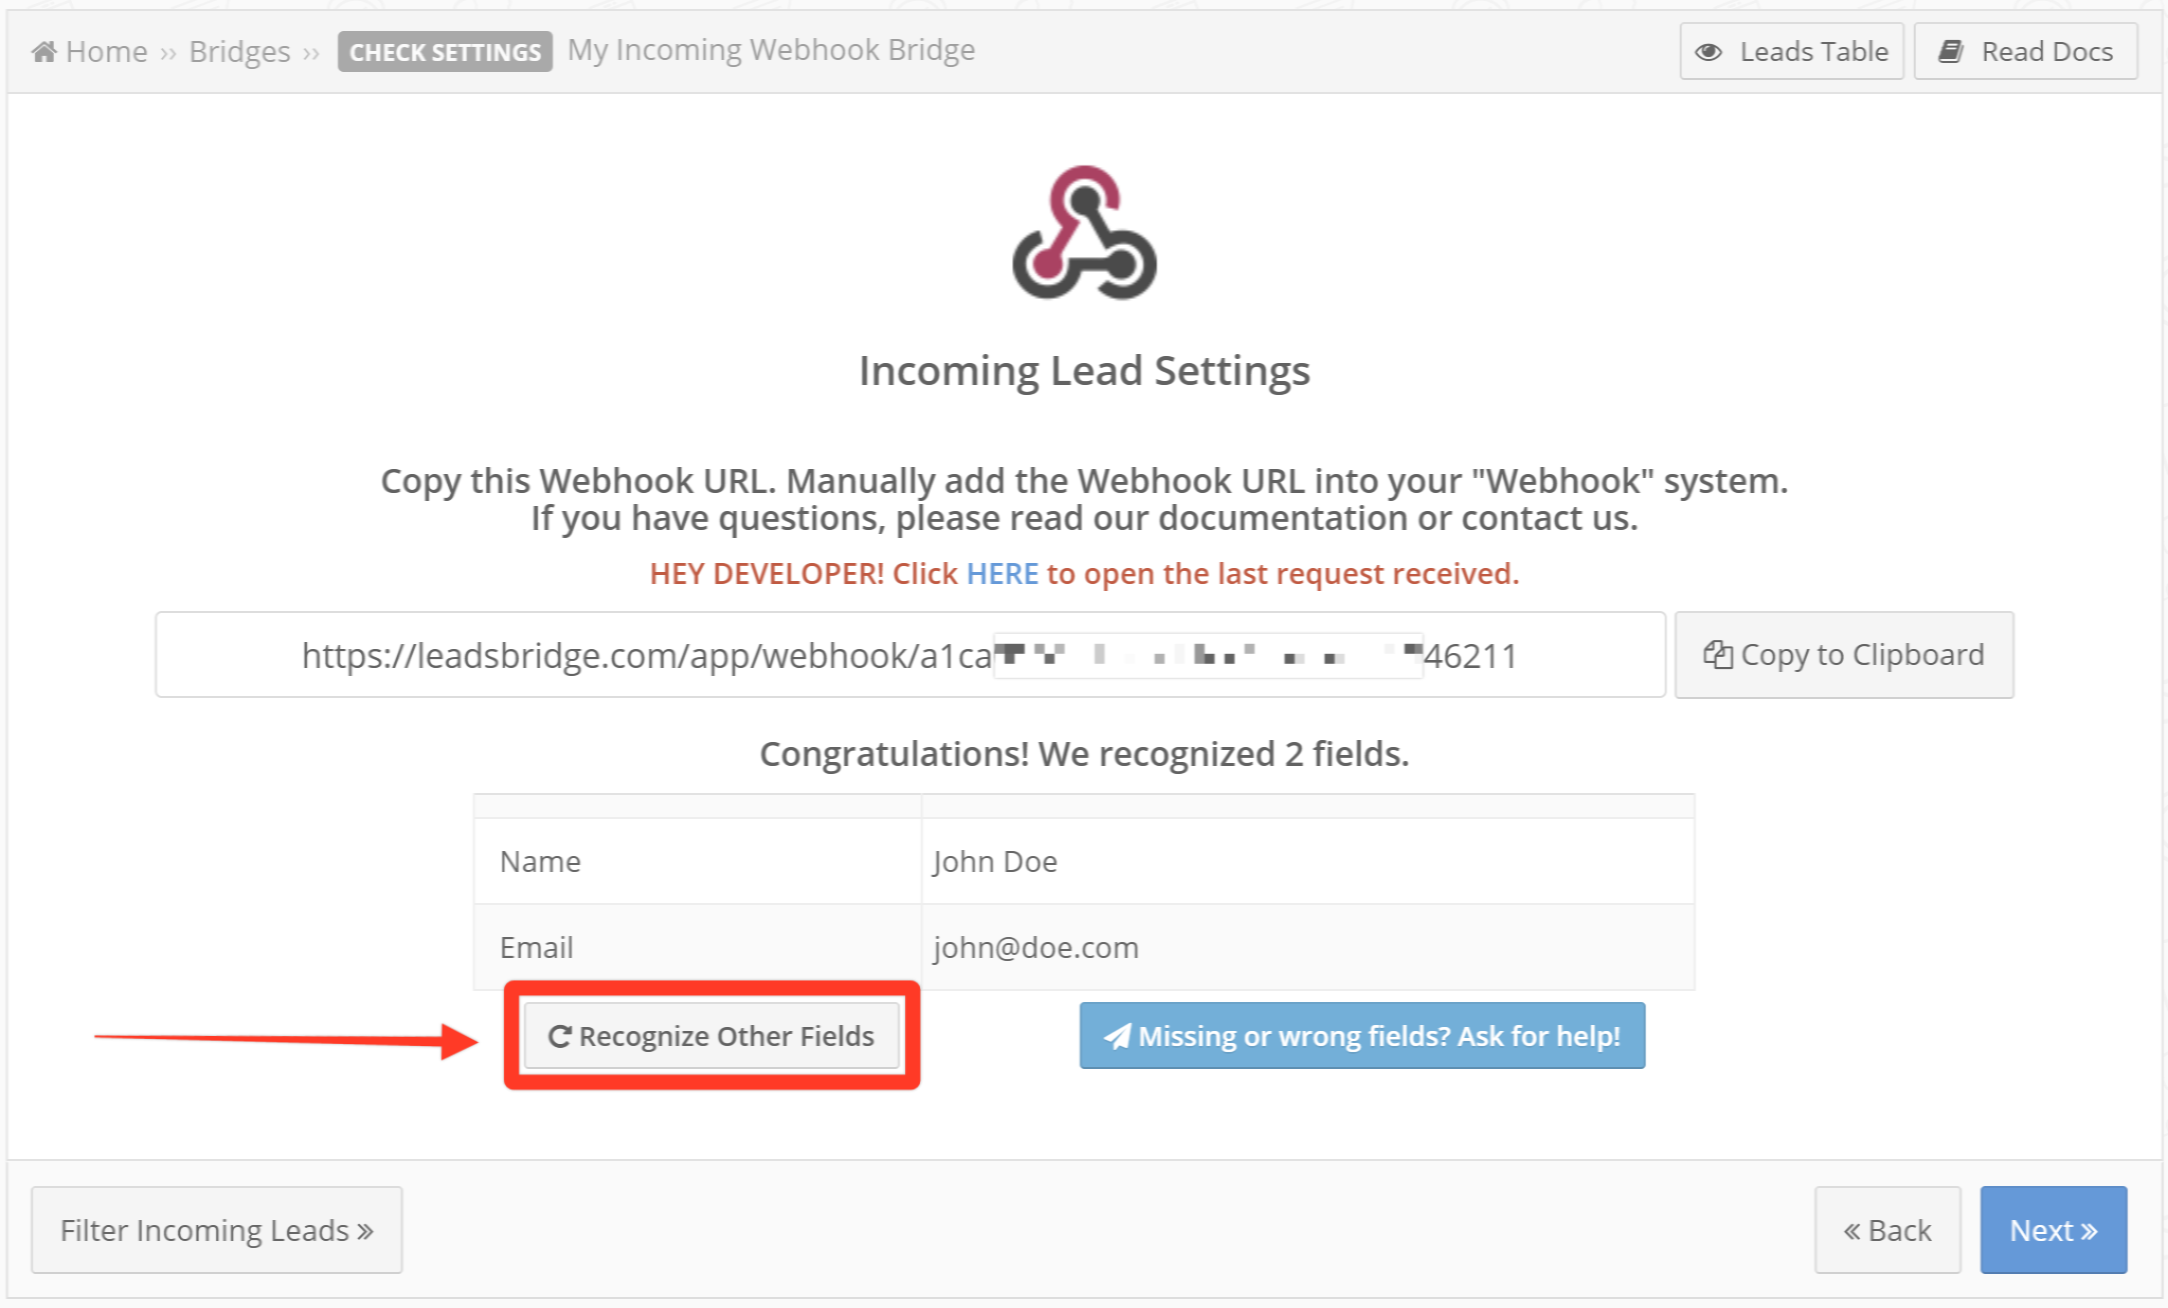
- Once you’re able to submit data from your Source it should get automatically recognized by LeadsBridge
![]()
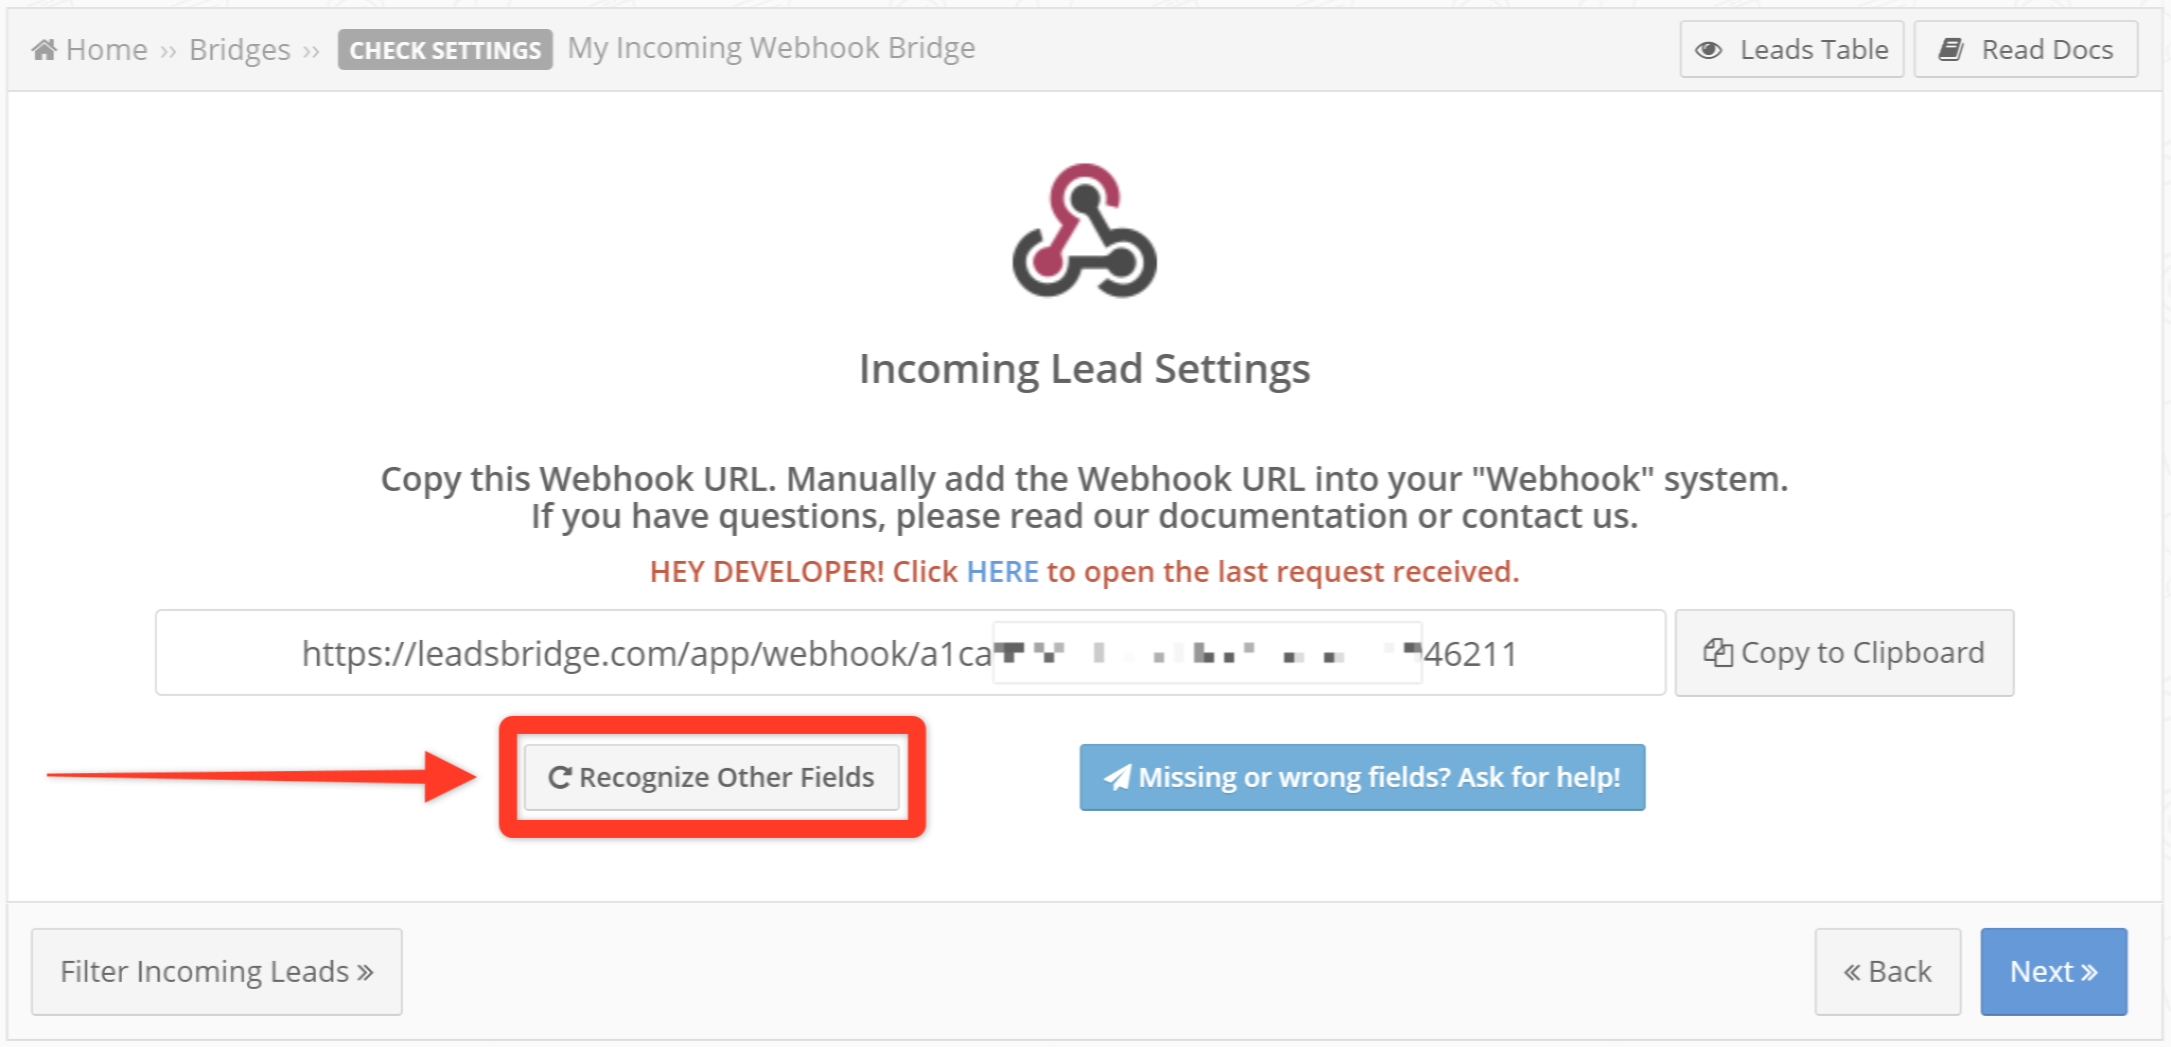
- In case you forgot to add some data, you should set the Bridge on Listening Mode by clicking on the Recognize Other Fields button and submit new data from your Source
![]()
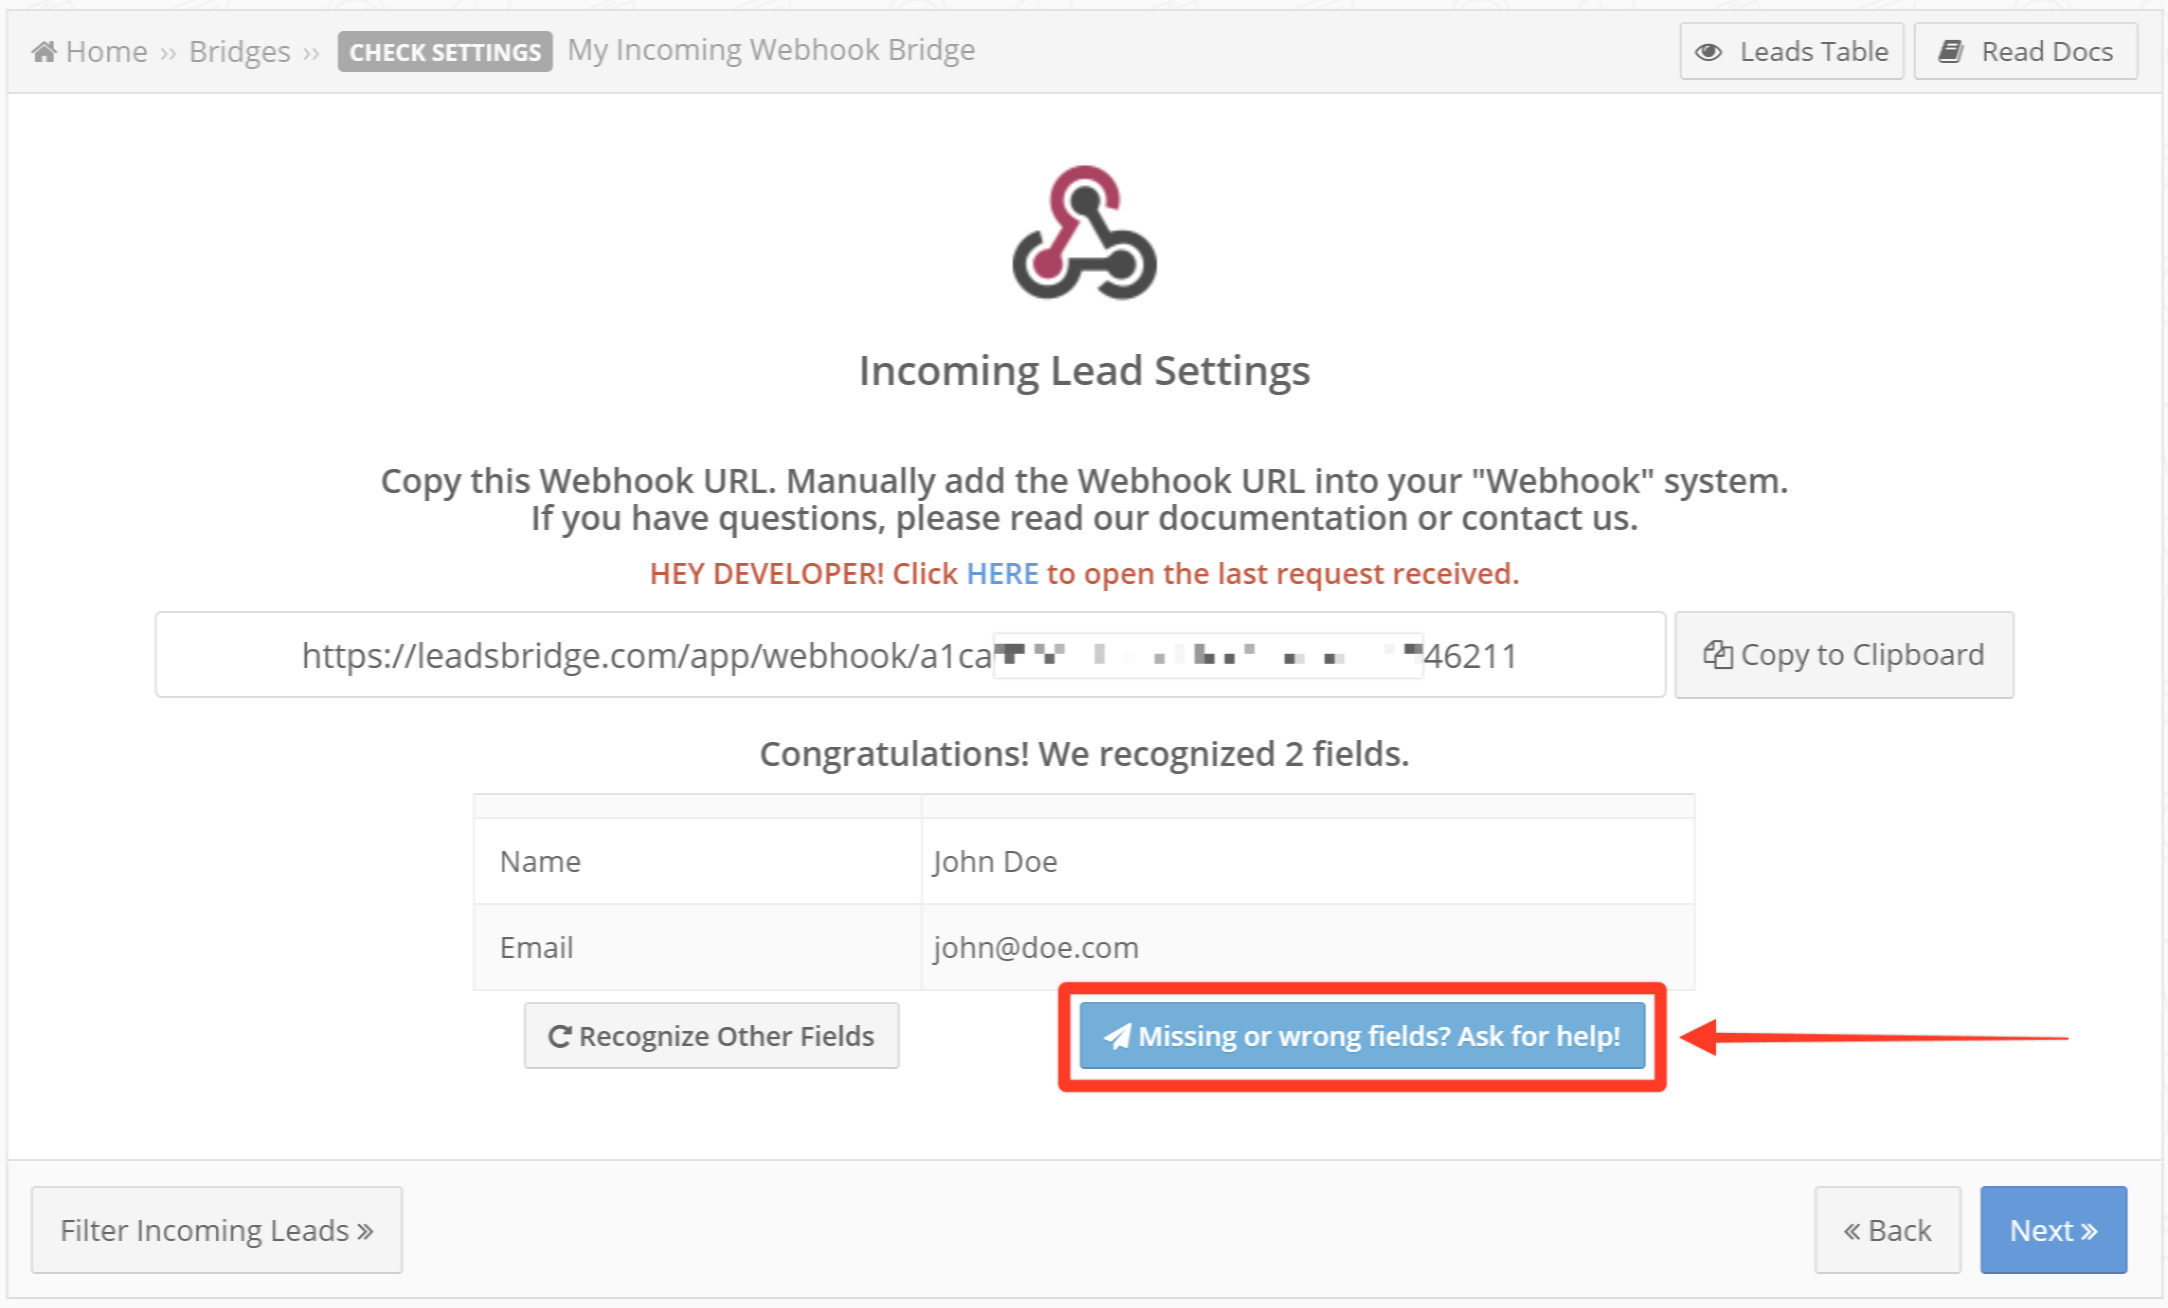
- In case data is not being correctly recognized you may reach our support with the Missing or wrong fields? Ask for help! button
![]()
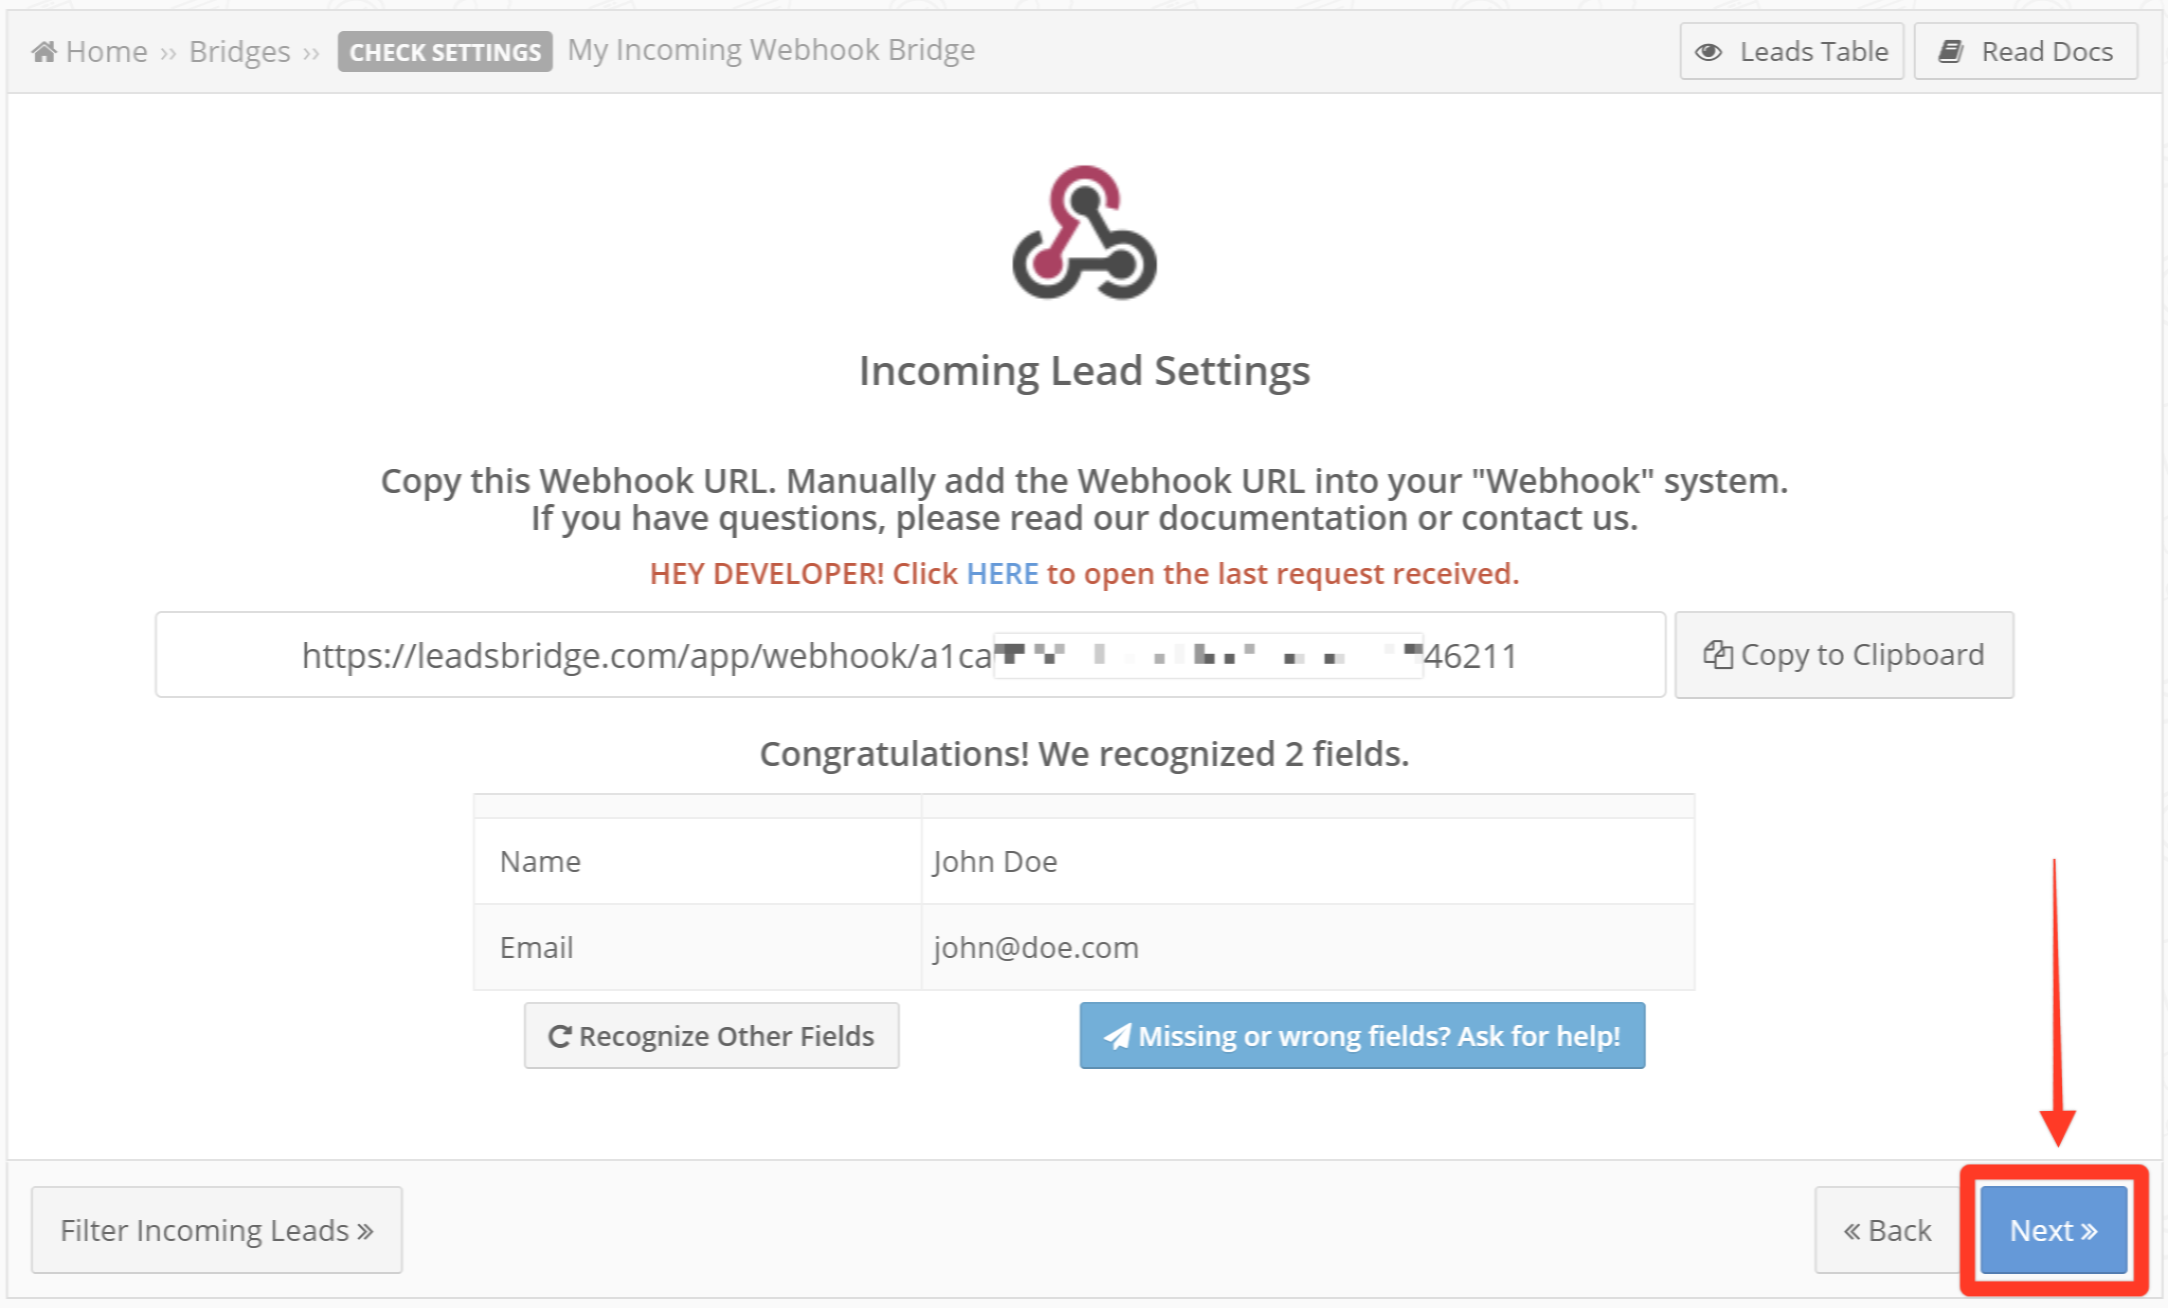
- Once all the data you want to map from your Source has been correctly recognized you should continue with your Bridge configuration by clicking on Next
![]()
Before proceeding
One last thing before proceeding to the next step is to send a test lead from Webhook. This will allow us to recognize the attributes you'd like to pass along and offer them as presets in the next steps of the setup.
- Please make sure the LeadsBridge screen is saying "Waiting for New Lead...", it means that we're ready to receive your test data
- Go to Webhook
- Submit a test lead
- Once done go back to LeadsBridge and verify that your test was sent successfully
- You should see the information processed correctly by the app
- Click on the Next button
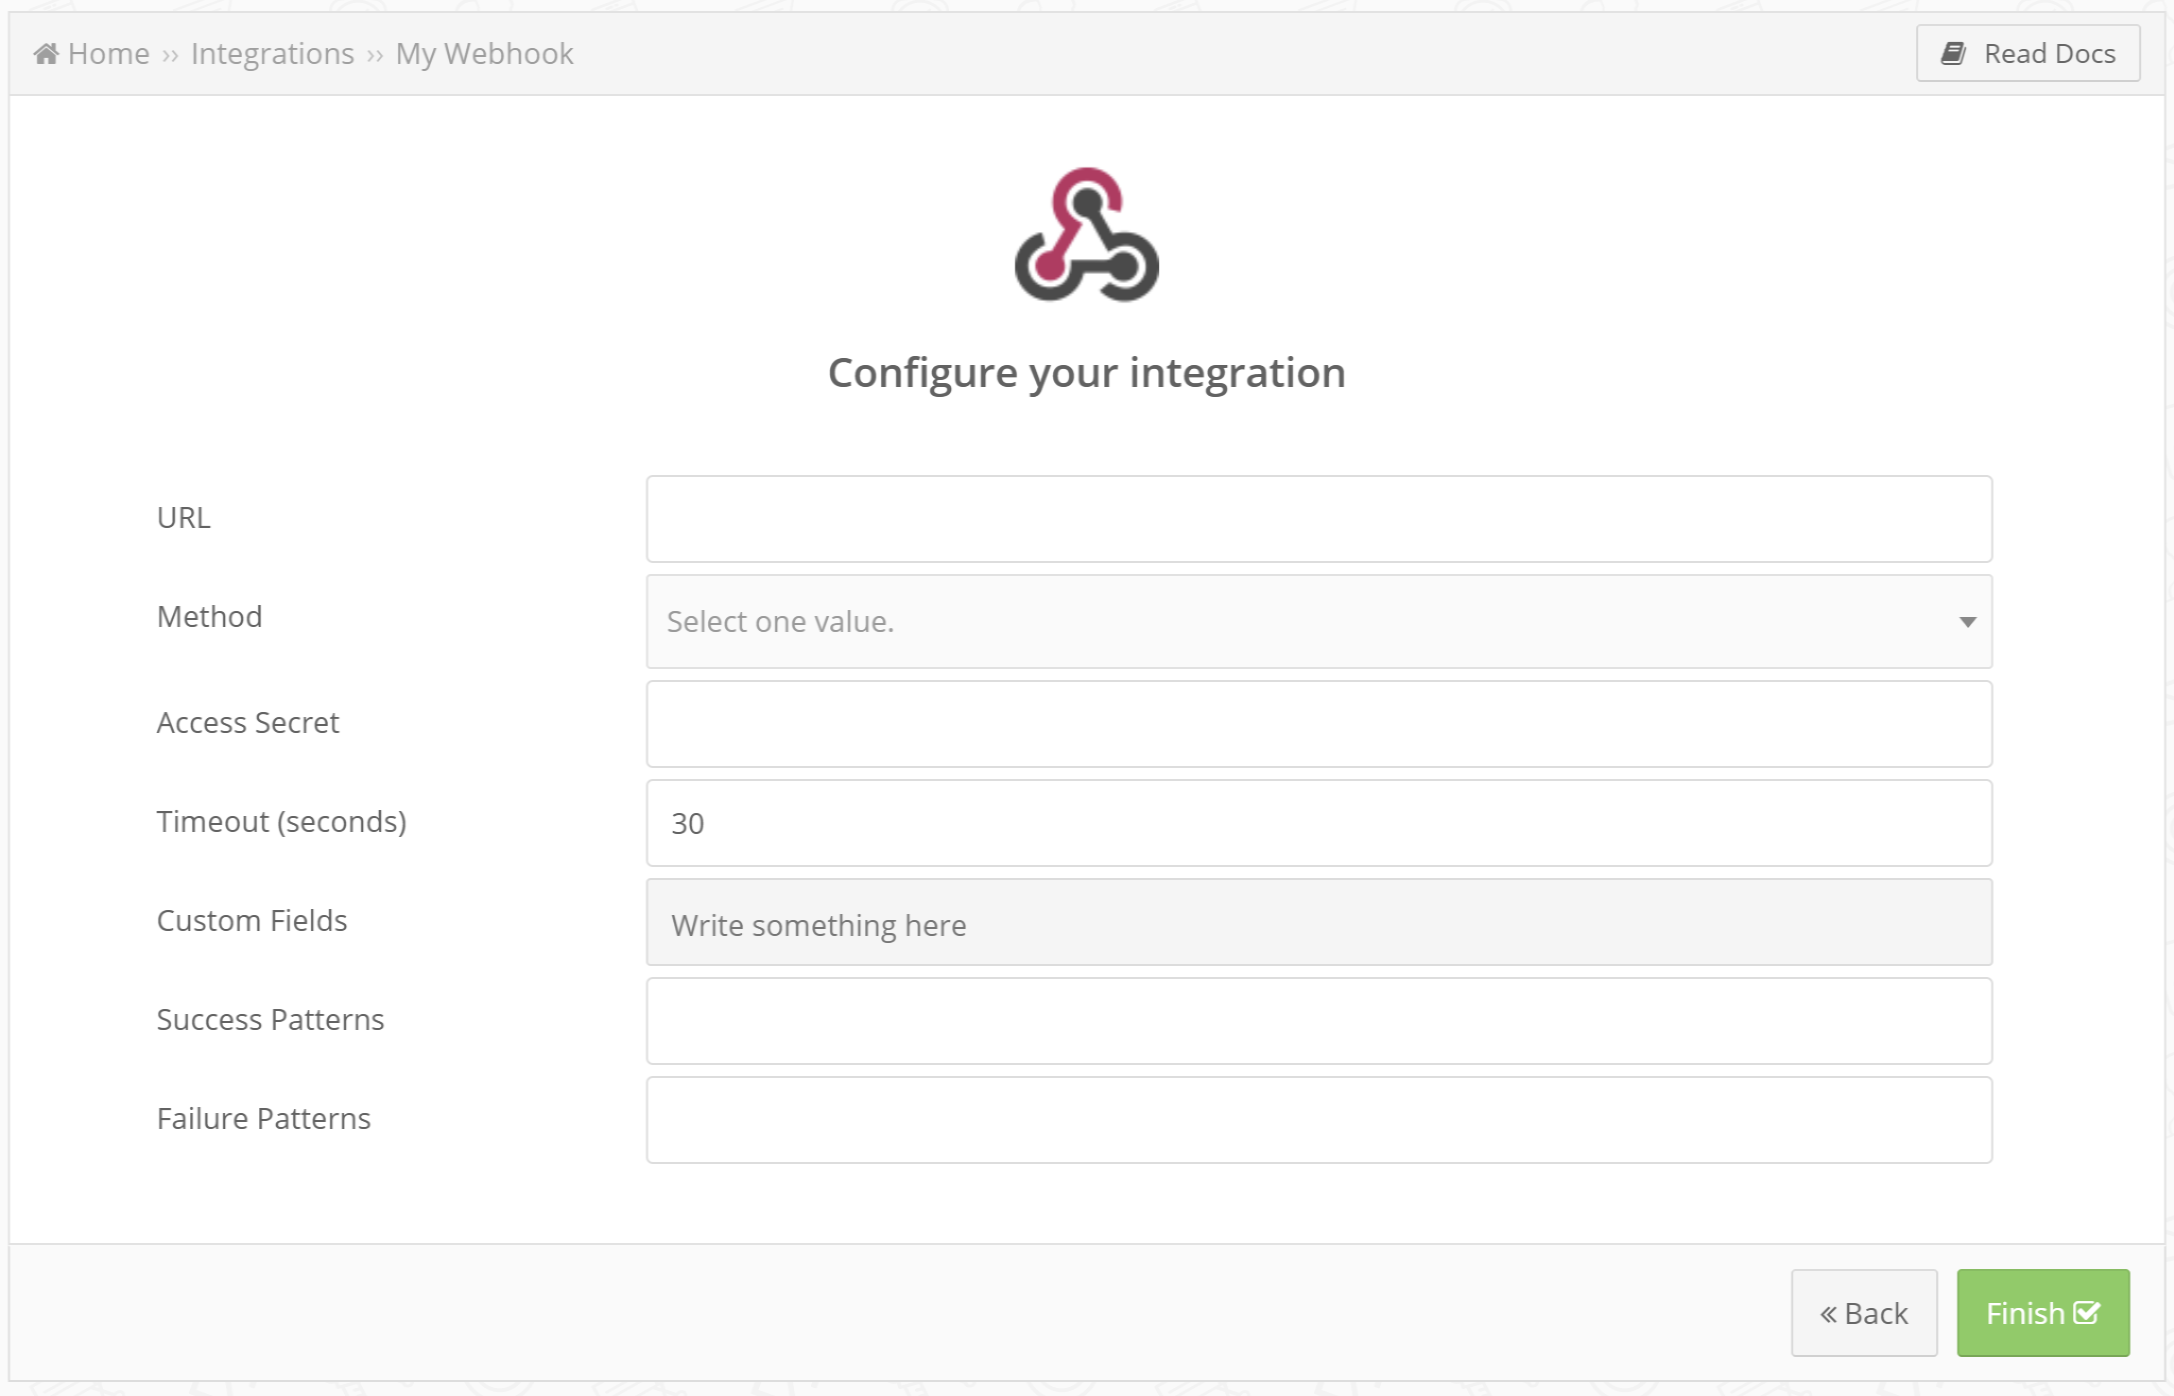
Step 3: Setup your SMS Notification destination
- Type in the integration's name in the dedicated field
- Enter Send SMS from to connect SMS Notification with LeadsBridge
![]()
- "Send SMS from" is the sender's phone number of your SMS notifications.
It may be your phone number or your company phone number, something recognizable when receiving the SMS. DISCLAIMER: if the receiver number is from the US or Canada, the sender's phone number will not be visible in accordance with their national legislation.
- "Send SMS from" is the sender's phone number of your SMS notifications.
- "Agents List (SMS Numbers)" is the field where the phone numbers to notify should be added.
You may enter only your phone number if you're the only receiver, or you may add a list of phone numbers along with names if you'd like to send SMS to different agents. Adding names will be useful to recognize the receiver later, inside the bridge settings.
- "Agents List (SMS Numbers)" is the field where the phone numbers to notify should be added.
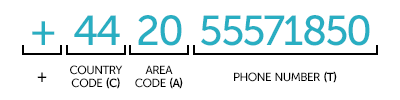
- Please remember that all phone numbers should be written with the +CAT format, as per the example below.
![]()
- Click on the Next button
- You'll now be able to select the destination segment to send your leads to
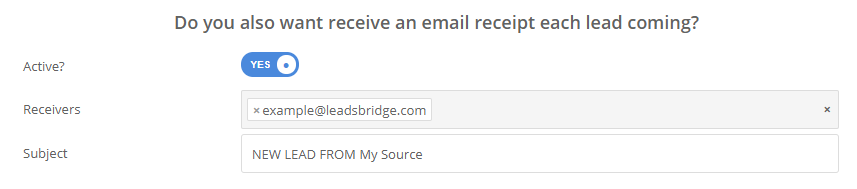
- You may choose to receive an email receipt for each incoming lead.
![]()
- Type the address(es) where you'd like to receive the receipt
- You may also modify the Subject line of the email
- Click on the Next button

Step 4: Fields Mapping
Here you'll be able to map your source information with your destination fields.
You'll see a field name with the destination integration's logo at the top, this indicates the name of the field on SMS Notification.
Underneath there's a box where you may add the information you'd like to send.
- Check each of the SMS Notification fields available
- Match the information you wish to pass along from Webhook
- You may type the information manually and pass them as a static value
- Use the functions to customize information like reformatting dates and times or modifying text, phone numbers and so on
- You may also leave blank the box of a field's information you don't want to send through
Custom Fields
- If you'd like to add more fields, just look at the bottom of the page
- Head over the "Don't find a CRM custom field?" box
- Select the field you'd like to add from the dropdown list
- Click the Add Custom Field button
![]()
- The field will appear above
- Add the desired information, as you did with the other ones

Once accomplished your desired outcome, just click Next and head to the last step.
Step 5: Test
In this final step, you'll be able to send a lead from LeadsBridge to test if the configuration works properly.
- To create a new test lead, fill in the required information when prompted
- Click Test Now
- To test with a real lead, switch the toogle to "Test with existing lead".
- Click Sync Now along the lead you'd like to send
- If you did everything right the button will turn green, meaning your lead was synced successfully and the integration is ready
- Click Finish to save your settings and turn active your bridge
That's all! Congratulations.
You'll be redirected to the bridges section of your account with a green success message at the top right of the page and your bridge will now be active.
Have you got some questions?
You may want to take a look at the common questions on the respective integration's documentation.
- Source: Webhook
- Destination: SMS Notification
If you have any other questions, or need help to configure your bridge from Webhook to SMS Notification with LeadsBridge, do not hesitate to contact our Support!