Integrate Leadpages with LeadsBridge
Intro
Leadpages is a landing page software that offers a suite of lead generation and opt-in tools to its customers.
In this article, you'll learn how to connect your LeadsBridge account with Leadpages.
Connect Leadpages integration
Before you start
- Head over to the left sidebar and click on the Create new Bridge button
- Select your integrations in the selectors
- Click on the Continue button at the bottom right
Authorize Leadpages integration
Setup your Leadpages integration
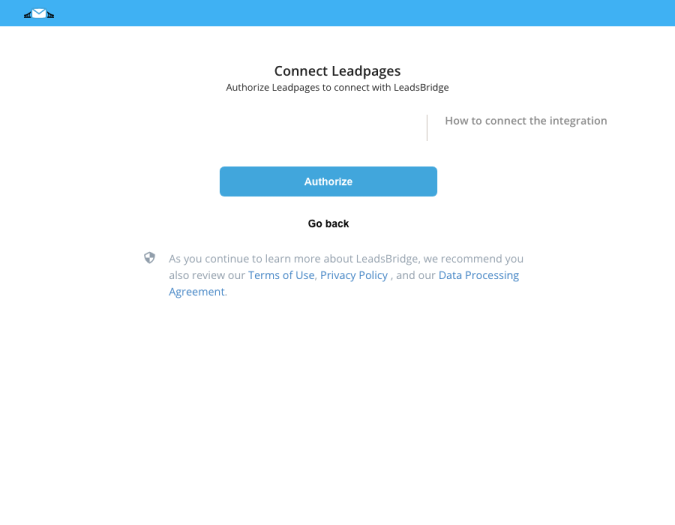
- Click on Connect Leadpages
- Click on Create new integration to connect your Leadpages (or select an existing one from the dropdown if you already connected it)
- A popup wil be opened where you can authorize the Leadpages integration
- Fill field to connect Leadpages with LeadsBridge
- Click on the Authorize button
- You can choose a name for this Leadpages and LeadsBridge integration (you can also edit it later)
- Once done, click on Continue button and you will get back to the bridge experience where you could choose additional integration settings
- Now that your Leadpages is connected, you can continue with the set-up of your bridge
Configuration details for Leadpages
Other Info
- Head over to Leadpages "Account Settings > Lead Notifications" section
- Add a new “Lead Notifications” email address
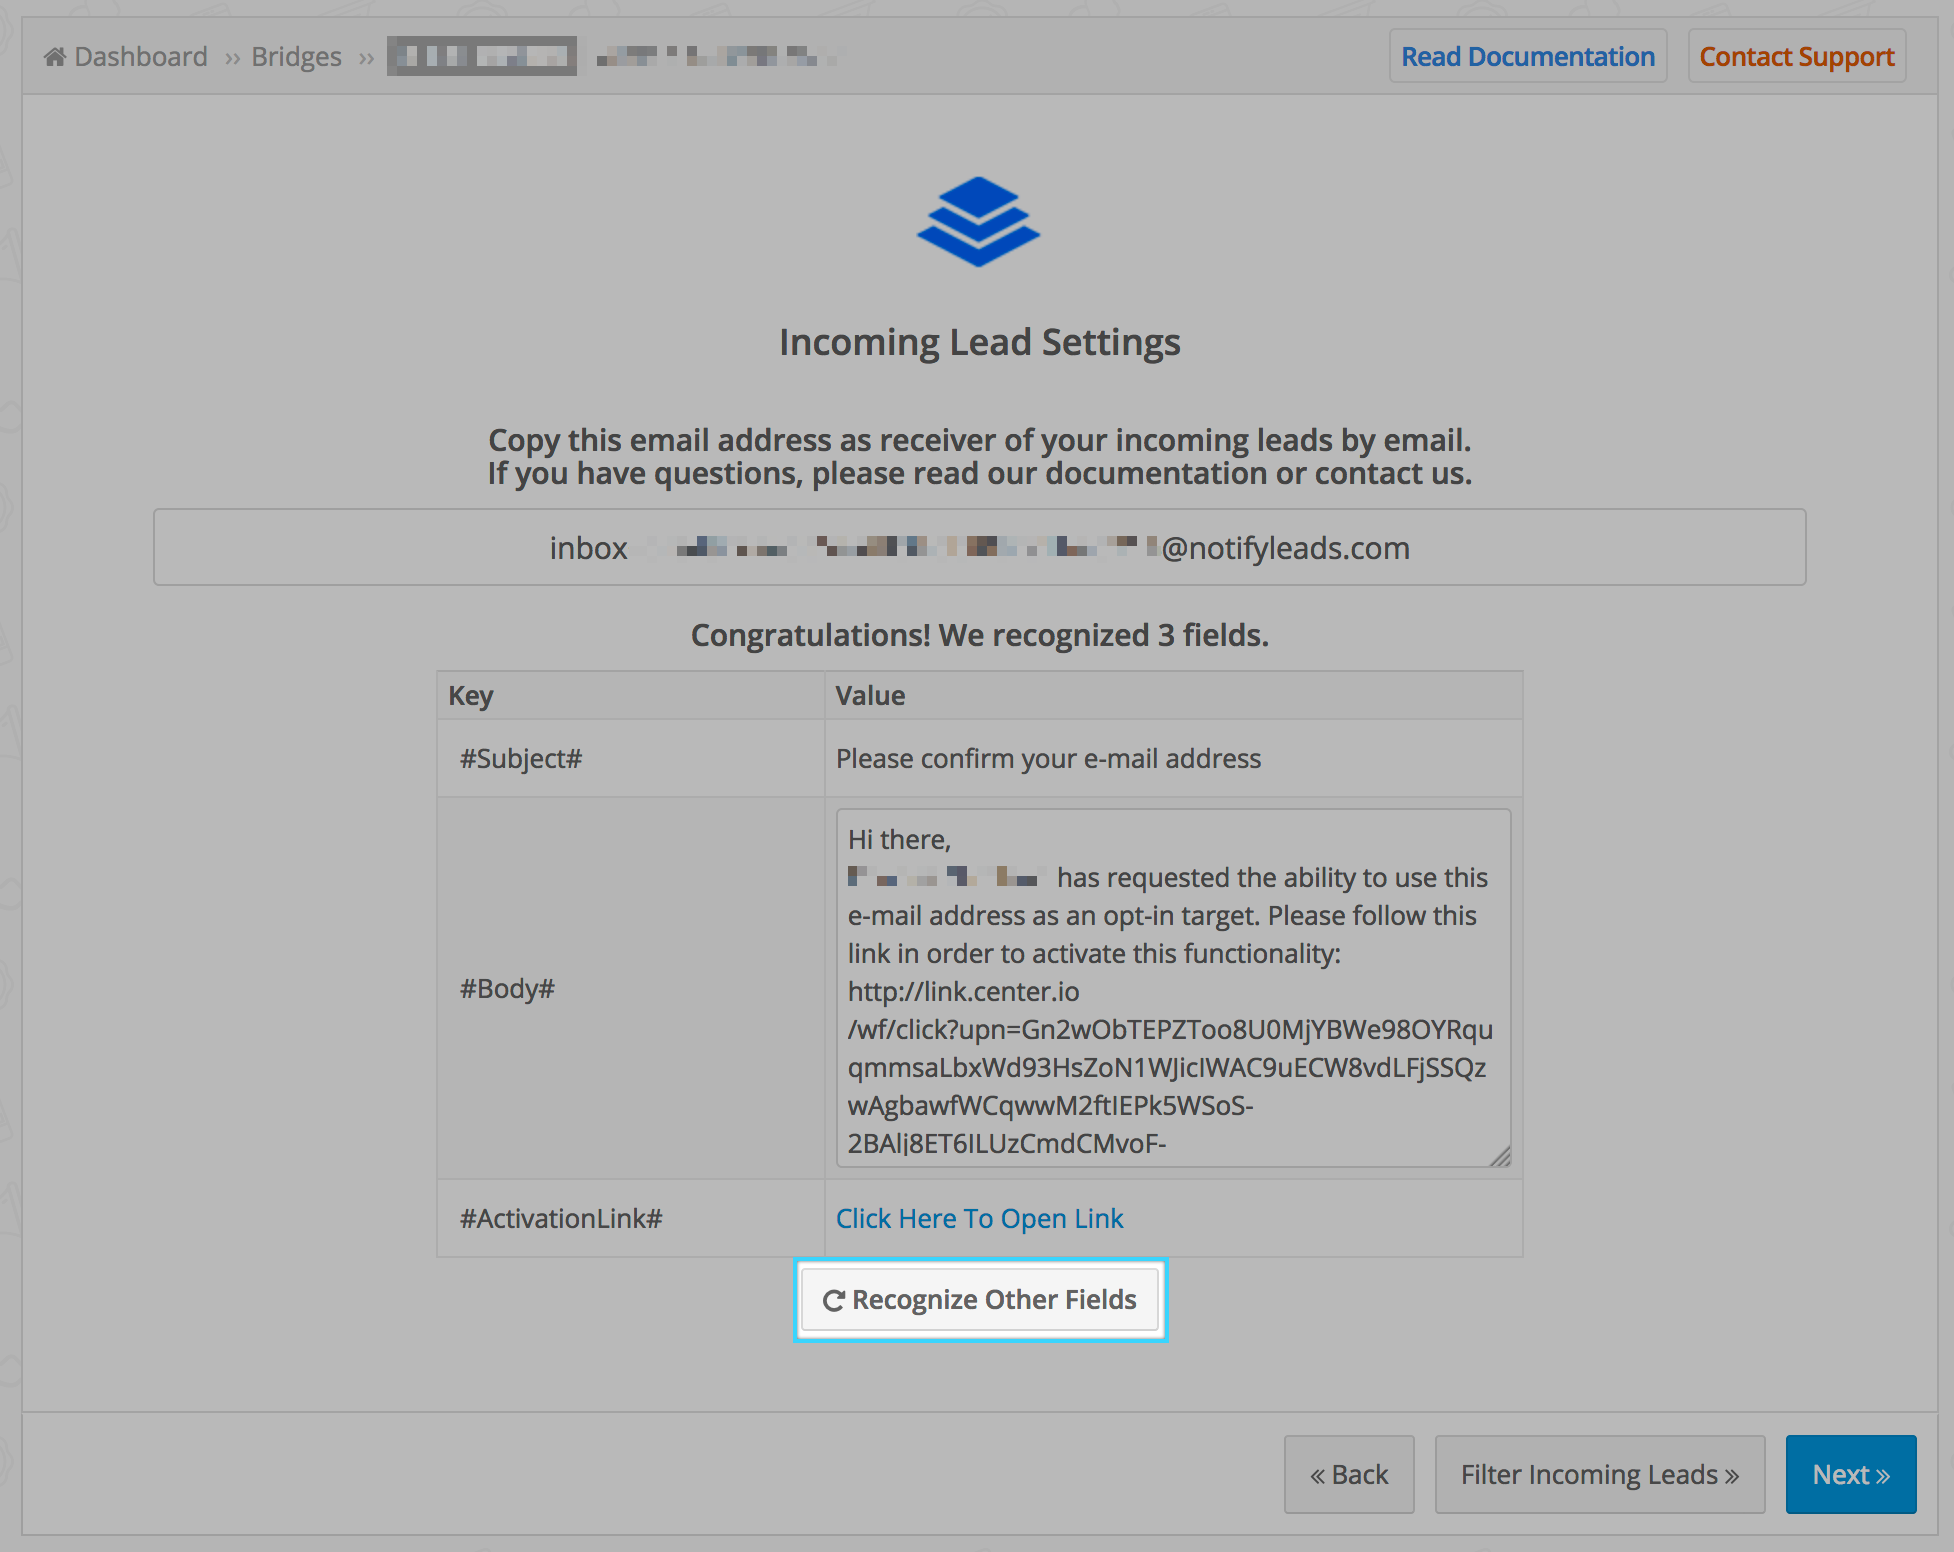
- Insert the unique email provided by LeadsBridge under “Add another email” type box
- Once this is done, LeadPages will send a confirmation email
- Go back to LeadsBridge and click on “Click Here To Open Link” so you may confirm the email.
This is a very important step!
- Go to your integrations page inside LeadPages and check the email status, it should say Confirmed
- Add a new “Lead Notifications” email address
- Insert the unique email provided by LeadsBridge under “Add another email” type box
- Once this is done, LeadPages will send a confirmation email
- Go back to LeadsBridge and click on “Click Here To Open Link” so you may confirm the email.
This is a very important step!
- Go to your integrations page inside LeadPages and check the email status, it should say Confirmed
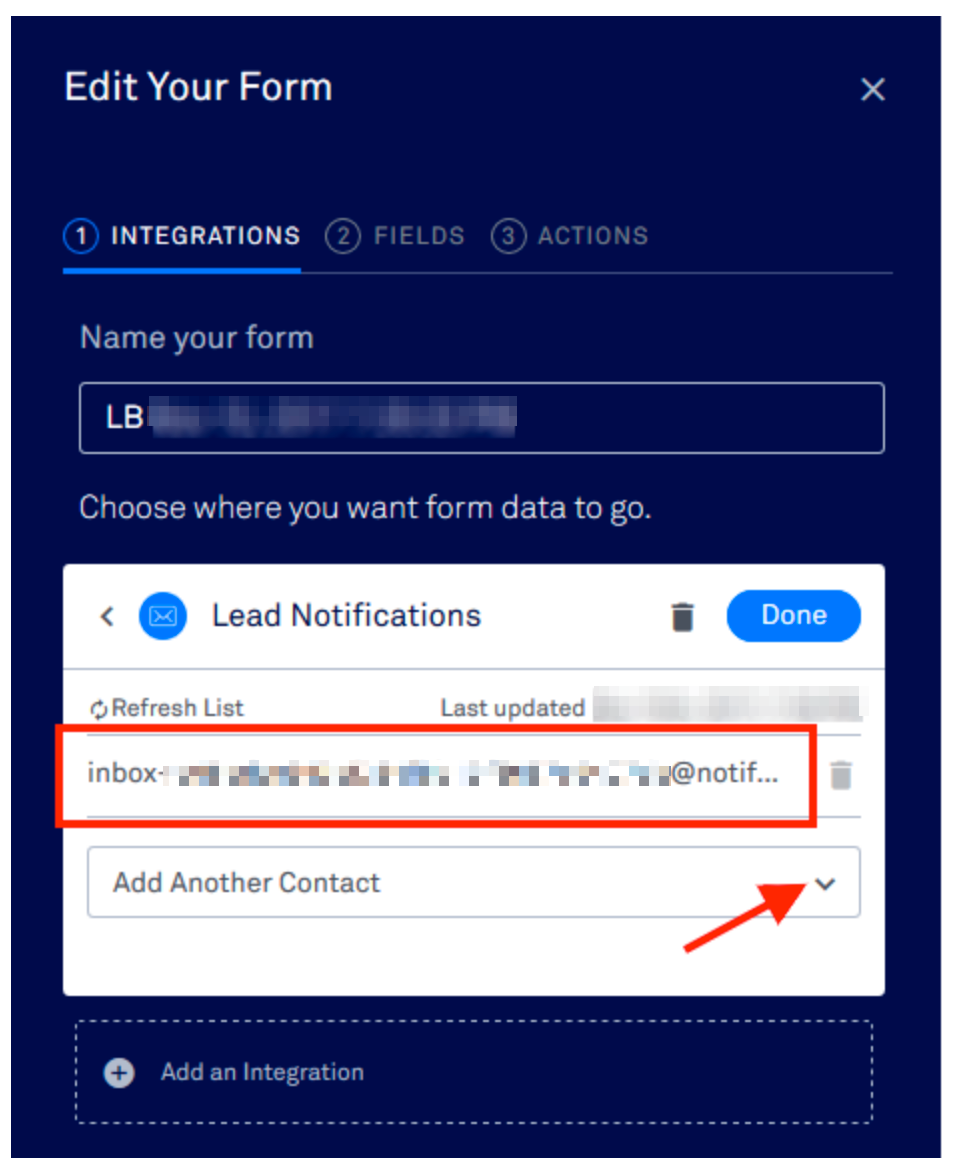
- Inside LeadPages, head over to the form you’d like to use as a source
- Go to Edit Your Form and add the integration to the form
- Select the unique email from LeadsBridge
- Go to Edit Your Form and add the integration to the form
- Select the unique email from LeadsBridge
- Now head back to LeadsBridge and click on “Recognize Other Fields” button
- Once it says “Waiting for a New Lead” you may go to where your form is
- View your form as a Lead, this means clicking on the “View” eye inside LeadPages or going to the page where it’s Published
- Fill in information for a test lead and submit it
- Go back to LeadsBridge and you’ll see the fields show up on the source step
- You may now continue with the Destination set up and Fields Matching
Common questions for Leadpages
I sent a test lead, but it's not being received by the bridge set up wizard. What should I do?
Make sure the landing page is correctly published and send the test from the published landing page so the email notification works properly.
Beware that sending a test form the "Preview" won't trigger the email notification properly, please send the test with a published landing page and it should work correctly.
Do you need help?
Here some additional resources:
- LeadsBridge KNOWLEDGE BASE
- Contact support from your account clicking on the top right Support button


