Connect Webhook to Google Customer Match with LeadsBridge
This article is a simple guide on how to set up the bridge and connect Webhook to Google Customer Match.
Add the Google Ads Account first
- Head over to the left sidebar and click on Google Suite.
- Click Google Ads Account.
- Click on Add New to connect the Ads Account.
- A Google screen will ask you to login with the account you'd like to use.
- Authorize LeadsBridge to access to your Google Ads Account information.
- Once done, you'll be taken back to the LeadsBridge app.
How to set up the bridge step-by-step tutorial
Before you start
- Head over to the left sidebar and click on Google Suite.
- Click Google Customer Match.
- You'll be taken to the Google Customer Match section of your account.
- Click on Add New.
- You'll be taken to the first step of the bridge creation.
Step 1: Account destination
- Select the Google Ad Account you want to assign the Google Customer Match.
- Click Next.
Step 2: Choose your Google Customer Match settings
- Pick an existing Custom Audience or choose to create a new one from the drop-down.
- In case of a new one, enter the name for your Google Customer Match (this will be visible inside your Ad Account).
- Add some labels to identify your bridge later in LeadsBridge.
- Click Next.
Step 3: Setup your Webhook source
- Choose Webhook as source of your contacts.
- Select to use an existing integration or to create a new one.
- Click Next.
You may skip the integration part if your integration has been already configured.
Integrate Webhook with LeadsBridge
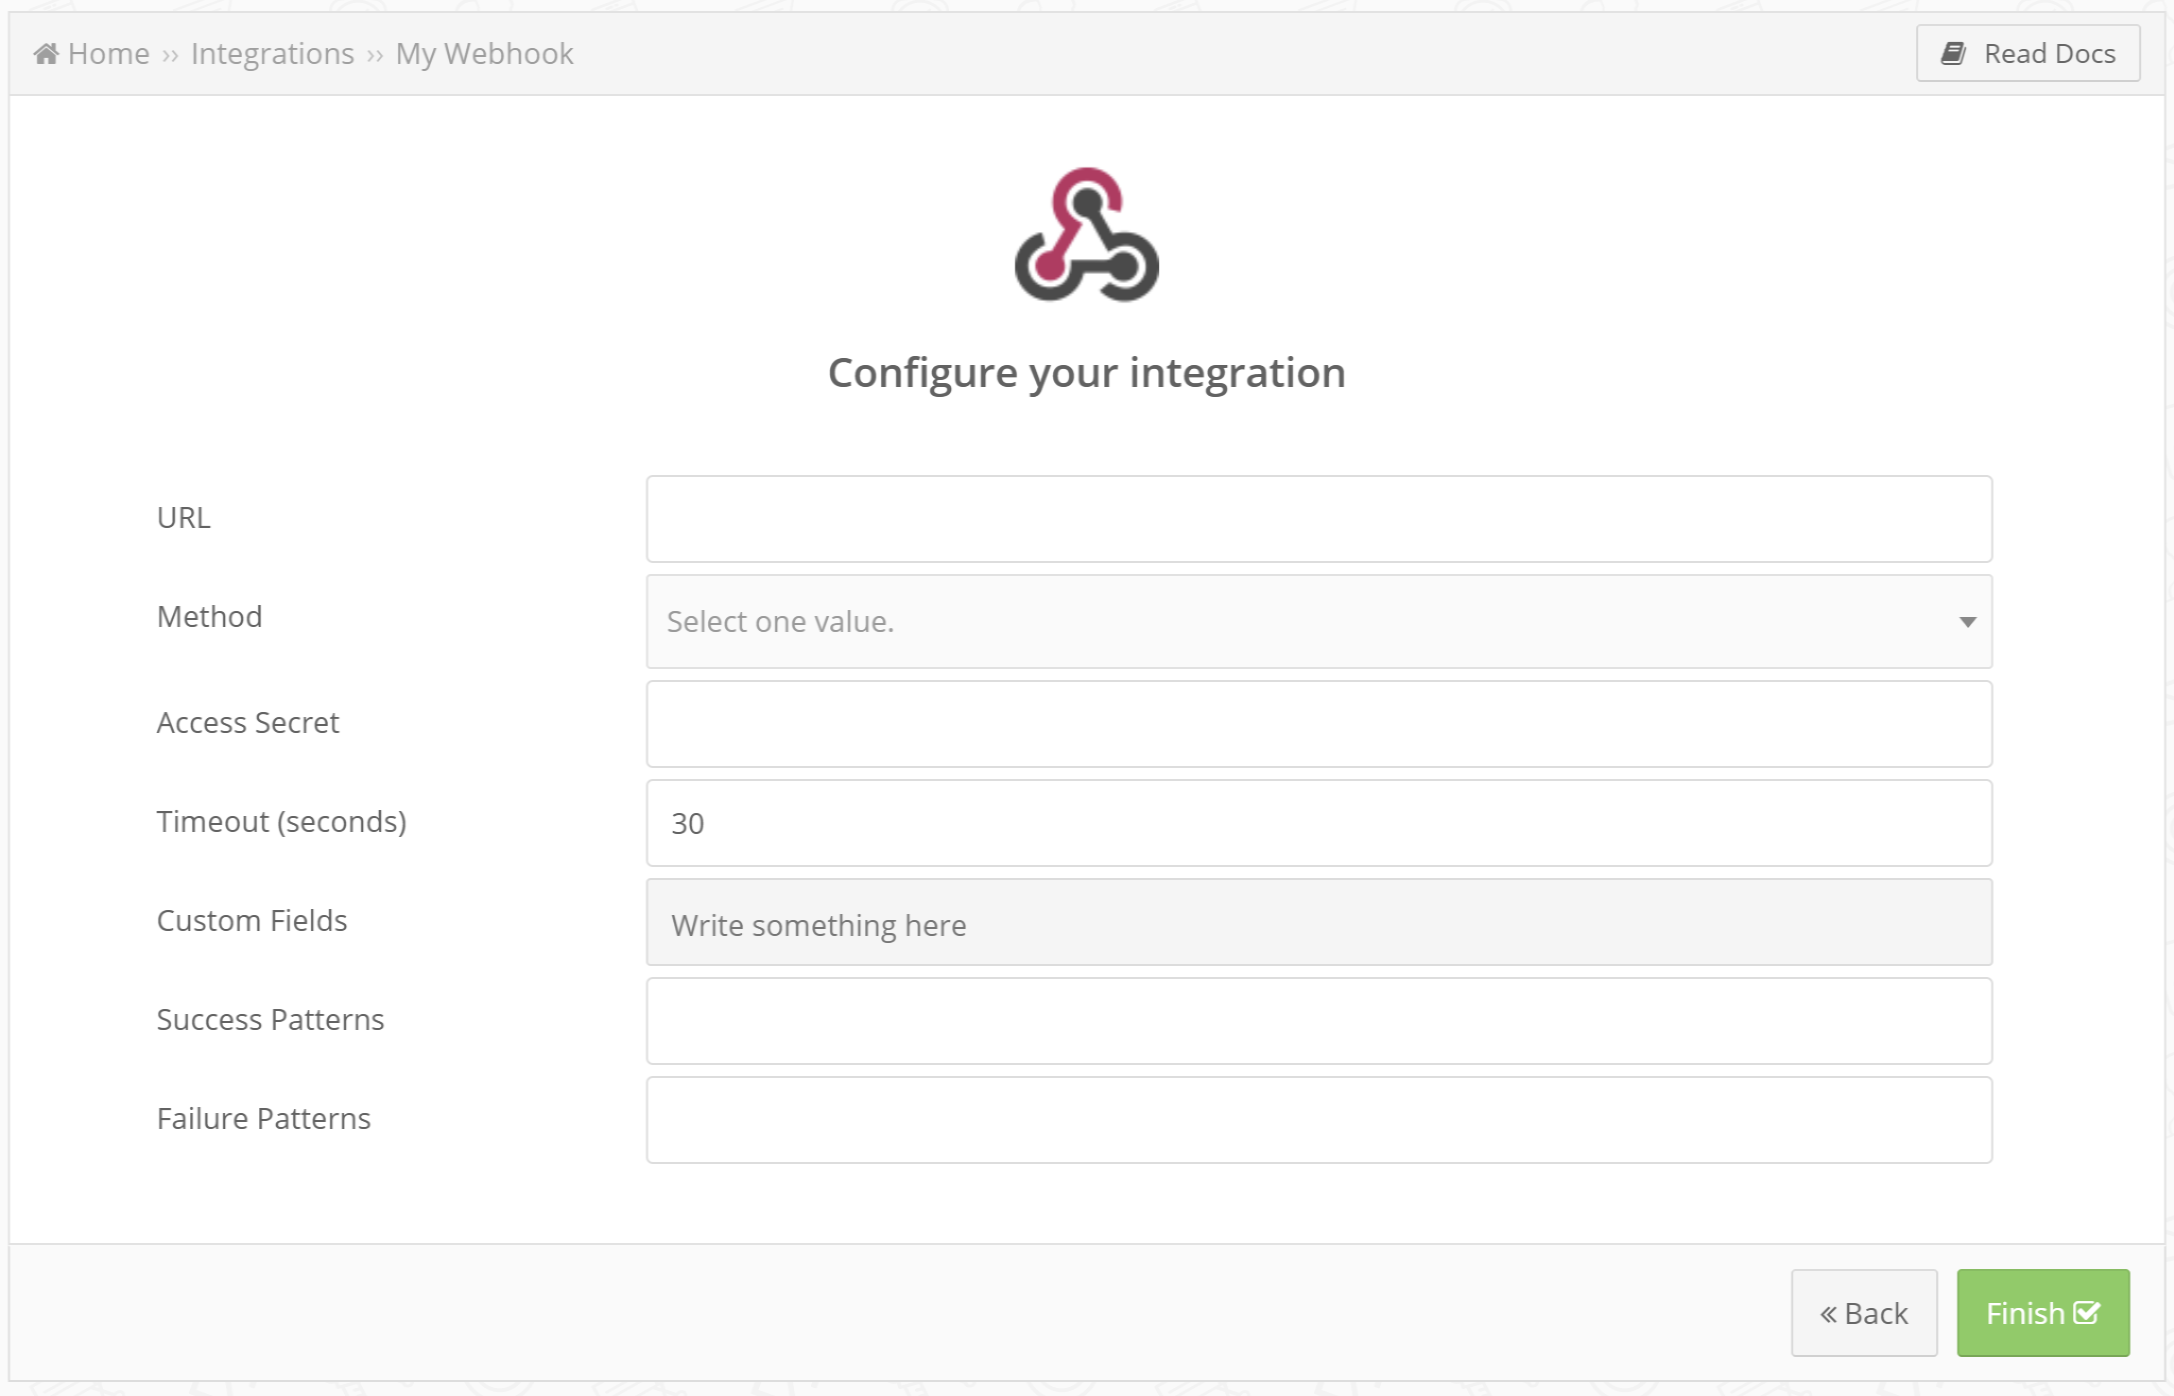
- Type in the name you'd like to call your integration to recognize it later.
- Enter Webhook to connect your Webhook with LeadsBridge.
- In order to correctly recognize incoming data when the Webhook Integration is used as Source you should do the following:
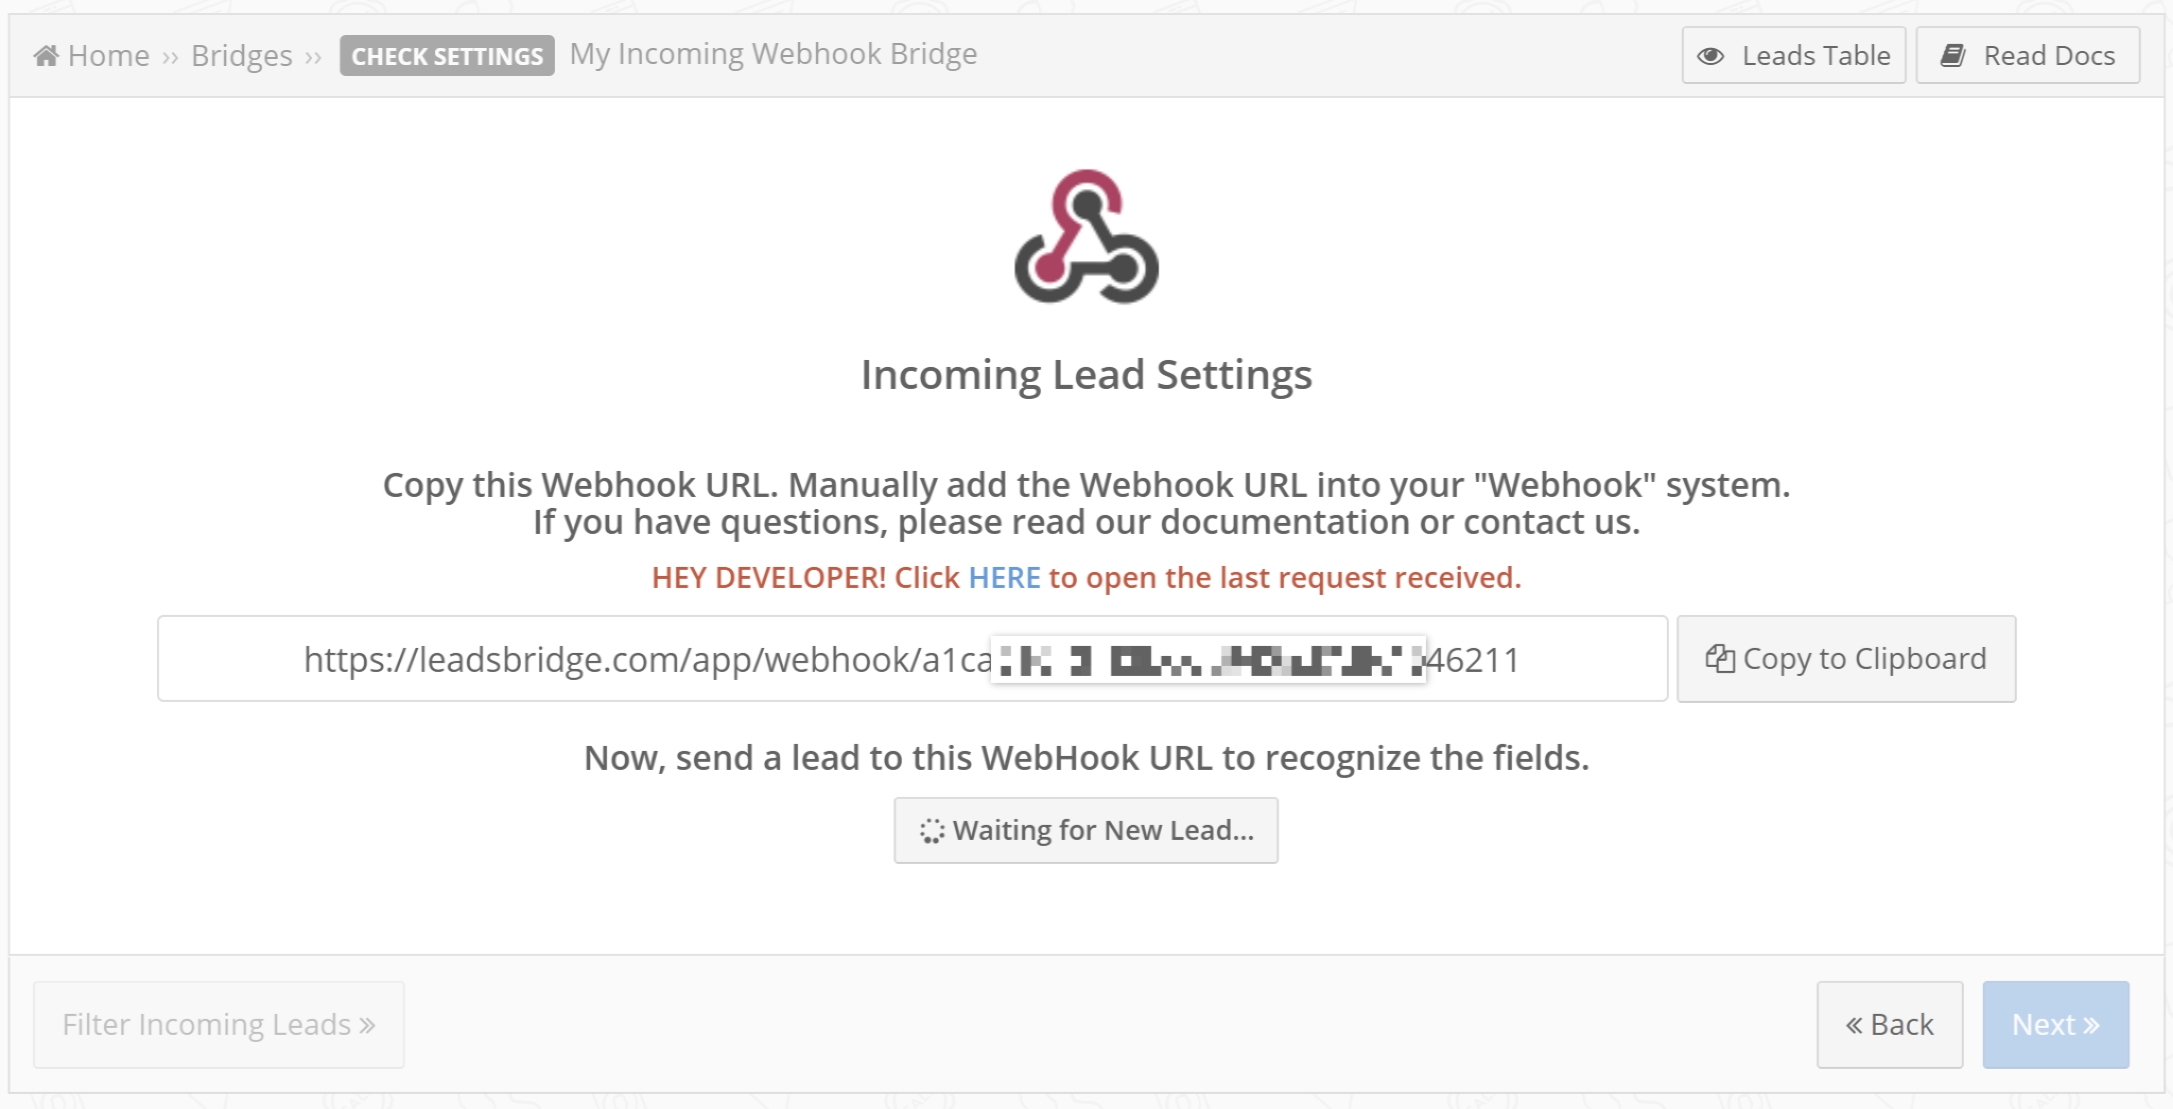
- Go into the Source step of your Incoming Webhook Bridge
- If the Bridge says Waiting for New Lead… means that is on Listening Mode and that any data you submit to the Webhook URL will be read by the LeadsBridge as soon as it arrives into the system
![]()
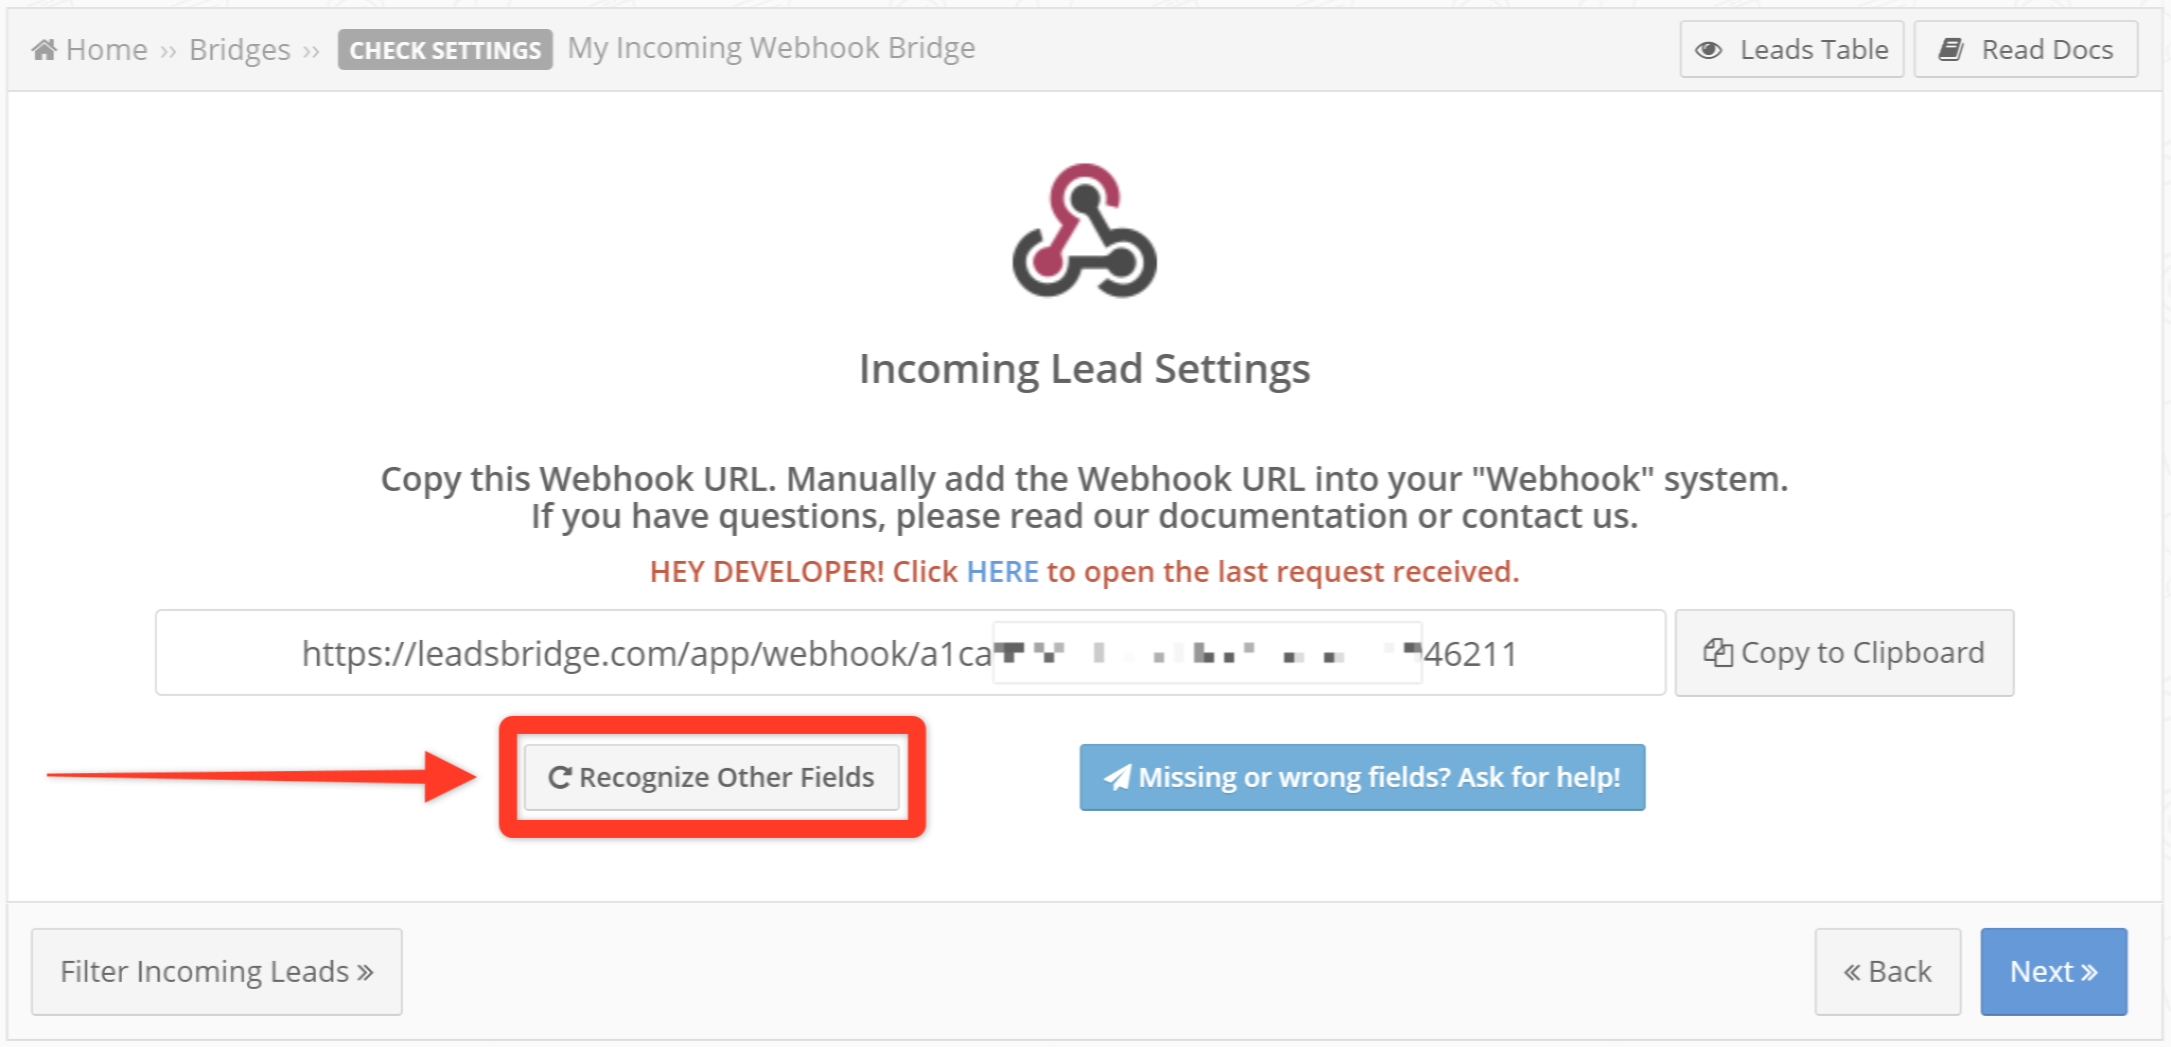
- You should leave this page open and submit data from the Source in which you have assigned the Webhook URL provided by LeadsBridge. In case you need to close the page and go back later to the Bridge configuration, make sure to set the Bridge on Listening Mode by clicking on the Recognize Other Fields button
![]()
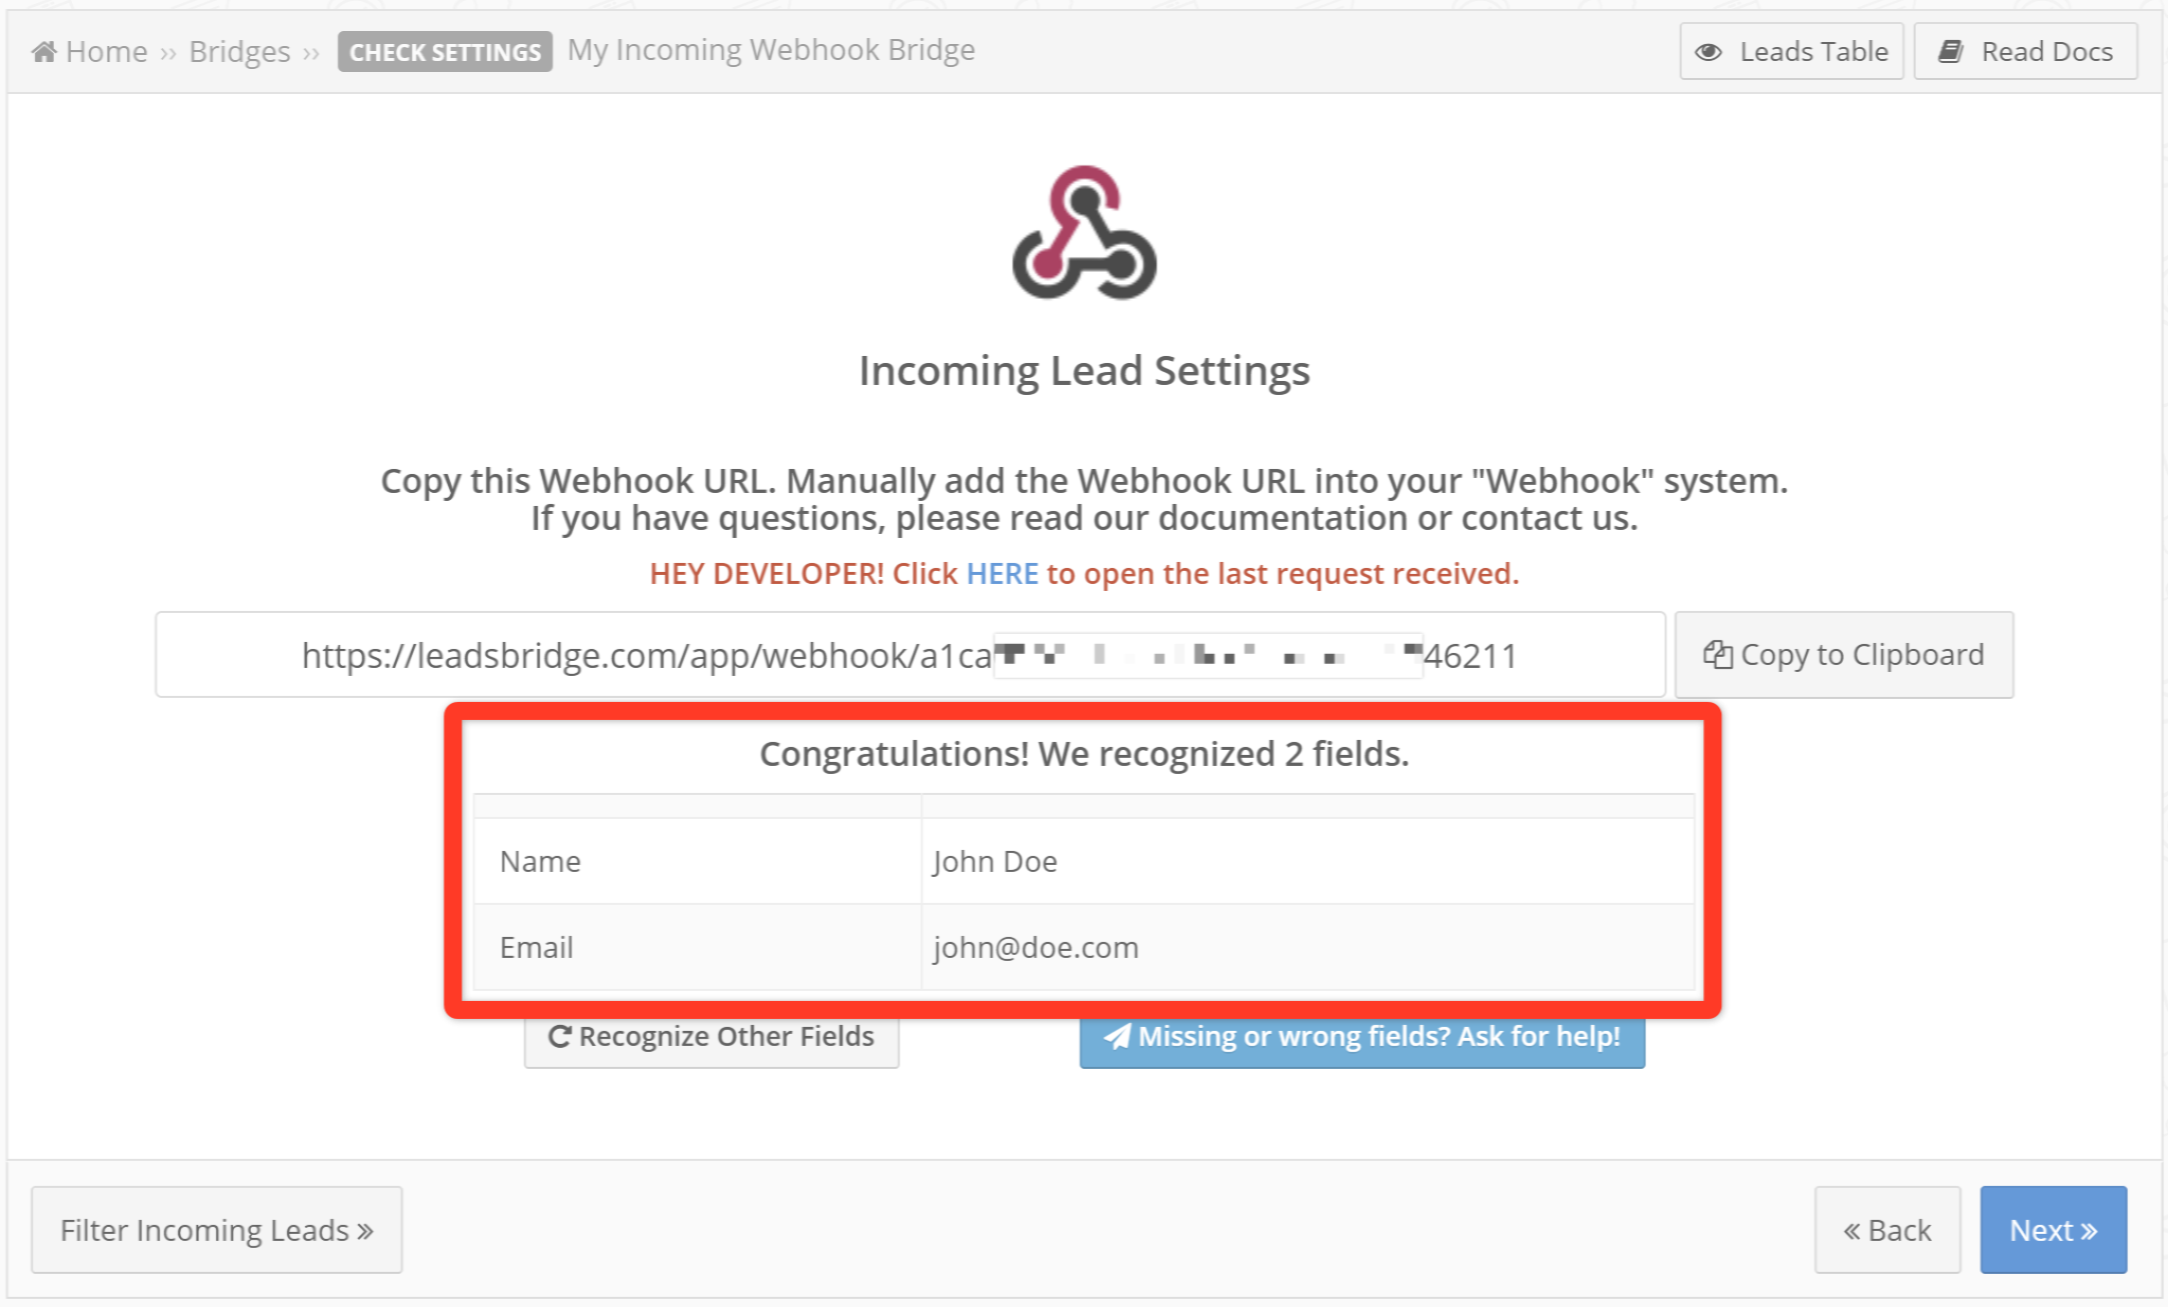
- Once you’re able to submit data from your Source it should get automatically recognized by LeadsBridge
![]()
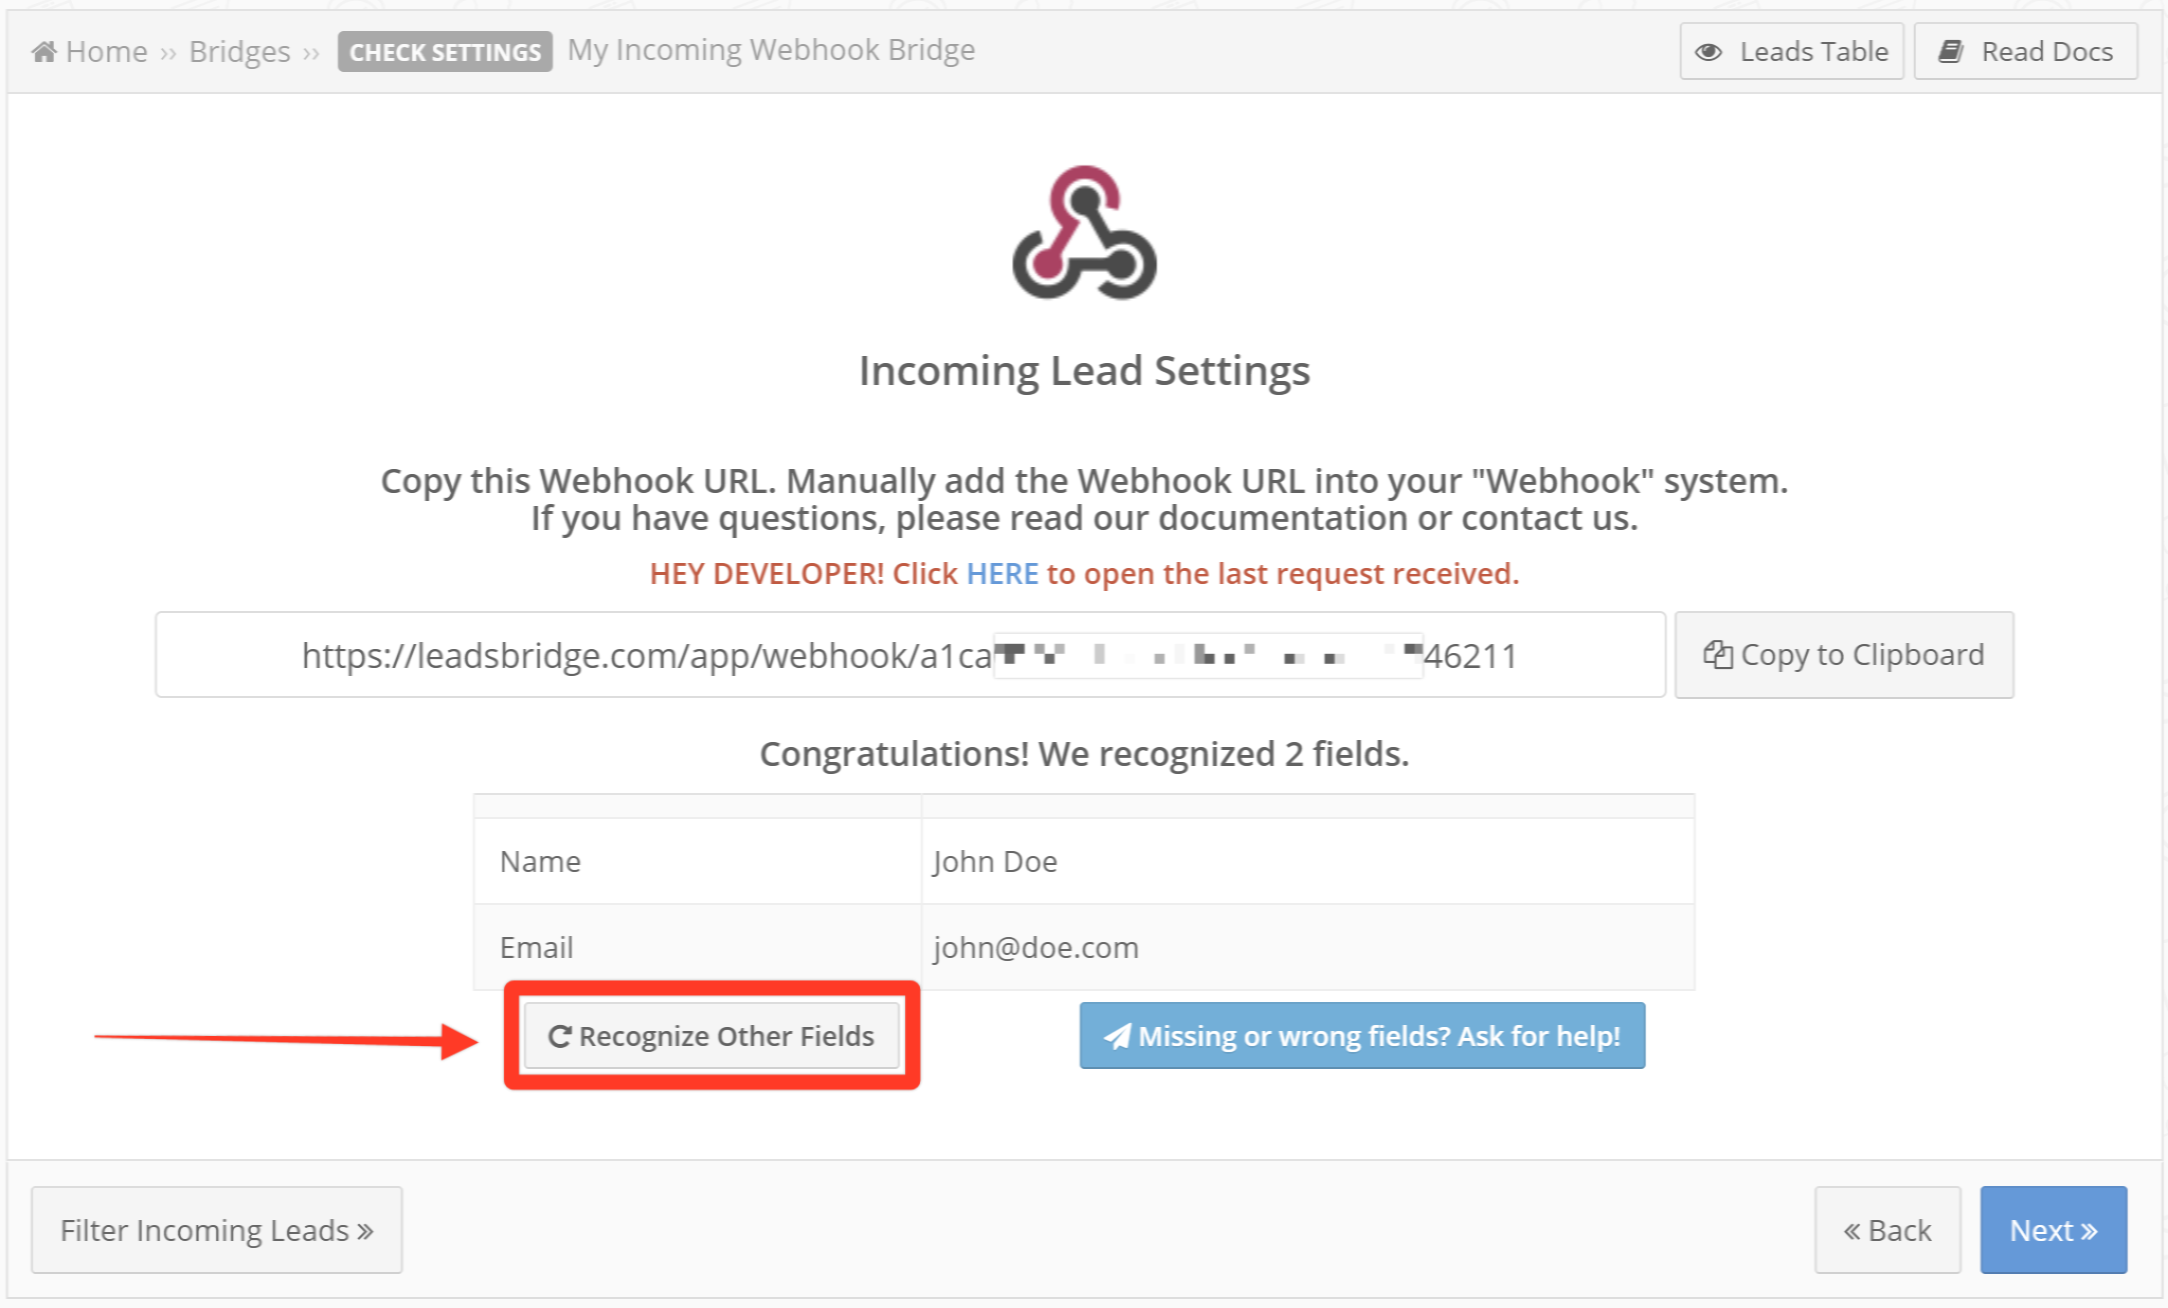
- In case you forgot to add some data, you should set the Bridge on Listening Mode by clicking on the Recognize Other Fields button and submit new data from your Source
![]()
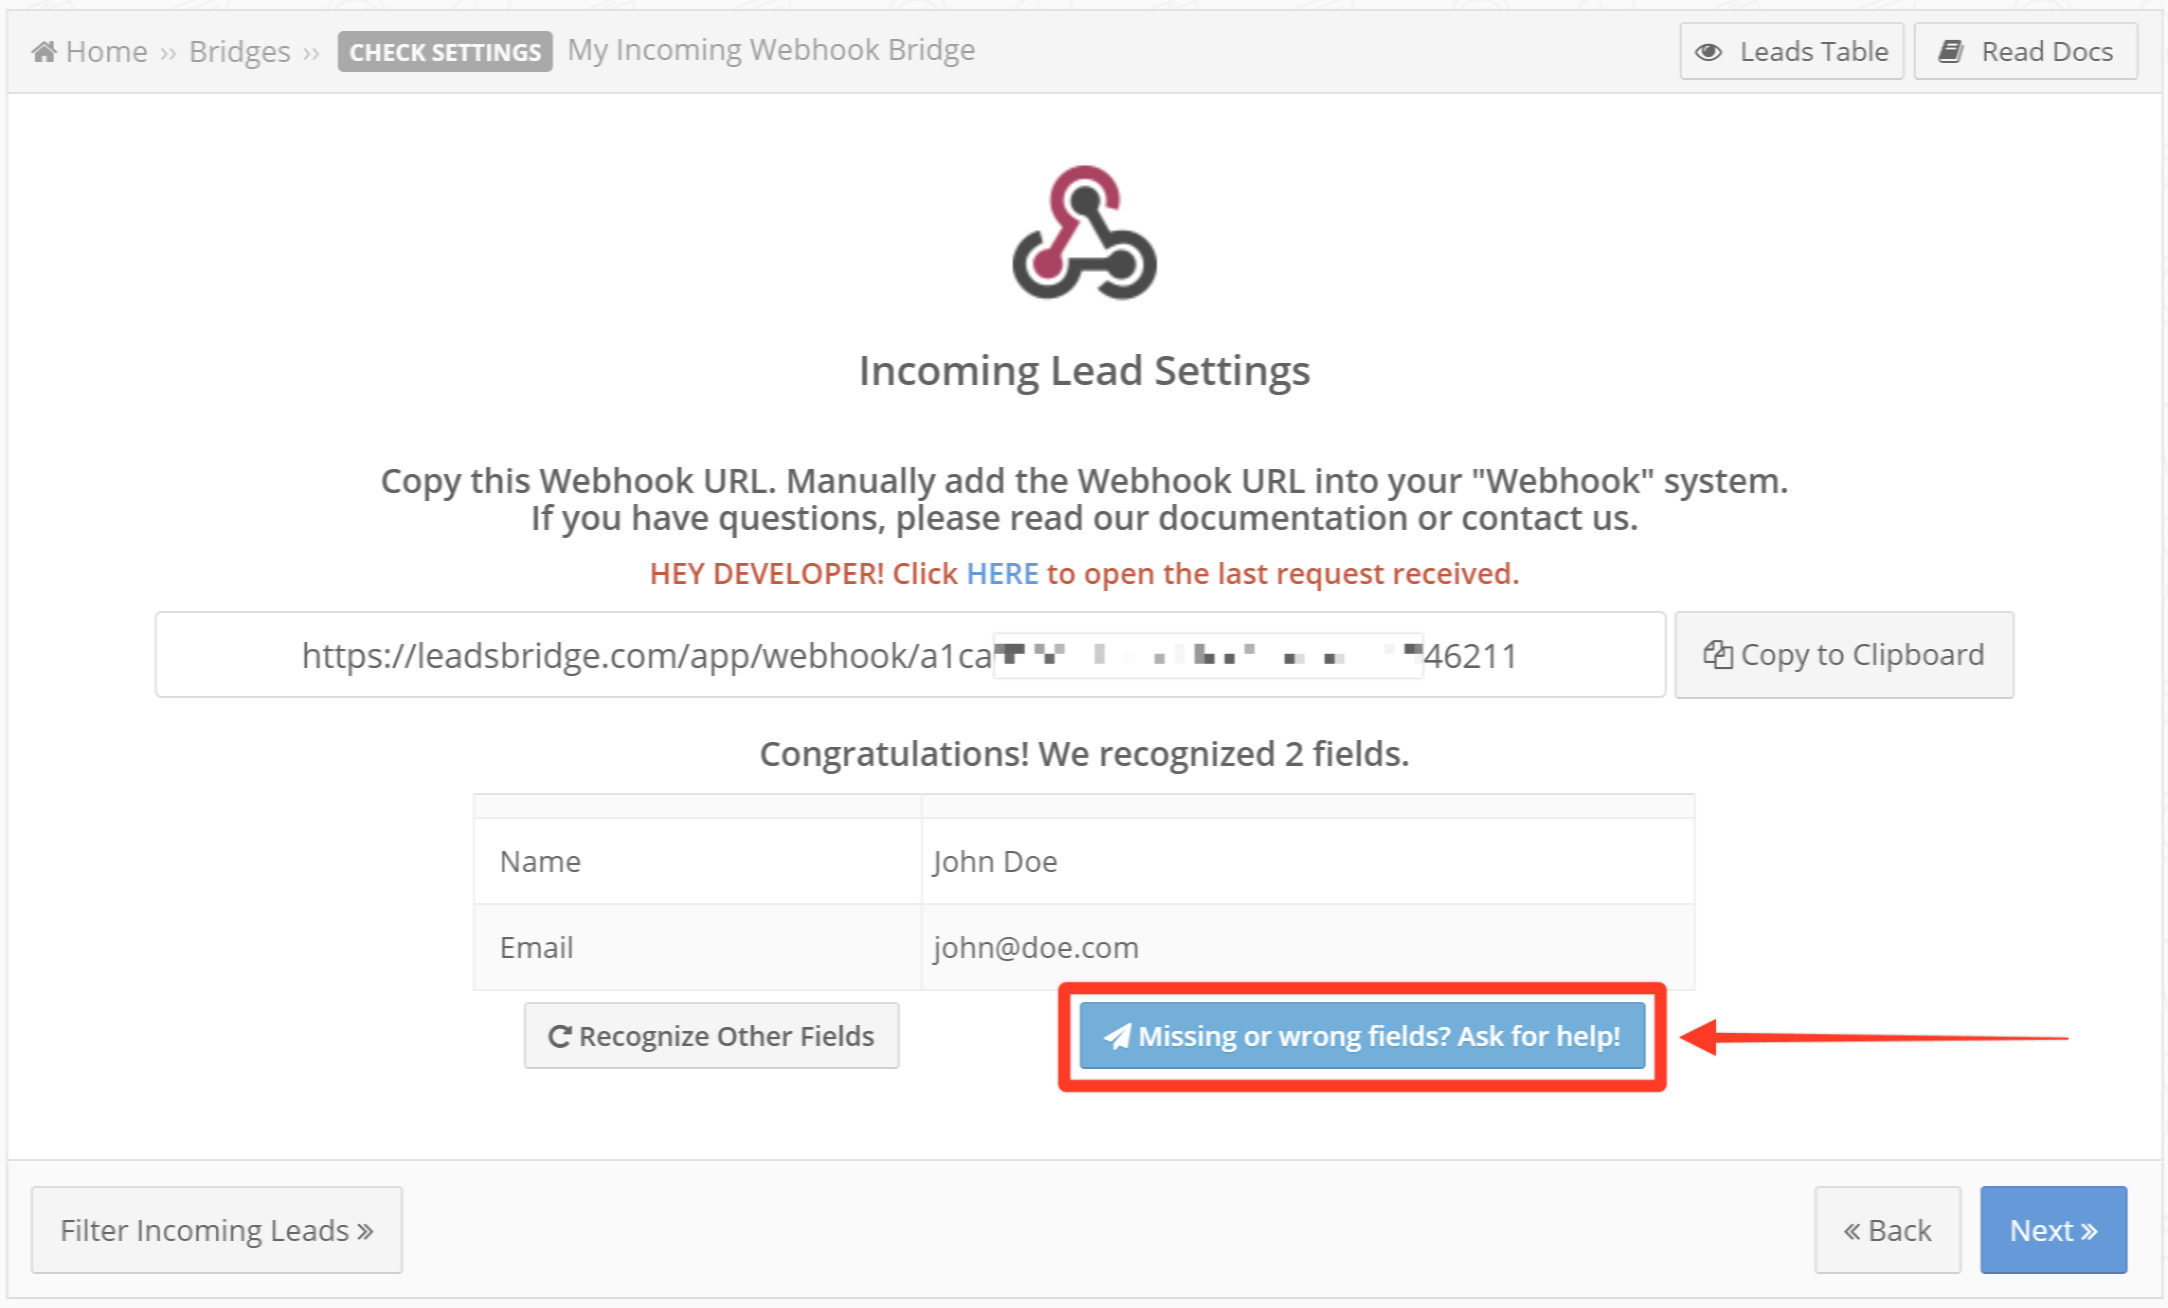
- In case data is not being correctly recognized you may reach our support with the Missing or wrong fields? Ask for help! button
![]()
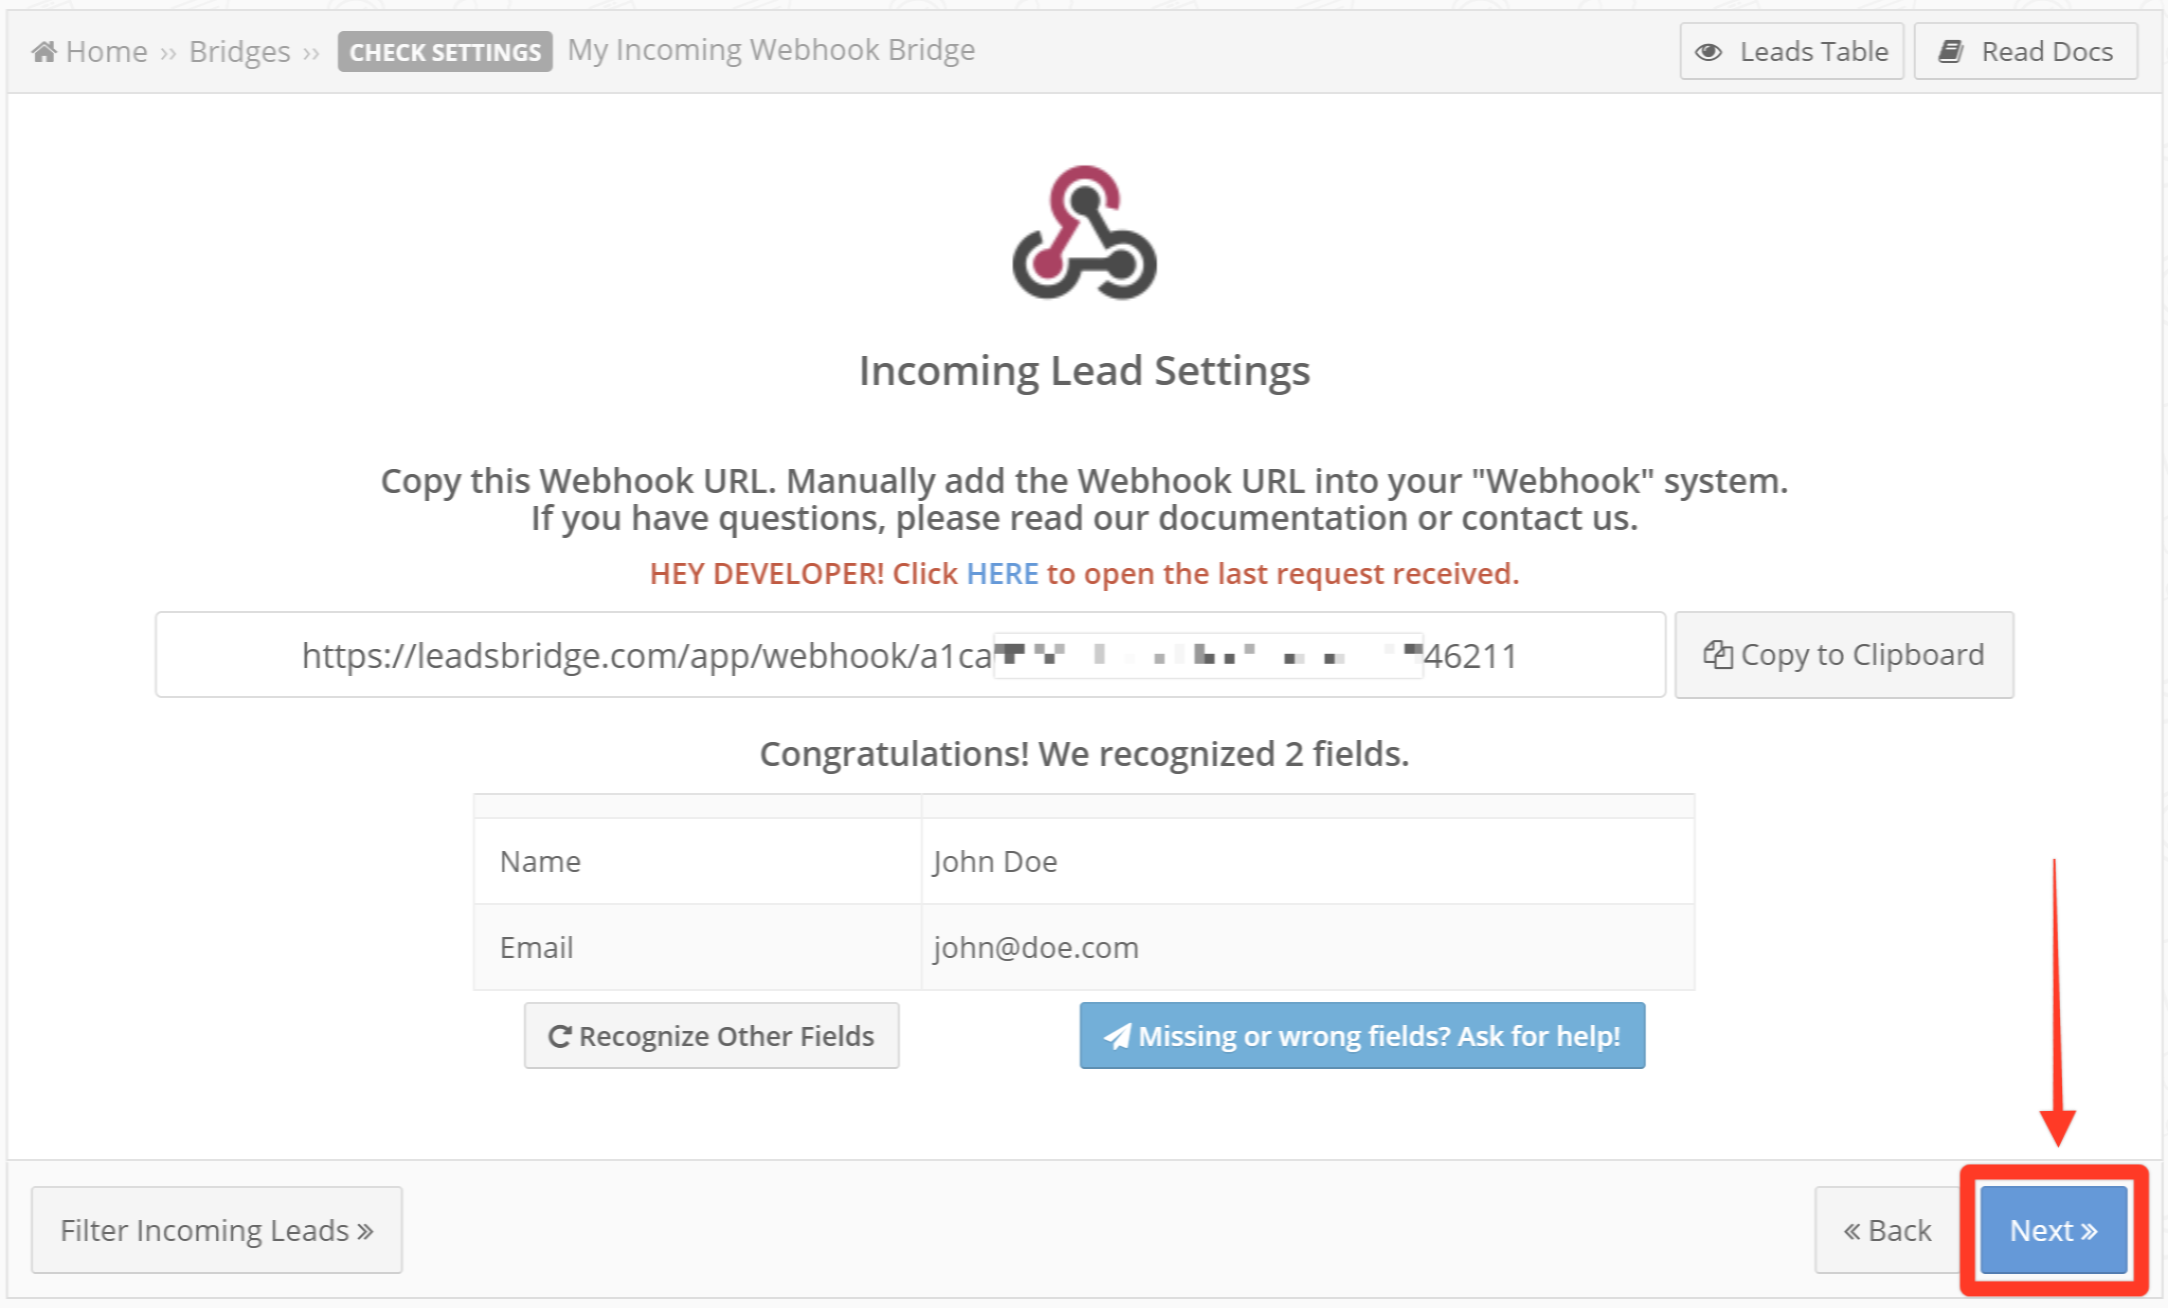
- Once all the data you want to map from your Source has been correctly recognized you should continue with your Bridge configuration by clicking on Next
![]()
- Click Next.
Contacts segmentation
- Select the segment you'd like to use as the source for your contacts.
- You may also add filter conditions by clicking the Source Filter button:
- Add conditions to filter contacts and tailor specific segments.
- Remember that source data will be processed only when all conditions added are met.
Fields Mapping
Here you can map your Webhook information with your destination fields.
You'll see a field name with the destination integration's logo at the top, this indicates the name of the field on Google Customer Match.
Underneath there's a box where you may add the information you'd like to send.
- Check each of the Google Customer Match fields available and match the data you wish to sync from Webhook.
- Map as many fields as possible to achieve higher performing data matching to people on Google.
- You may also leave blank the box of a field's information you don't want to send through.
Once accomplished your desired outcome, click Next.
Audience Sources
Here you can Edit the source created, Delete it or Add Another Source to combine different sources into your Google Customer Match.
If you'd like to add other source data, please click Add Another Source and repeat the Step 3 to setup your new source.
Once done, click Next and head to the last step.
Step 4: Summary
- Before proceeding, please check the information recap.
- Choose if you'd like to run a Simulation or you're ready to go Live.
- Simulation mode provides you with the opportunity to elaborate source data excluding the data sync process. The outcome is a report in order to verify the information processed.
- Live mode process source data and sync information with Google Customer Match as the outcome. Activate this when you're ready to go live.
That's all! Congratulations.
Your bridge will now start the sync process to gather all the information. Once ready, it will be synced and updated automatically.
Related Articles
If you have any other questions, or need help to configure your bridge from Webhook to Google Customer Match with LeadsBridge, do not hesitate to contact our Support!