Connect Facebook Lead Ads to Robly with LeadsBridge
In this article, you'll learn how to set up the bridge and connect Facebook Lead Ads to My CRM Example using LeadsBridge.
Benefits
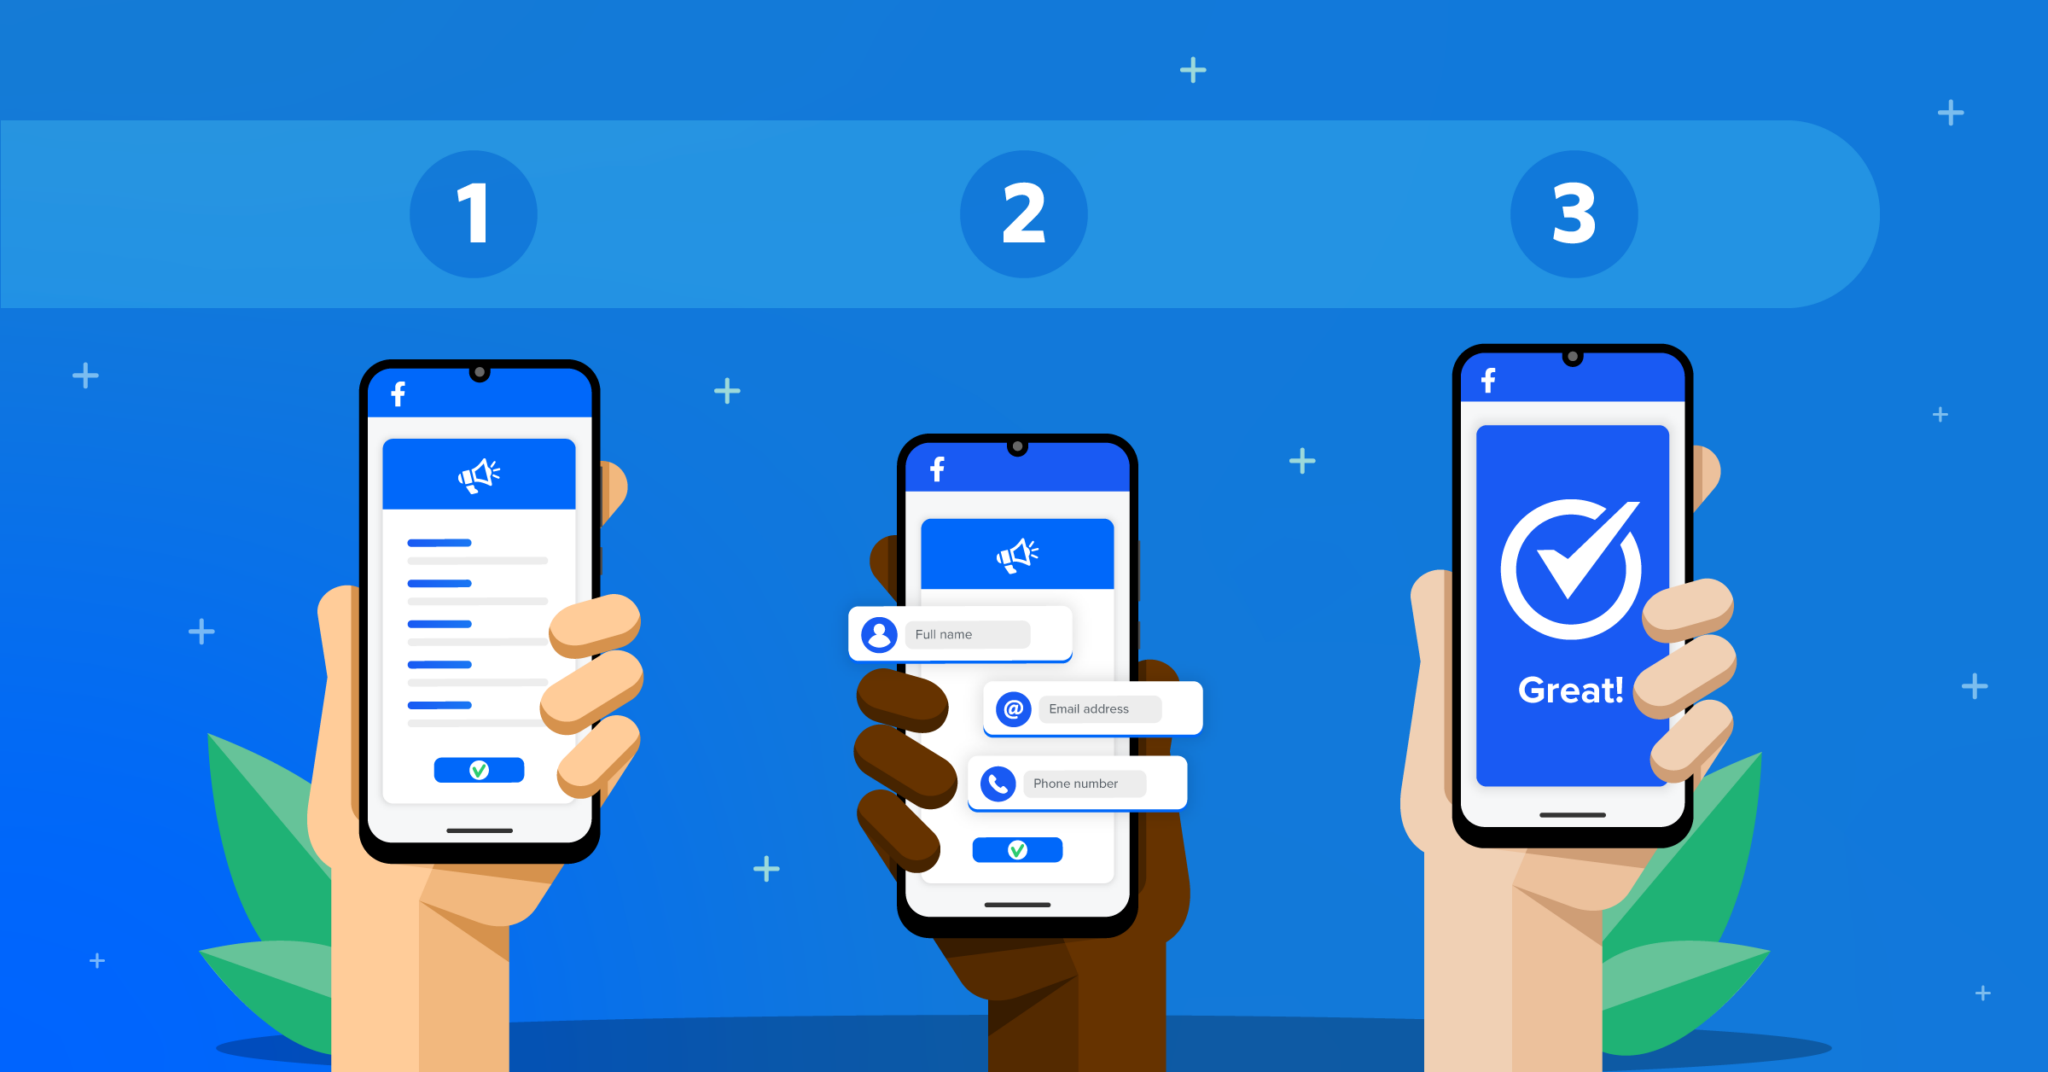
Facebook Lead Ads are a type of ads specifically designed to collect leads. In comparison to traditional ads that drive to website landing pages, with Facebook Lead Ads, the process of generating leads on Facebook is much easier. When users click on a Lead Ad on Facebook they instantly visualize a registration form to leave their data, without leaving the social network and the opt-in forms are pre-filled. Moreover, Facebook Lead Ads are optimized for mobile navigation and allow advertisers to easily collect leads from smartphones and tablets. User's data are automatically added by Facebook which takes them from their profiles.
How to set up your bridge step-by-step tutorial
Before you start
- Head over to the left sidebar and click on the Create new Bridge green button
- You'll be taken to the first step of the bridge creation
Step 1: Choose the apps you want to connect
- Choose Facebook Lead Ads as the source for your bridge
- Choose Robly as the destination for your bridge
- Click on the Continue button
- At this point you can choose a name for your bridge (this will only be visible inside LeadsBridge and you can also edit it later)
Step 2: Configure your Facebook Lead Ads with Robly
Step 2.A: Setup your Facebook Lead Ads integration
- Click on Connect Facebook Lead Ads
- Click on Create new integration to connect your Ad account (or select an existing one from the dropdown if you already connected it)
- You will be prompted to the Ad platform authorization experience. Here you will need to grant LeadsBridge access on click on the Authorize button
- Once done, you can choose a name for this Facebook Lead Ads and LeadsBridge integration (you can also edit it later)
- Once the authorization pop up is closed, you are ready to select from the dropdown the Ad Account and all the required parameters, including the form used to generate the leads.
- Now that your Facebook Lead Ads is connected, you can set-up your bridge destination
Step 2.B: Setup your Robly integration
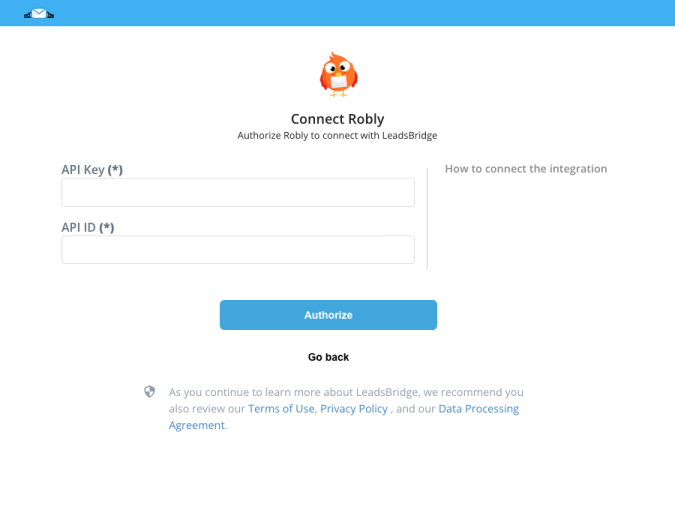
- Click on Connect Robly
- Click on Create new integration to connect your Robly (or select an existing one from the dropdown if you already connected it)
- A popup wil be opened where you can authorize the Robly integration
- Fill API Key, API ID field to connect Robly with LeadsBridge
- Click on the Authorize button
- You can choose a name for this Robly and LeadsBridge integration (you can also edit it later)
- Once done, click on Continue button and you will get back to the bridge experience where you could choose additional integration settings
- Now that your Robly is connected, you can continue with the set-up of your bridge
Step 2.C: Configuration details for Robly
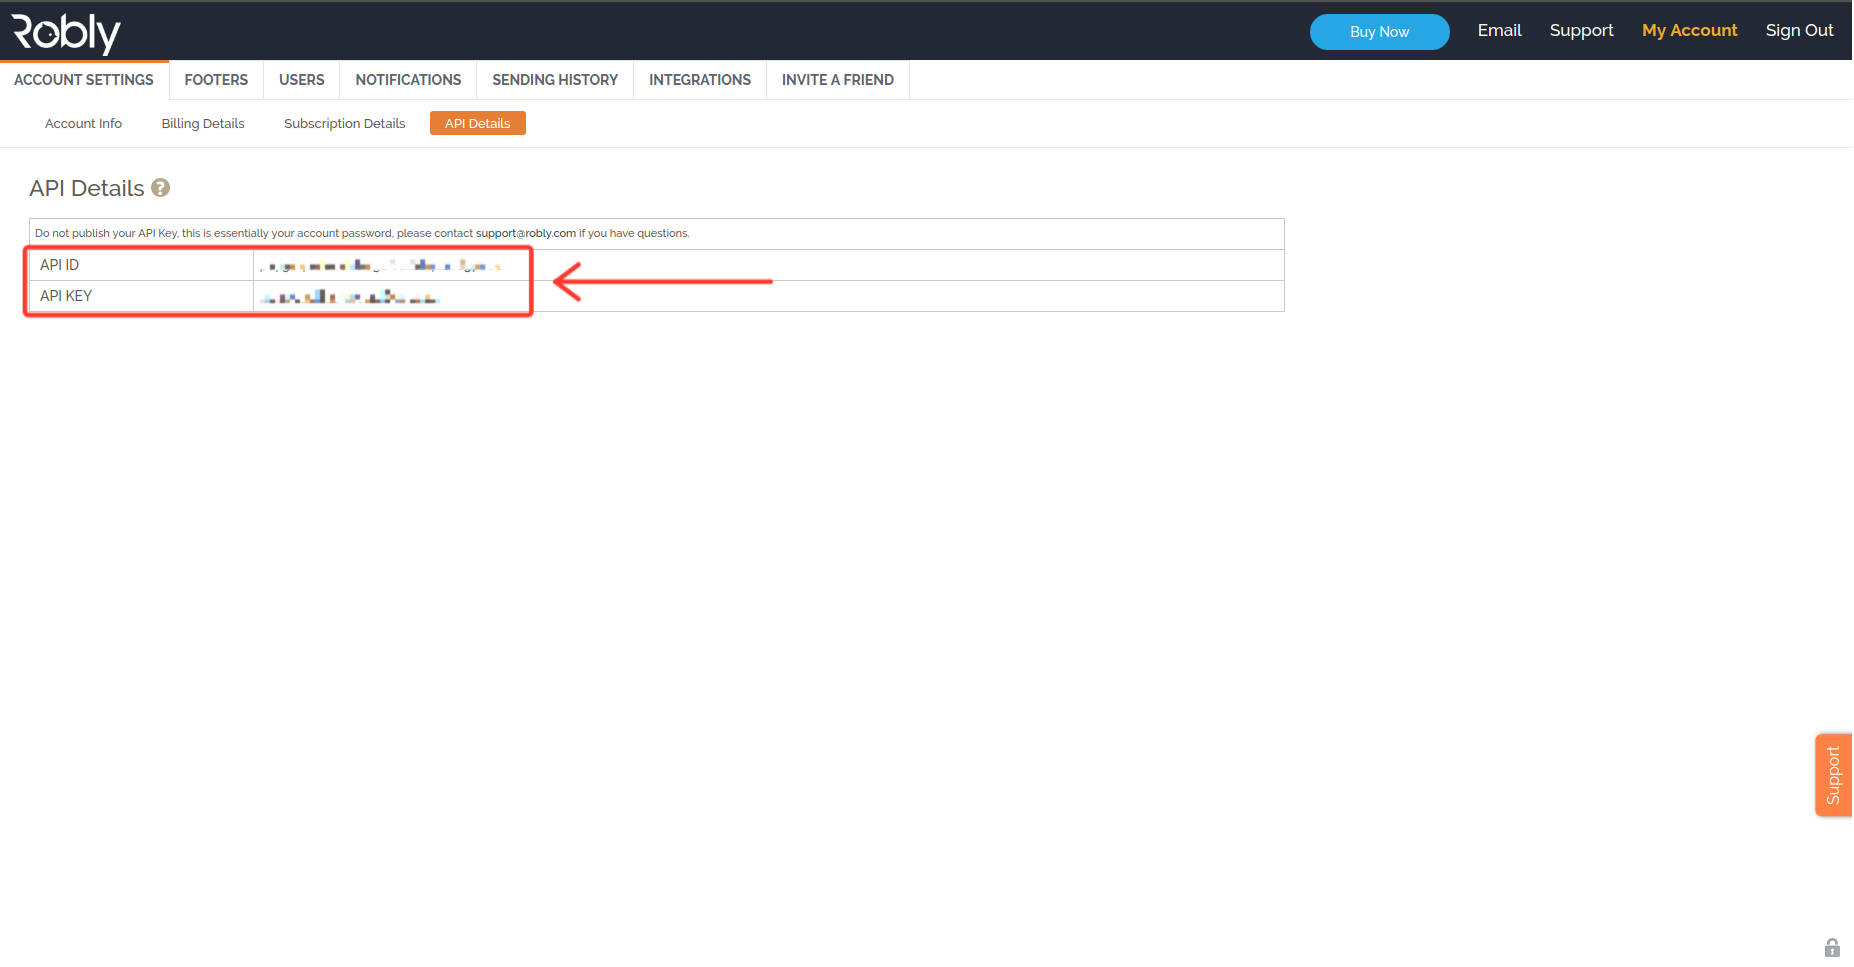
How to get API Key, API ID

Other Info
Step 2.D: Email Receipt (Optional)
You may choose to receive an email receipt for each incoming lead.
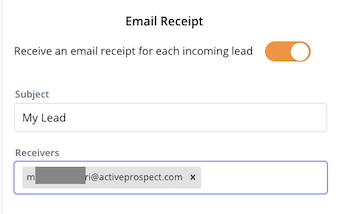
- Type the address(es) where you'd like to receive the receipt
- You may also modify the Subject line of the email
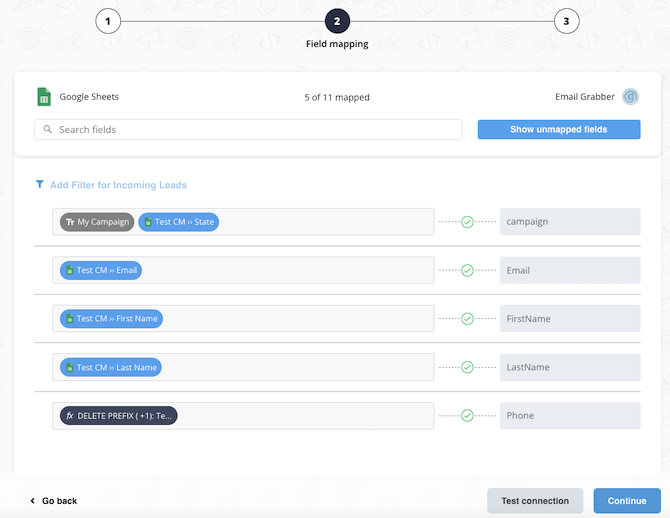
Step 3: Fields Mapping
Here you'll be able to map your Facebook Lead Ads information with your Robly fields.
- You will have Robly fields on the left. Match the information you wish to pass align from Facebook Lead Ads
- Based on Robly functionality, some fields might be required; if this is the case, you can identify those fields with a * (star), so be sure to map all them
- You can also use the functions to customize information like reformatting dates and times or modifying text, phone numbers and so on.
- You may leave blank the box of a field's information you don't want to send through. Clicking on the Show unmapped fields button you will have visibility on all the available fields still not mapped
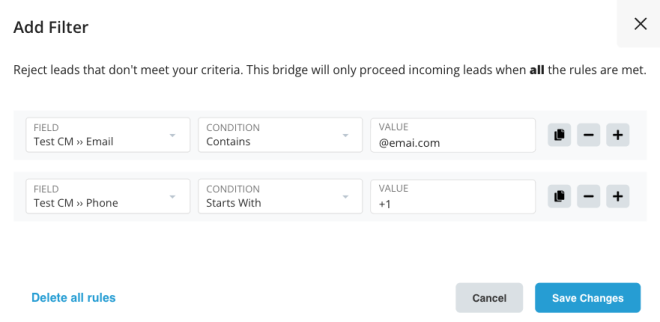
Step 3.A: Leads Filter (Optional)
If you'd like you could add a filter for incoming leads. This filter will sync only leads that meet the configured conditions
- Click on the link Add Filter for Incoming Leads on the top left
- A popup wil be opened where you can configure the filter
- You can define a series of condition to filter the leads. The lead will be synced only when all the conditions will be met
- Once finished, click the Save Changes button to switch back to the Fields Mapping to continue with the bridge configuration
Step 3.B Test Connection (Optional)
Once you’ve mapped all the fields that you need, if available, you can run a test of your connection by clicking on the Test Connection button.

Step 4: Save and Publish
- Click on the Save and publish button
Congratulations! Now your bridge is up and running
Common questions for Facebook Lead Ads
How to create an Instant Form on Facebook?
You can set up lead ads with an instant form from your Facebook Page, Meta Ads Manager or Meta Business Suite. Lead ads with the instant form are designed to help you generate and qualify leads by asking people to fill out a form. Using instant forms, you can collect information from people who may be interested in your business or service without requiring them to leave Facebook or Instagram.
Once the Form is set up and activated, the lead who engages with your lead ad with instant form, will be directed to your instant form.
( Learn more)How to test Facebook Lead Ads?
To test Facebook Lead Ads and ensure their effectiveness, you can utilize the Facebook Lead Ads testing tool provided by LeadsBridge. This tool allows you to test your Lead Ads before they are released, providing you with the opportunity to evaluate the performance of your Lead Generation Form without even viewing the Ads on the Facebook platform.
Once you have created a bridge on LeadsBridge, it will be in active status automatically. This means that any mock lead sent through this tool will also be synced with your destination, ensuring a seamless connection between Facebook and your preferred marketing application.
To proceed with testing your Facebook Ads through LeadsBridge, follow these steps:
- Begin by creating a Facebook Leads Ads integration as outlined in this documentation.
- Once you have connected your "Source," which in this case is Facebook Lead Ads, and your "Destination" apps, and authorized the necessary accounts, move on to field mapping.
- Now, it's time to test the connection between your Facebook Form for Lead Ads and your destination platform, such as CRMs or Autoresponders. This testing phase further guarantees flawless execution. Follow these steps:
- On the field mapping screen, locate the "Test connection" button at the bottom.
- Fill in the required information and click "Run test".
- Finally, click "Save & publish".
It's important to keep in mind that when using the LeadsBridge testing tool, any mock leads sent cannot be found on Facebook.
Then you have to set up your Facebook Lead Ads testing tool on Facebook, as well.
Follow these steps:
- Access the Facebook for Developers platform and open the Facebook Lead Ads testing tool.
- Choose a "Page" and select a "Form".
- Click on "Create lead" to generate a new lead associated with the selected form. An email (test@fb.com) will be created as well.
If the setup is correct, you will see the following:
- The lead will appear in your CRM or other destination platforms.
- In the Leads Table of your bridge, the lead will be highlighted in green and marked as "Synced".
- Any errors encountered can be viewed in the Error Table associated with your LB account.
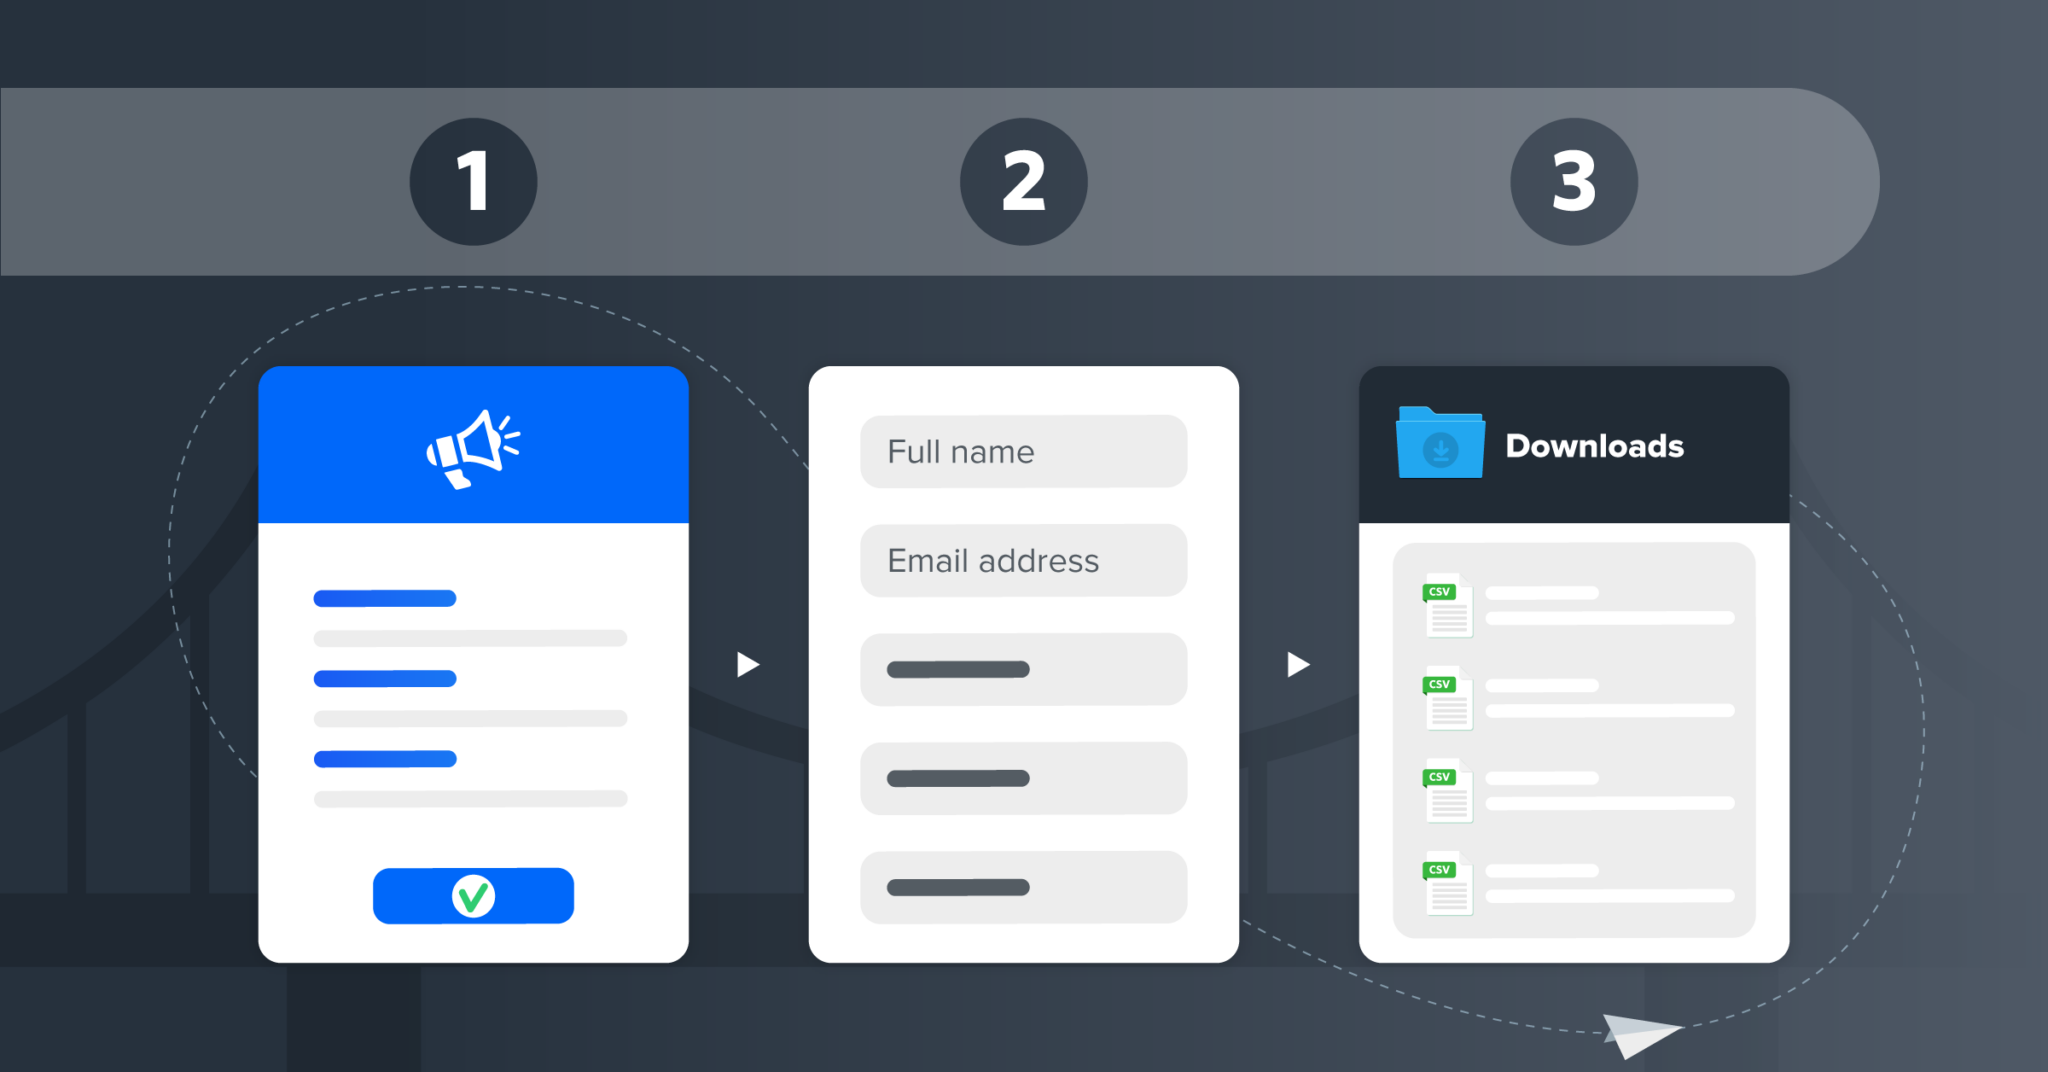
How to export your leads from Facebook Lead Ads
There are three ways to export leads from Facebook Lead Ads.
- Manual Download (CSV format): This method involves downloading the leads in CSV format and then uploading them to a CRM or autoresponder for nurturing. While not the most recommended option due to manual handling drawbacks, combining CSV - Facebook Ads datasets allows you to create data visualizations and dashboards across your marketing stacks. You can download leads from Ads Manager or your Facebook page.
- API Download: Facebook provides the option to download leads through the API (application programming interface). To use this method, you need programming knowledge and must create an API. You'll also require the page access token and user access token, along with advertiser-level permissions.
- Facebook Lead Ads Automation: After capturing leads from your Facebook Lead Ads campaigns, you can automate the process of nurturing and following up with them. By connecting Facebook Lead Ads to your CRM or email marketing platform through LeadsBridge, you can sync lead data in real-time and gain valuable insights to optimize your campaigns, such as individual ads' ROI. Automation offers higher data accuracy compared to manual transfers, which are prone to errors.
( Learn more)
How to integrate Facebook Lead Ads with your CRM
To integrate Facebook Lead Ads with your CRM, there are two main methods you can consider.
- Custom Integrations: One way is to set up your own tool using Webhooks and Facebook Graph API to sync leads. This involves leveraging the APIs provided by Facebook to retrieve the lead data and then using Webhooks to transfer this information to your CRM. By setting up this custom integration, you can ensure a seamless flow of leads from Facebook to your CRM.
- Third-Party Integration: Alternatively, you can opt for a third-party provider like LeadsBridge to handle the integration for you. LeadsBridge offers a convenient solution to sync your Facebook leads with your CRM. By leveraging their platform, you can streamline the process and ensure that your leads are seamlessly transferred to your CRM without any manual effort on your part.
Learn more about the best Facebook Lead Ads - CRM integrations provided by LeadsBridge.
Moreover, LeadsBridge offers tailor-made solutions for custom development in case you need specific integrations for your in-house CRM.Discover more about our CRM tailor-made solutions!
How to automate Facebook Lead Ads notification with LeadsBridge
To automate Facebook Lead Ads notifications, rely on LeadsBridge. We offer a solution for integrating Facebook emails, ensuring that all new Lead Ad forms are instantly delivered to your preferred email address. Setup is quick and once completed, the process becomes automatic and instantaneous, eliminating any need for manual transfers or waiting.
With email alerts, your team will never miss out on lead generation or conversion events. This enables prompt follow-up during peak user engagement, significantly increasing conversion chances. Our flexible integration allows you to designate whether the emails should be directed to a department head for lead assignment or a single salesperson. Rest assured, we support any system that helps your team promptly follow up with Facebook leads.
( Learn more)Do you need help?
Here some additional resources:
- Facebook Lead Ads documentation page and common questions
- Robly documentation page and common questions
- LeadsBridge KNOWLEDGE BASE
- Contact support from your account clicking on the top right Support button