Connect Landingi to LeadByte with LeadsBridge
In this article, you'll learn how to set up the bridge and connect Landingi to My CRM Example using LeadsBridge.
How to set up your bridge step-by-step tutorial
Before you start
- Head over to the left sidebar and click on the Create new Bridge green button
- You'll be taken to the first step of the bridge creation
Step 1: Choose the apps you want to connect
- Choose Landingi as the source for your bridge
- Choose LeadByte as the destination for your bridge
- Click on the Continue button
- At this point you can choose a name for your bridge (this will only be visible inside LeadsBridge and you can also edit it later)
Step 2: Configure your Landingi with LeadByte
Step 2.A: Setup your Landingi integration
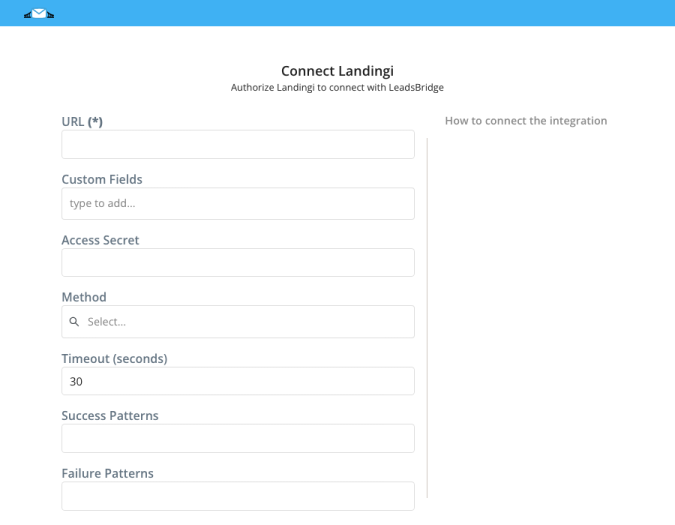
- Click on Connect Landingi
- Click on Create new integration to connect your Landingi (or select an existing one from the dropdown if you already connected it)
- A popup wil be opened where you can authorize the Landingi integration
- Fill URL, Access Secret field to connect Landingi with LeadsBridge
- Click on the Authorize button
- You can choose a name for this Landingi and LeadsBridge integration (you can also edit it later)
- Once done, click on Continue button and you will get back to the bridge experience where you could choose additional integration settings
- Now that your Landingi is connected, you can continue with the set-up of your bridge
Step 2.B: Configuration details for Landingi
How to get URL, Access Secret
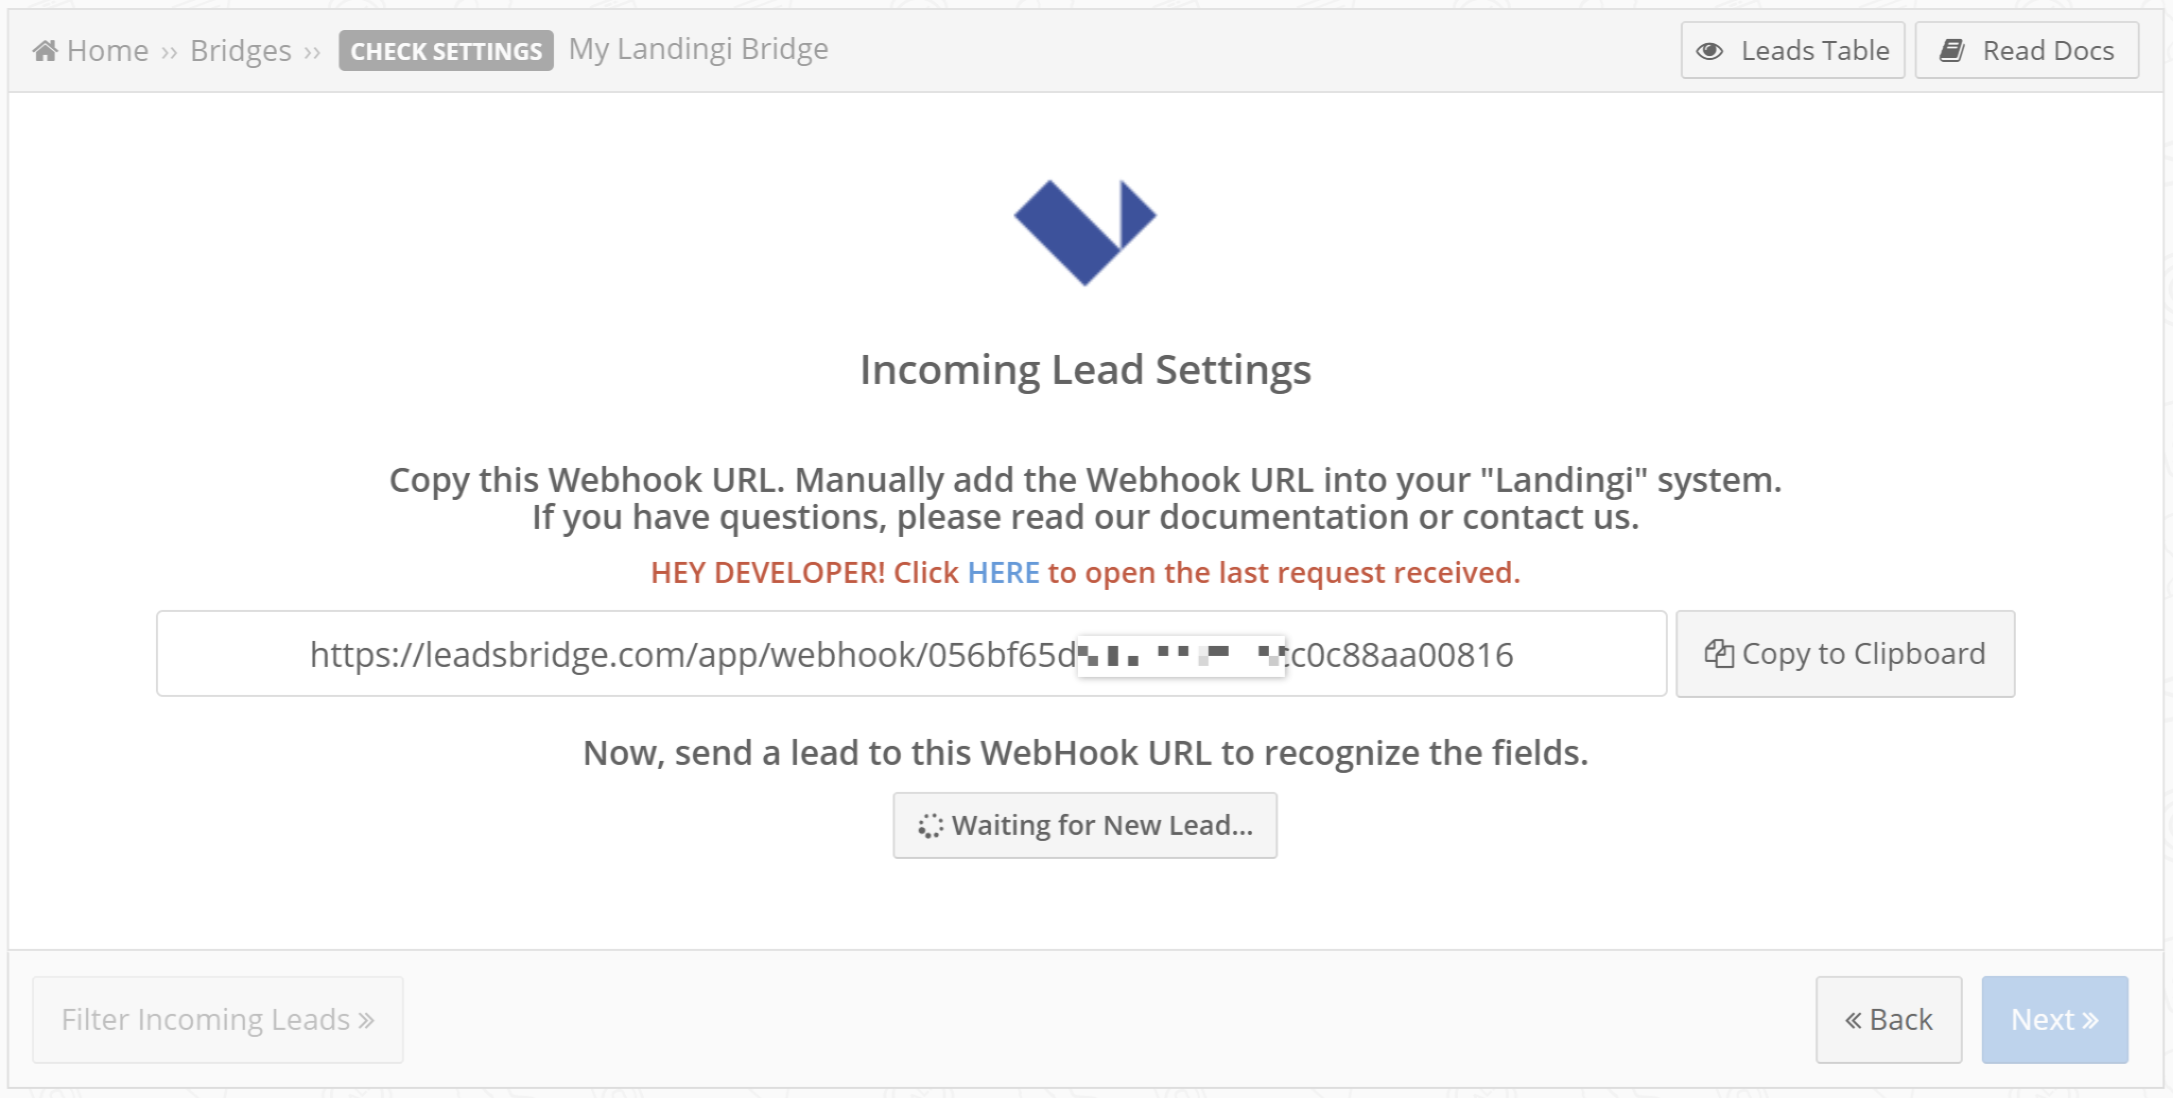
Landingi gives the possibility to send lead’s information to a Webhook URL, this is set up in the form settings. Create the bridge and select Landingi as Source. In the source step, you’ll see a URL address, set that endpoint as the data receiver inside your Landingi form settings.
Set the Webhook with lead information in a form by following the steps below:
1. Log in to your account in the Landingi platform. Then go to editing the selected landing page.
2. In the editor, go to form settings. On the left, enter the Integrations and choose integration with Webhook.
3. In the Request URL field, paste the URL provided by LeadsBrdige during the Bridge creation.
4. In the Request method field, select POST.
5. Map the Landingi form fields with the fields that you would like to receive in LeadsBridge.
6. In the Request Headers fields, set the request headers that will be sent each time the form is sent. Remember that each heading consists of two parts: key and value, e.g. API_KEY: 1234-abcd-5678, where the first field concerns key and the second - value.
7. In the Request parameters fields you can set additional parameters that will be sent together with the form. Similarly to headers, it consists of two parts: key and value, which should be completed. For example, if we have a form with an email field and we set one parameter source:landingi, then each time someone sends this form, the query will send data to the API: email: marta@test.com (or what the user enters in the form) and source: Landingi. The request parameters perform almost the same function as the hidden fields in the form, but their advantage is that they are invisible from the page code.
For further information see: https://landingi.com/help/webhook-integration/
Step 2.C: Setup your LeadByte integration
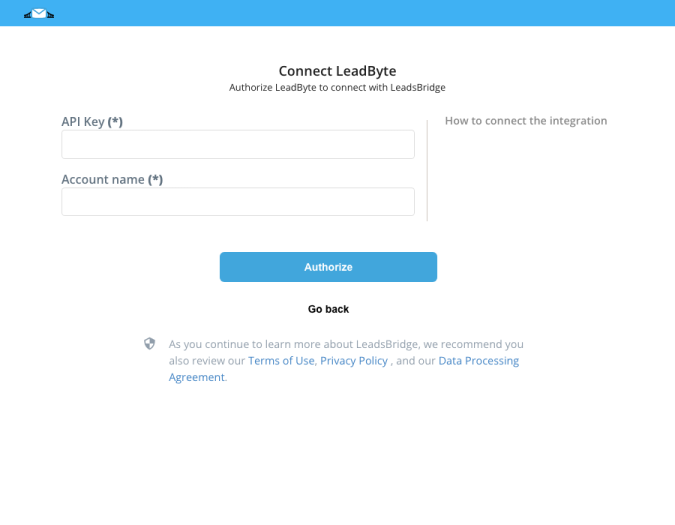
- Click on Connect LeadByte
- Click on Create new integration to connect your LeadByte (or select an existing one from the dropdown if you already connected it)
- A popup wil be opened where you can authorize the LeadByte integration
- Fill Account name, API Key field to connect LeadByte with LeadsBridge
- Click on the Authorize button
- You can choose a name for this LeadByte and LeadsBridge integration (you can also edit it later)
- Once done, click on Continue button and you will get back to the bridge experience where you could choose additional integration settings
- Now that your LeadByte is connected, you can continue with the set-up of your bridge
Step 2.D: Configuration details for LeadByte
How to get Account name, API Key
The Account Name is the name of the LeadByte Account used for your User.
You could find it in the login URL
XXXX.leadbyte.co.uk where XXXX is the Account Name
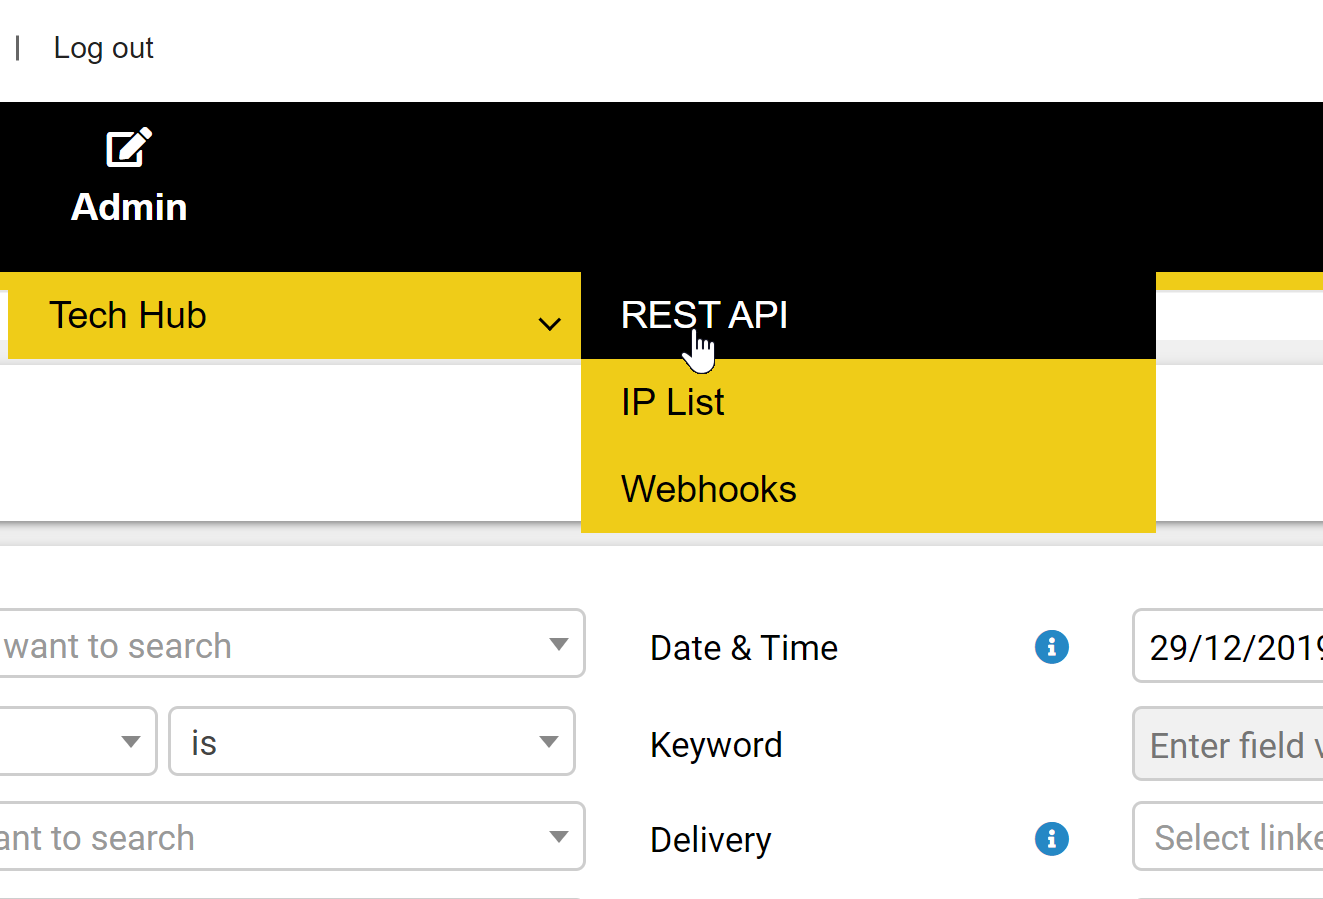
To find the API Key open the REST API section clicking on the menu "Admin --> Tech Hub --> REST API"
You could find it in the login URL
XXXX.leadbyte.co.uk where XXXX is the Account Name
To find the API Key open the REST API section clicking on the menu "Admin --> Tech Hub --> REST API"
Click on the Edit button for the related User.
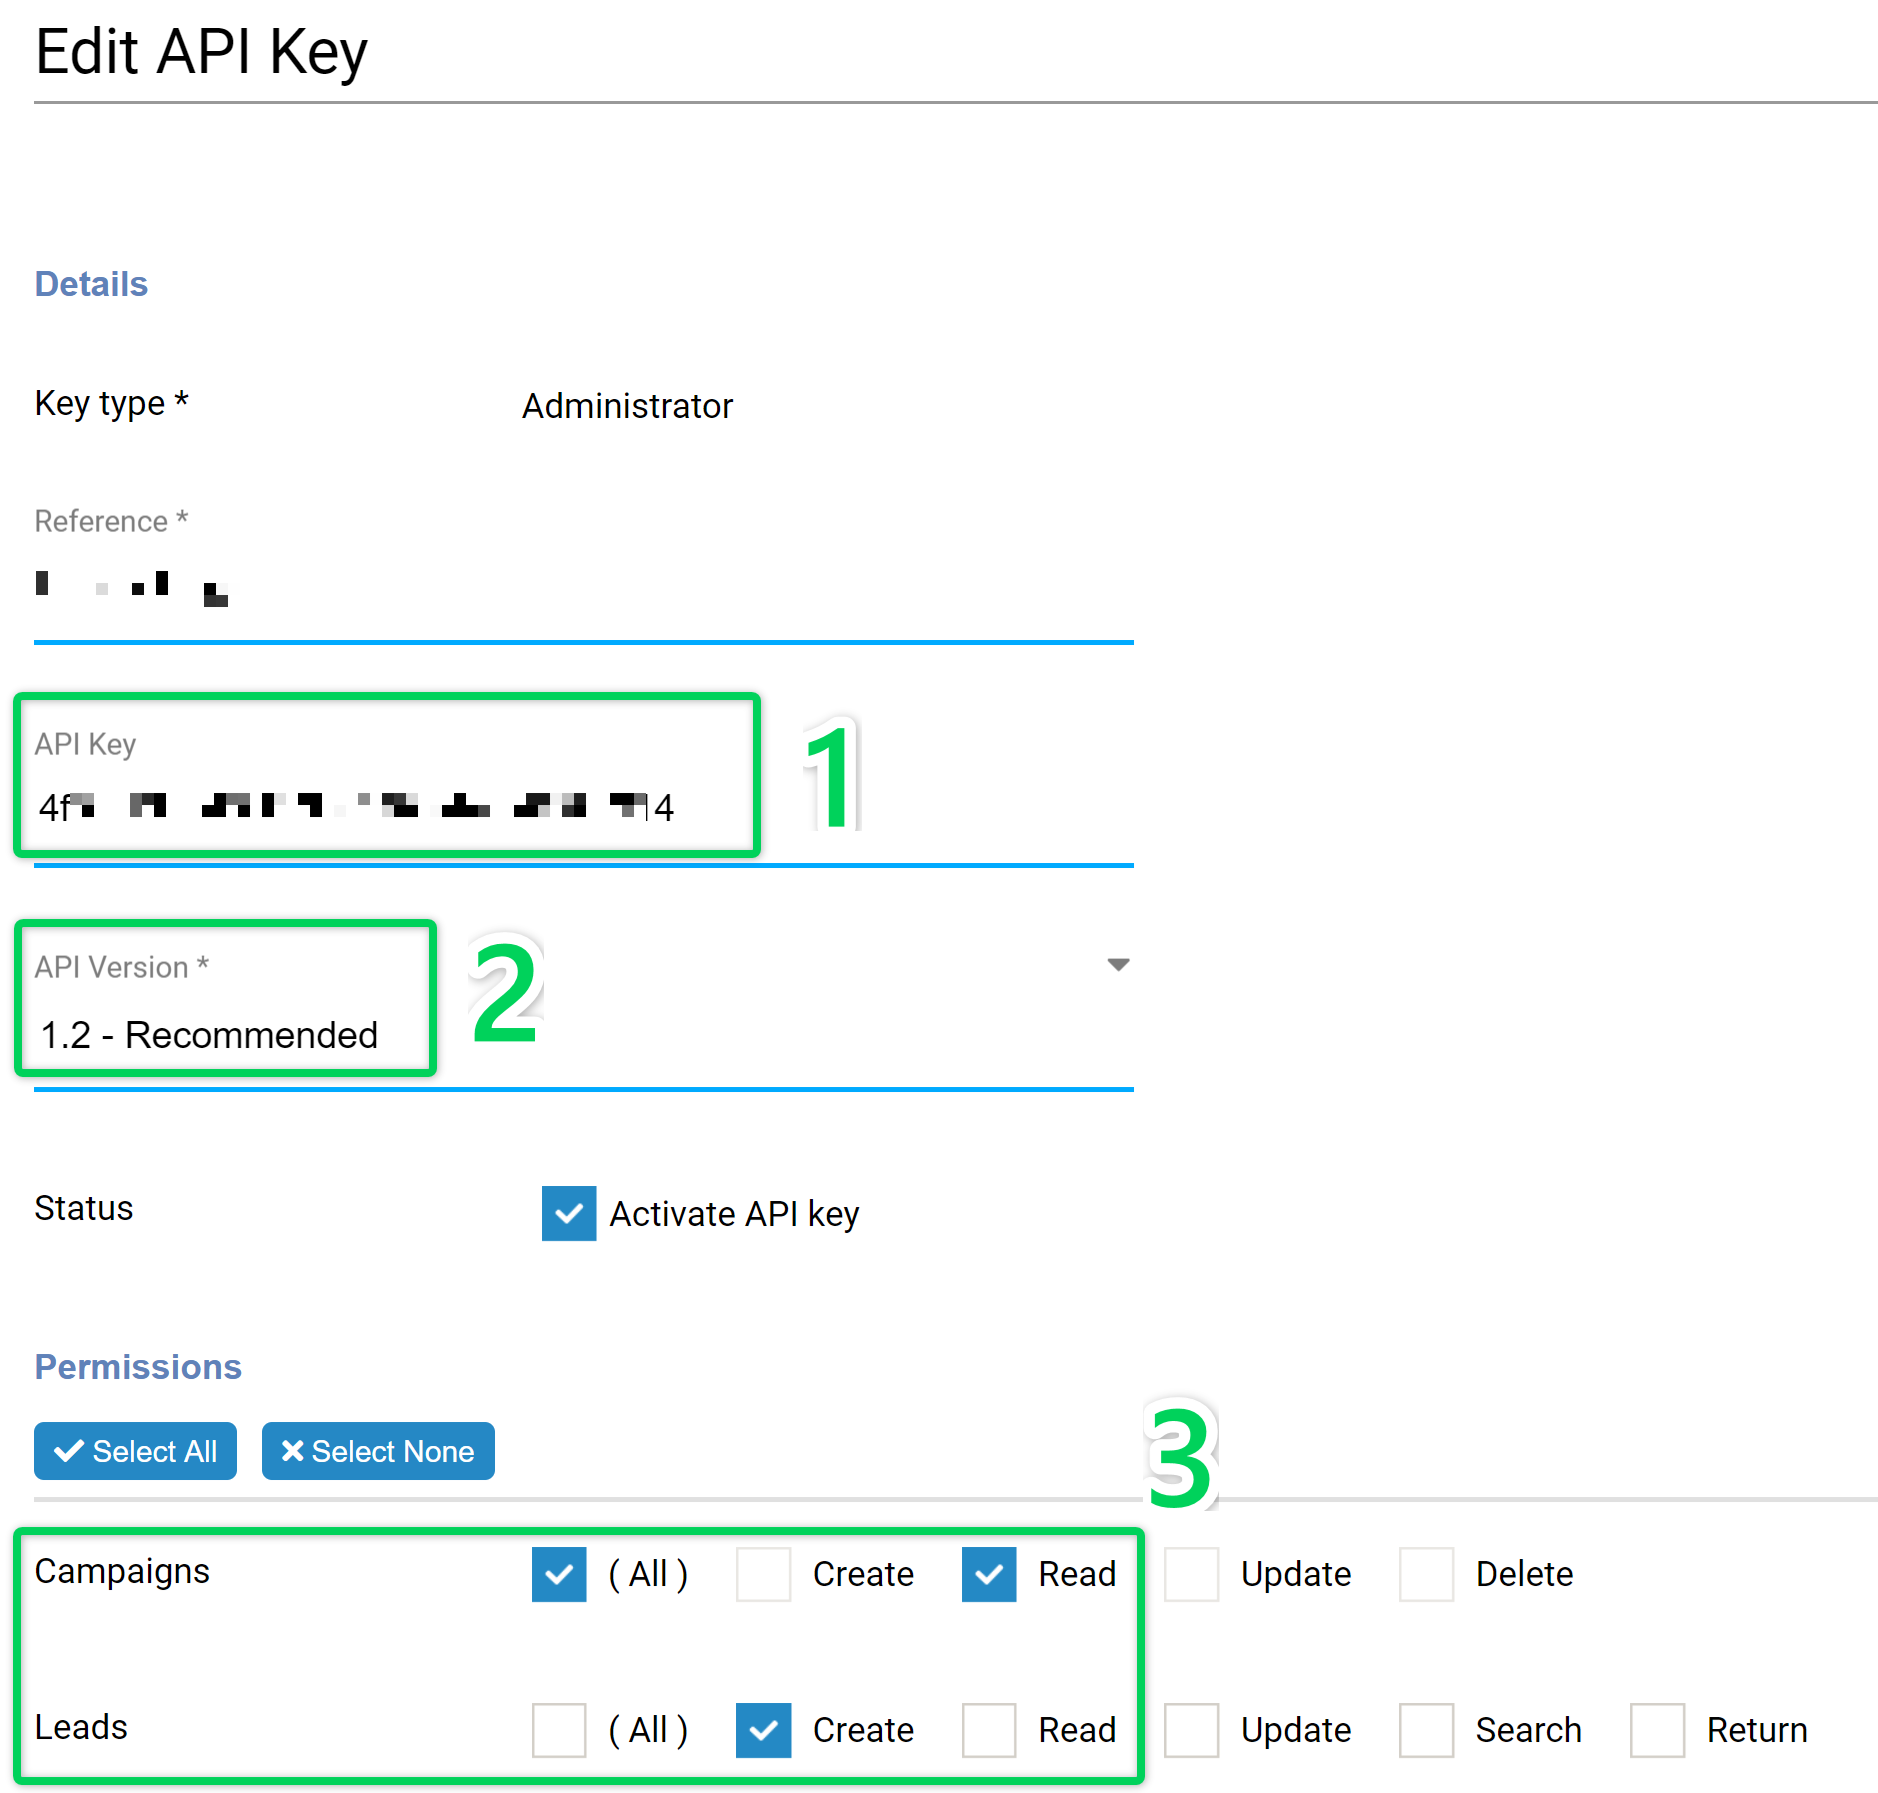
You could find the API Key under the related label (see GREEN box 1 in the image below).
There are other two important configurations to setup
- API Version to 1.2 (see GREEN box 2 in the image below)
- Set Read permissions for Campaigns and Create permission for Leads (see GREEN box 3 in the image below)
Other Info
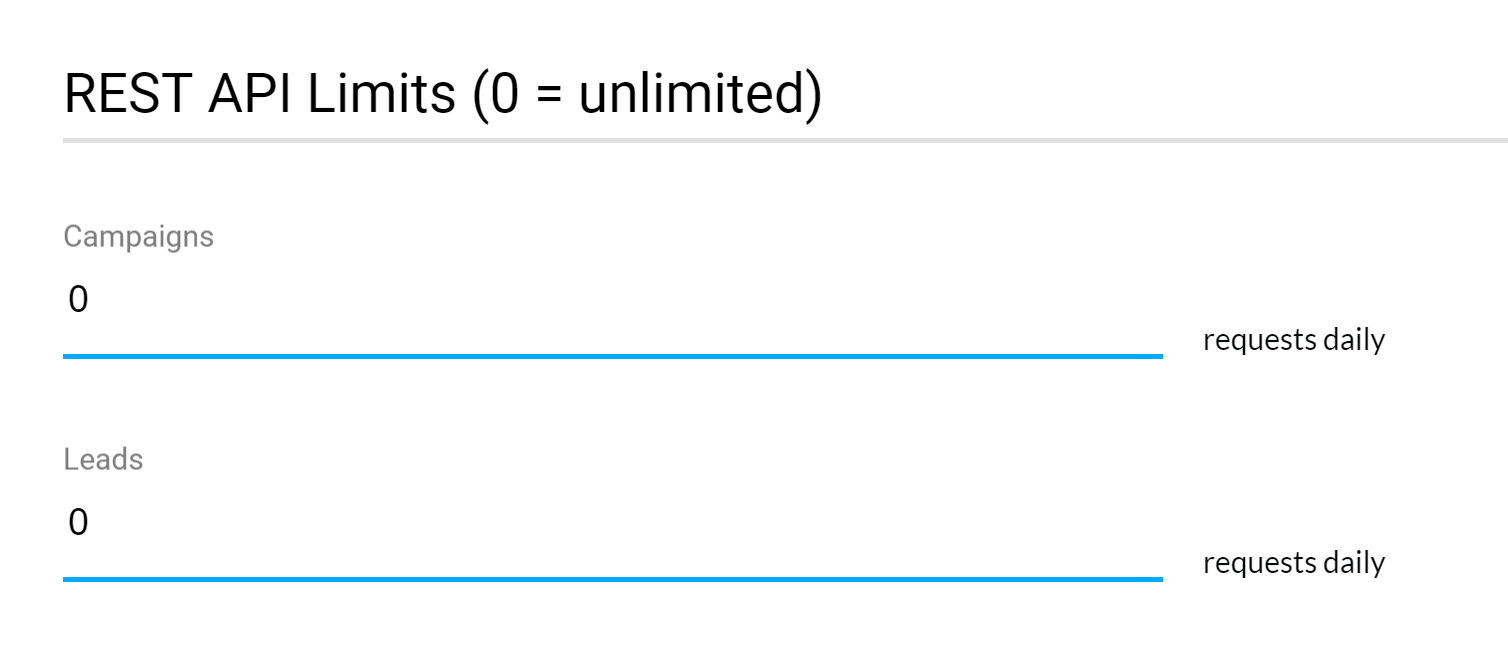
Another important configuration is the Daily API rate limits.
If you set a specific daily limit, once the limit is reached, LeadsBridge will not be able to sync Leads until the limit is reset on the day after.
If you don't need a daily limit, leave the values to 0.
If you set a specific daily limit, once the limit is reached, LeadsBridge will not be able to sync Leads until the limit is reset on the day after.
If you don't need a daily limit, leave the values to 0.
Step 2.E: Email Receipt (Optional)
You may choose to receive an email receipt for each incoming lead.
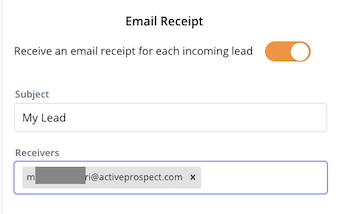
- Type the address(es) where you'd like to receive the receipt
- You may also modify the Subject line of the email
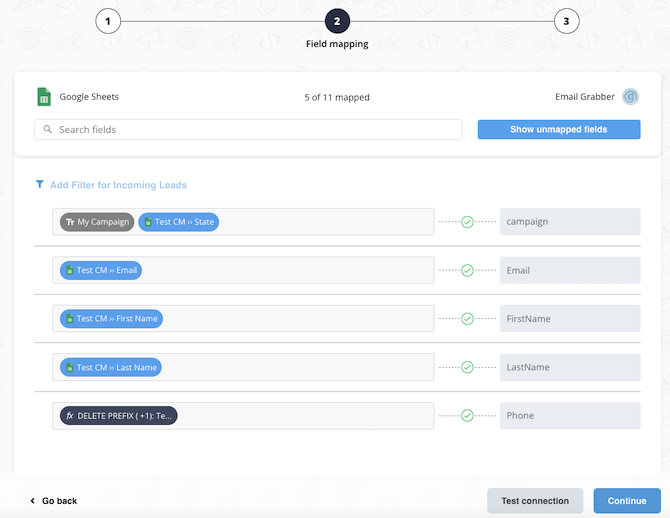
Step 3: Fields Mapping
Here you'll be able to map your Landingi information with your LeadByte fields.
- You will have LeadByte fields on the left. Match the information you wish to pass align from Landingi
- Based on LeadByte functionality, some fields might be required; if this is the case, you can identify those fields with a * (star), so be sure to map all them
- You can also use the functions to customize information like reformatting dates and times or modifying text, phone numbers and so on.
- You may leave blank the box of a field's information you don't want to send through. Clicking on the Show unmapped fields button you will have visibility on all the available fields still not mapped
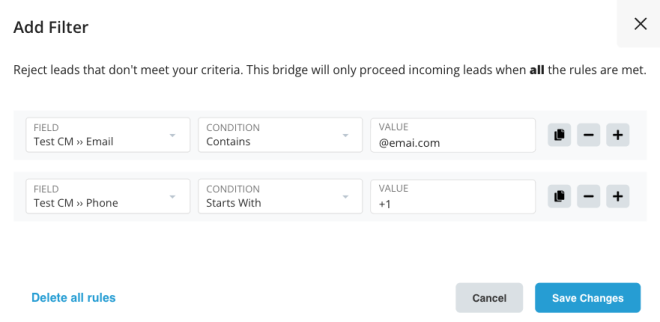
Step 3.A: Leads Filter (Optional)
If you'd like you could add a filter for incoming leads. This filter will sync only leads that meet the configured conditions
- Click on the link Add Filter for Incoming Leads on the top left
- A popup wil be opened where you can configure the filter
- You can define a series of condition to filter the leads. The lead will be synced only when all the conditions will be met
- Once finished, click the Save Changes button to switch back to the Fields Mapping to continue with the bridge configuration
Step 3.B Test Connection (Optional)
Once you’ve mapped all the fields that you need, if available, you can run a test of your connection by clicking on the Test Connection button.

Step 4: Save and Publish
- Click on the Save and publish button
Congratulations! Now your bridge is up and running
Do you need help?
Here some additional resources:
- Landingi documentation page and common questions
- LeadByte documentation page and common questions
- LeadsBridge KNOWLEDGE BASE
- Contact support from your account clicking on the top right Support button


