Connect NetSuite to Google Customer Match with LeadsBridge
In this article, you'll learn how to set up the bridge and connect NetSuite to My CRM Example using LeadsBridge.
How to set up your bridge step-by-step tutorial
Before you start
- Head over to the left sidebar and click on the Create new Bridge green button
- You'll be taken to the first step of the bridge creation
Step 1: Choose the apps you want to connect
- Choose NetSuite as the source for your bridge
- Choose Google Customer Match as the destination for your bridge
- Click on the Continue button
- At this point you can choose a name for your bridge (this will only be visible inside LeadsBridge and you can also edit it later)
Step 2: Configure your NetSuite with Google Customer Match
Step 2.A: Setup your NetSuite integration
- Click on Connect NetSuite
- Click on Create new integration to connect your NetSuite (or select an existing one from the dropdown if you already connected it)
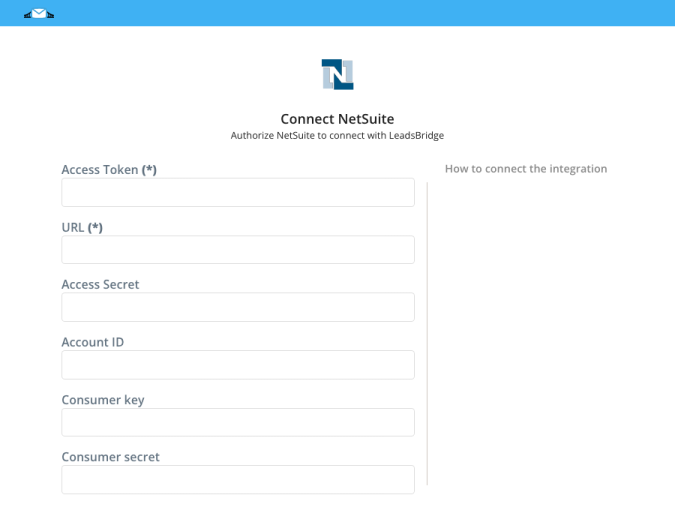
- A popup wil be opened where you can authorize the NetSuite integration
- Fill URL, Account ID, Consumer key, Consumer secret, Access Token, Access Secret field to connect NetSuite with LeadsBridge
- Click on the Authorize button
- You can choose a name for this NetSuite and LeadsBridge integration (you can also edit it later)
- Once done, click on Continue button and you will get back to the bridge experience where you could choose additional integration settings
- Now that your NetSuite is connected, you can continue with the set-up of your bridge
Step 2.B: Configuration details for NetSuite
How to get URL, Account ID, Consumer key, Consumer secret, Access Token, Access Secret
In order to get your URL and Account ID you should follow the steps below:
- Log into your NetSuite account as Administrator
- Go to Setup » Company » Company Information
![]()
- Your URL should look like one of the following cases:

- https://AccountID.suitetalk.api.netsuite.com
- https://AccountID.app.netsuite.com
- If those URL formats doesn't work, go back to the Company Information page and check the value of CUSTOMER CENTER LOGIN which contains the URL but use only the first part of it: https://XXX.netsuite.com where XXX depends on your account region.
After that, in order to get your Consumer Key and Consumer Secret, you should create an Integration inside NetSuite by follow the steps below:
- Log into your NetSuite account as Administrator
- Go to Setup » Integration » Manage Integrations » New
![]()
- Inside the Name field type a descriptive name, for example LeadsBridge Integration
- Keep State as Enabled
- Check the Token-Based Authentication checkbox in the Authentication section
- Then click on Save
- After that, Consumer Key and Consumer Secret will be displayed, copy them.
- Go back into your LeadsBridge Integration and paste your Consumer Key and Consumer Secret in their corresponding fields

To be able to create an Access Token you should enable your NetSuite account with Token-Based Authentication by following the steps below:
- Log into your NetSuite account as Administrator
- Go to Setup » Company » Enable Features
- Click on SuiteCloud sub tab
- Scroll down to Manage Authentication section
- Check the TOKEN-BASED AUTHENTICATION checkbox
- Save your changes
After this you should assign a role to the user’s account you are using inside LeadsBridge by following the steps below:
- Log into your NetSuite account as Administrator
- Go to Setup » Users/Roles » Manage Users
- Under the Name column click on the user’s name you want to give access
- Then click on Edit button under the user’s name
- Go into the Access sub-tab at the bottom
- Then click on the Add dropdown button under Roles, we recommend selecting Full Access or other similar roles
- Click again on Add to assign the role to the user
- After that, click on Save
Now we should create the Token for this user by following the steps below:
- Go to Setup » Users/Roles » Access Tokens » New
![]()
- Select an Application Name
- Under User select the user you assigned the Role in the step before
- Inside Role select the one you gave to the user in the step before, for example Full Access
- Under Token Name you can give a descriptive name to the Token you are creating
- Then click on Save button
![]()
- Now you should be able to see your Token ID and Token Secret
- Copy your NetSuite Token ID and paste it inside LeadsBridge Access Token field
- Finally, copy your NetSuite Token Secret and paste it inside LeadsBridge Access Secret field


Step 2.C: Setup your Google Customer Match integration
- Click on Create new integration to connect your Ad account (or select an existing one from the dropdown if you already connected it)
- You will be prompted to the Ad platform authorization experience. Here you will need to grant LeadsBridge access on click on the Authorize button
- Once done, you can choose a name for this Google Customer Match and LeadsBridge integration (you can also edit it later)
- Once the authorization pop up is closed, you are ready to select from the dropdown the Ad Account and all the required parameters, including the sync frequencies.
- Use Simulation functionality in order to test the source data and receive a report to verify the information processed
- Now that your Google Customer Match integration is fully set up too, you can click on the Continue button
Notes for the simulation mode: A published bridge with simulation ON is not sending any data, the simulation has to be switched off to have the audience being created, up and running on the Advertising platform. You can edit it later from inside the bridge if you want to go live and send the data.
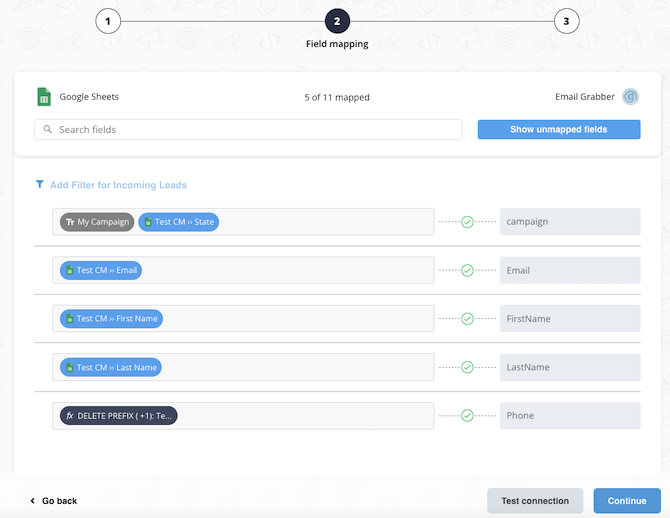
Step 3: Fields Mapping
Here you'll be able to map your NetSuite information with your Google Customer Match fields.
- You will have Google Customer Match fields on the left. Match the information you wish to pass align from NetSuite
- Based on Google Customer Match functionality, some fields might be required; if this is the case, you can identify those fields with a * (star), so be sure to map all them
- You can also use the functions to customize information like reformatting dates and times or modifying text, phone numbers and so on.
- You may leave blank the box of a field's information you don't want to send through. Clicking on the Show unmapped fields button you will have visibility on all the available fields still not mapped
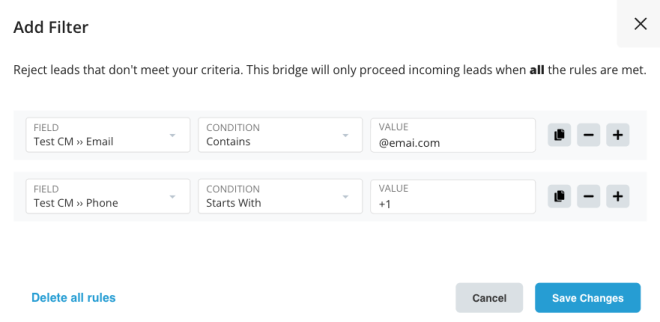
Step 3.A: Leads Filter (Optional)
If you'd like you could add a filter for incoming leads. This filter will sync only leads that meet the configured conditions
- Click on the link Add Filter for Incoming Leads on the top left
- A popup wil be opened where you can configure the filter
- You can define a series of condition to filter the leads. The lead will be synced only when all the conditions will be met
- Once finished, click the Save Changes button to switch back to the Fields Mapping to continue with the bridge configuration
Step 4: Save and Publish
- Click on the Save and publish button
Congratulations! Now your bridge is up and running
Common questions for Google Customer Match
What is Customer Match in Google Ads?
Google Customer Match is a powerful feature that allows advertisers to target and retarget customers using online and offline data across various Google properties. By utilizing this feature, you can create user groups that are more likely to convert.
Customer Match allows you to match customers' information with users on Google's platform to determine who can see your ads. These ads can be displayed on Google Search, YouTube, Gmail, and the Google Display Network.
With Google Customer Match, you can reach a wider audience and acquire new customers for your business. Additionally, it ensures that your messages and ads are delivered directly to your audience without being directed to spam folders, providing a better chance of engagement and conversions.
How to use Customer Match in Google Ads?
Google Customer Match in Google Ads allows you to leverage email addresses, physical addresses, and phone numbers of your prospects to create a Customer Match Audience. By uploading these identifiers, you can target your prospects across various Google platforms like Search, Shopping, Gmail, and YouTube. Here are some ways to make the most out of Google Customer Match:
- Move prospects down the sales funnel: Segment your prospects based on their buying cycle and create tailored advertisements to nurture their interest and guide them toward becoming paying customers.
- Convert mid and low-funnel prospects: Use Google Customer Match to help prospects who exhibit high intent but struggle to finalize a purchase. Overcome their decision fatigue and encourage them to convert through targeted ads.
- Improve upsell and cross-sell efforts: Extend the use of Customer Match beyond acquiring new customers. Increase conversions and average revenue per customer by encouraging existing customers to make additional purchases or cross-sell complementary products.
- Enhance account-based marketing: Take advantage of Customer Match's ability to target prospects based on their email addresses. This makes account-based marketing more efficient and straightforward, allowing you to focus on specific individuals within a particular company or geographic region.
Target users across devices: Unlike remarketing, Google Customer Match enables you to target customers on all devices, including mobile, tablet, and laptop computers. This ensures you don't miss out on users who switch between devices, maximizing your reach and engagement.
How to upload Customer Match lists on Google Ads?
To upload a customer match list in Google Ads, follow these steps:
- Log in to your Google Ads account.
- Click on the "Tools and setting" icon at the top of your screen and select "Shared Library".
- Under the Shared Library section, choose "Audience manager".
- Select "Segments" from the left menu.
- Click on the blue "+" button and choose "Customer list".
- On the Customer list screen, give a name to your list and upload your customer data, including emails, phone numbers, and mailing addresses.
- Specify the type of customer data you are uploading.
- Upload the CSV file and confirm that the data was collected and shared with Google in compliance with their policies.
- Choose the membership duration for the list and add any additional details about your segment.
- Once you've completed the setup, click on "Upload and create".
Please note that it may take up to 48 hours for the list to be uploaded to your audience lists. Once the audience is ready, you can further refine it using the insights tool.
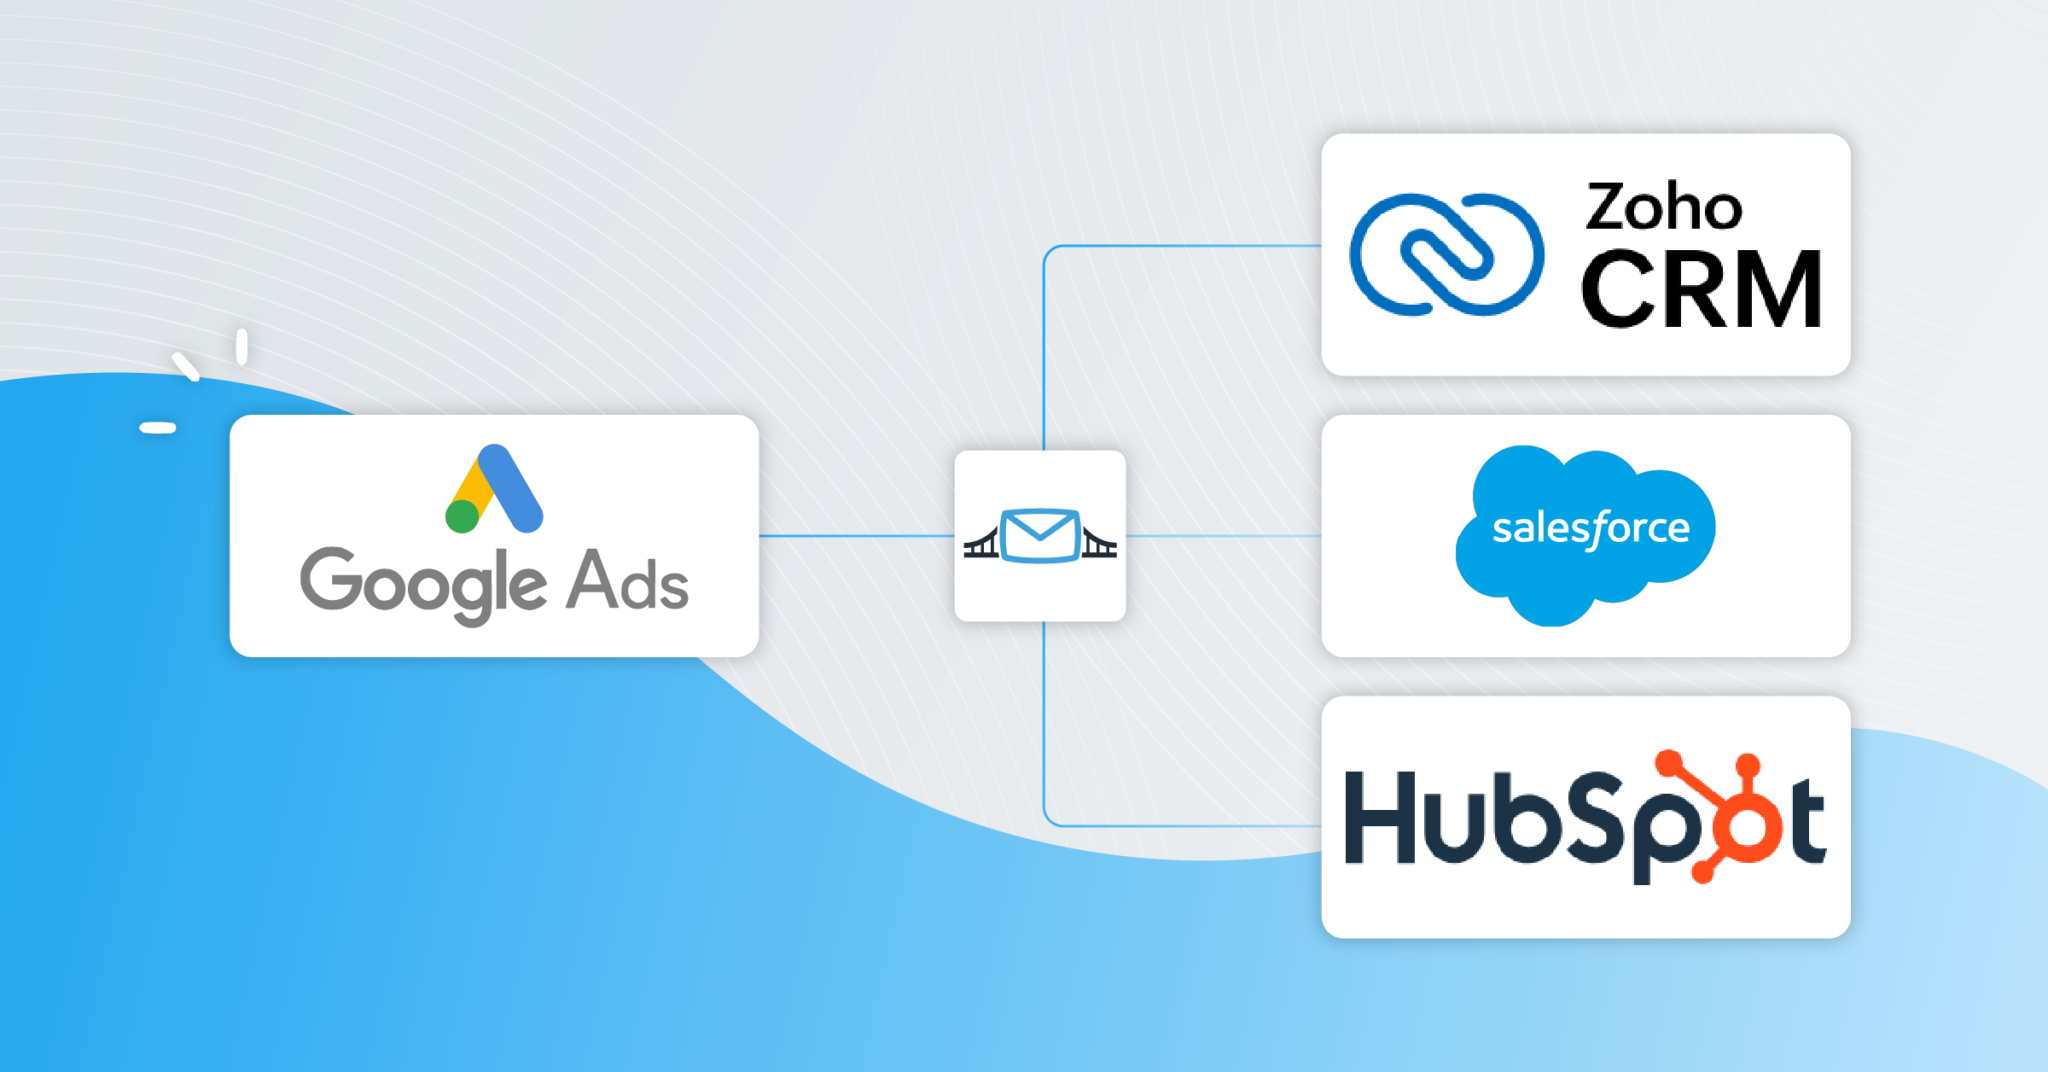
Alternatively, you can automate the process by connecting your CRM or autoresponder with Google Customer Match through LeadsBridge.
What is LeadsBridge’s Google Customer Match integration?
The Google Customer Match integration with LeadsBridge is a powerful automation tool that simplifies the process of syncing your CRM or autoresponder with Google Customer Match. It saves you time by eliminating the need for manual email list uploads and ensures higher accuracy in data processing.
With LeadsBridge's Google Customer Match integration, you can effortlessly upload and update your email data in Google Customer Match. This includes adding new subscribers, deleting unsubscribed leads, and removing unsegmented users. This integration allows you to efficiently follow up and nurture your leads as they come in.
LeadsBridge, as a Google Premier Marketing Partner, helps streamline advertising processes by automating Google Marketing tools with your marketing stack. By utilizing these integrations, you can automatically track lead data, optimize campaigns in real-time, and achieve a higher return on investment without any manual effort.
How to create a new Google Ads account through LeadsBridge and get a $500 Google ad credit
To get a $500 Google ad credit by creating your Google Ads account through LeadsBridge, follow these steps:
- Log in to your LeadsBridge account or create one for free, if you don't have one yet.
- Click on "Google Suite" in the left-side panel. Select "Google Ads Accounts" from the drop-down menu.
- Find and click on "Create new ads account".
- Complete the Google Ads account creation process:
Create: Fill in your information, Google account (email), timezone, and currency, then click "Continue".
Activate: Fill in your billing information, including name, personal and billing address, and payment method. Once verified, proceed to the next step.
Connect: Set your Customer Match Audience and start your Lead Gen Campaigns using the "Try now" buttons.
Check out how the credit works:
This offer is only available to new Google advertisers. You must spend at least $500 on Google Ads campaigns within the first 60 days to activate the offer. Once you reach $500 in ad spend, you will receive a $500 Google Ads credit to use on your campaigns (USD or equivalent currency).
The credit is valid until the end of the year and becomes spendable 31 days after being issued. The promotion will be automatically applied to your Google Ads account (Tools → Billing → Promotions).
Does LeadsBridge comply with the European Union's Digital Markets Act?
LeadsBridge helps you comply with the European Union's Digital Markets Act by providing the following fields.
Please remember that complying with the new regulations enforced by Google is mandatory for all users located in the EU and falls under your responsibility.
We recommend collecting consent for leads, contacts, and conversions, maintaining this information within your databases to map it with the mentioned fields.

Do you need help?
Here some additional resources:
- NetSuite documentation page and common questions
- Google Customer Match documentation page and common questions
- LeadsBridge KNOWLEDGE BASE
- Contact support from your account clicking on the top right Support button