Integrate Velocify with LeadsBridge
Intro
Velocify, Inc. is a cloud computing company headquartered in El Segundo, California that provides cloud-based intelligent sales automation software designed for fast-paced sales environments.
In this article, you'll learn how to connect your LeadsBridge account with Velocify.
Connect Velocify integration
Before you start
- Head over to the left sidebar and click on the Create new Bridge button
- Select your integrations in the selectors
- Click on the Continue button at the bottom right
Authorize Velocify integration
Setup your Velocify integration
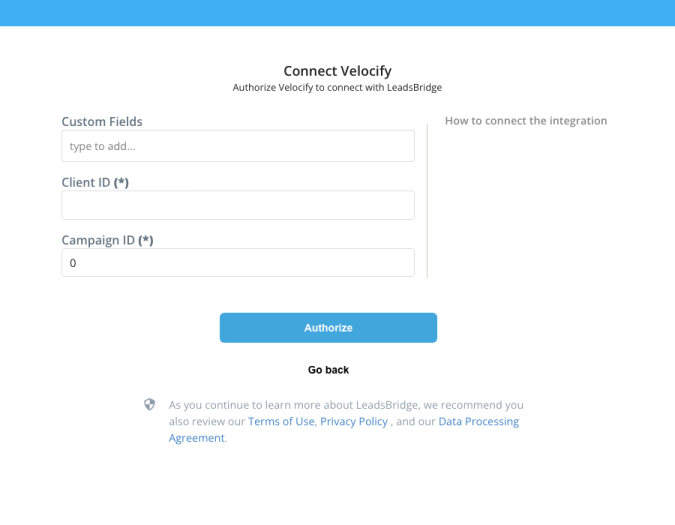
- Click on Connect Velocify
- Click on Create new integration to connect your Velocify (or select an existing one from the dropdown if you already connected it)
- A popup wil be opened where you can authorize the Velocify integration
- Fill Client ID, Campaign ID field to connect Velocify with LeadsBridge
- Click on the Authorize button
- You can choose a name for this Velocify and LeadsBridge integration (you can also edit it later)
- Once done, click on Continue button and you will get back to the bridge experience where you could choose additional integration settings
- Now that your Velocify is connected, you can continue with the set-up of your bridge


Configuration details for Velocify
How to get Client ID, Campaign ID
In order to find the Client ID, you need to have a Posting URL. You can find it following these steps:
1. Access the Menu page by clicking on your name in the upper right of the header
2. Under Administration, click on Campaigns
3. Under the main Manage Campaigns page, select the Delivery Instructions/URL link next to the campaign and copy and paste the highlighted area into an e-mail
Into the Posting URL, you'll be able to find the Client ID. In order to get the Client ID, just copy the green-highlighted part of your URL that you can find in the image, into the Integration field.
Please note: requests for a URL can only come from an administrator on the account. If you are a lead provider, please contact the company's administrator.

Campaign ID is a unique identifier associated with each of your campaigns, and they are an easy way for you to reference your campaigns. It's the Campaign ID you would like your leads to import under.
You may find it by accessing the Lead Sources page, under Administration » Lead Sources. IDs are stated at the most left column of the table.
You may find it by accessing the Lead Sources page, under Administration » Lead Sources. IDs are stated at the most left column of the table.


Which entity concepts we support for Velocify
With LeadsBridge you may use these entity concepts for Velocify.
Lead
A potential client, person or company, that actively shows interest in your offerings.
Common questions for Velocify
How do I send leads to a different Campaign?
Since each integration may have one Campaign ID at most, the best and most used practice is to set up a new integration adding the ID of the campaign you'd like to take advantage of.
Then, connect the new integration to a bridge and start sending leads to your new campaign.
Advanced (and not recommended to most users): you may overwrite the Campaign ID field value by specifying a different value inside the bridge settings, at the Fields Matching step.
How can I add a Custom Field to the bridge?
To add a new Custom Field you should first create it on Velocify, after that follow the steps below to display it on the Field Matching step of the bridge:
1. Open the bridge and go to the Integration step
2. Click on Edit near the integration name
3. Add the Custom Field that you've previously added on Velocify into the Custom Fields section (E.G. Custom_Question_1). The field is not case-sensitive
4. Match the new field in the Fields Matching step
5. Send a test lead and check if you see it properly on your Velocity account
If you don’t receive the correct information inside Velocify, we suggest getting in touch with Velocify support and request the HTTP POST for this custom field
Once you receive this information from Velocify, you need to check if it's different from the value that you've added in the Integration field (EG: Custom_Question_1), if so you need to edit it with the right value provided by Velocify support (EG: CustomQuestion1).


Do you need help?
Here some additional resources:
- LeadsBridge KNOWLEDGE BASE
- Contact support from your account clicking on the top right Support button


