Integrate Pardot with LeadsBridge
Intro
Pardot is a B2B marketing automation by Salesforce helps marketers create more leads, generate more pipeline, and empower sales to close more deals.
In this article, you'll learn how to connect your LeadsBridge account with Pardot.
Connect Pardot integration
Before you start
- Head over to the left sidebar and click on the Create new Bridge button
- Select your integrations in the selectors
- Click on the Continue button at the bottom right
Authorize Pardot integration
Setup your Pardot integration
- Click on Connect Pardot
- Click on Create new integration to connect your Pardot (or select an existing one from the dropdown if you already connected it)
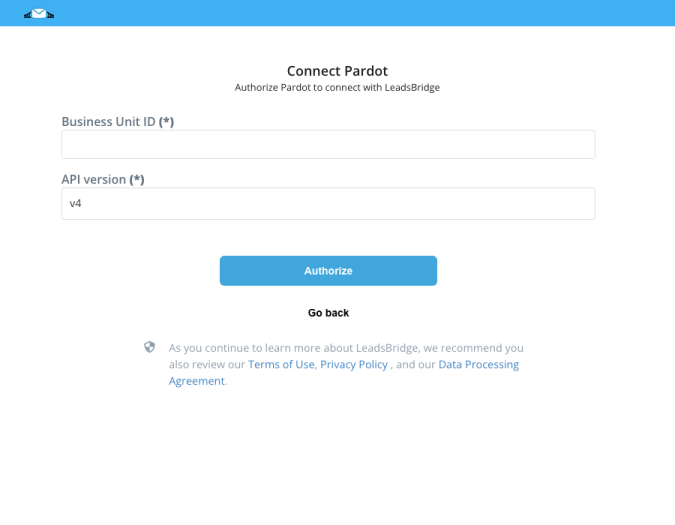
- A popup wil be opened where you can authorize the Pardot integration
- Click on Authorize and you will be prompted to the Pardot authorization experience
- Here you will need to provide the info required and grant access to LeadsBridge
- Once done, you will be get back to LeadsBridge application
- You can choose a name for this Pardot and LeadsBridge integration (you can also edit it later)
- Once done, click on Continue button and you will get back to the bridge experience where you could choose additional integration settings
- Now that your Pardot is connected, you can continue with the set-up of your bridge
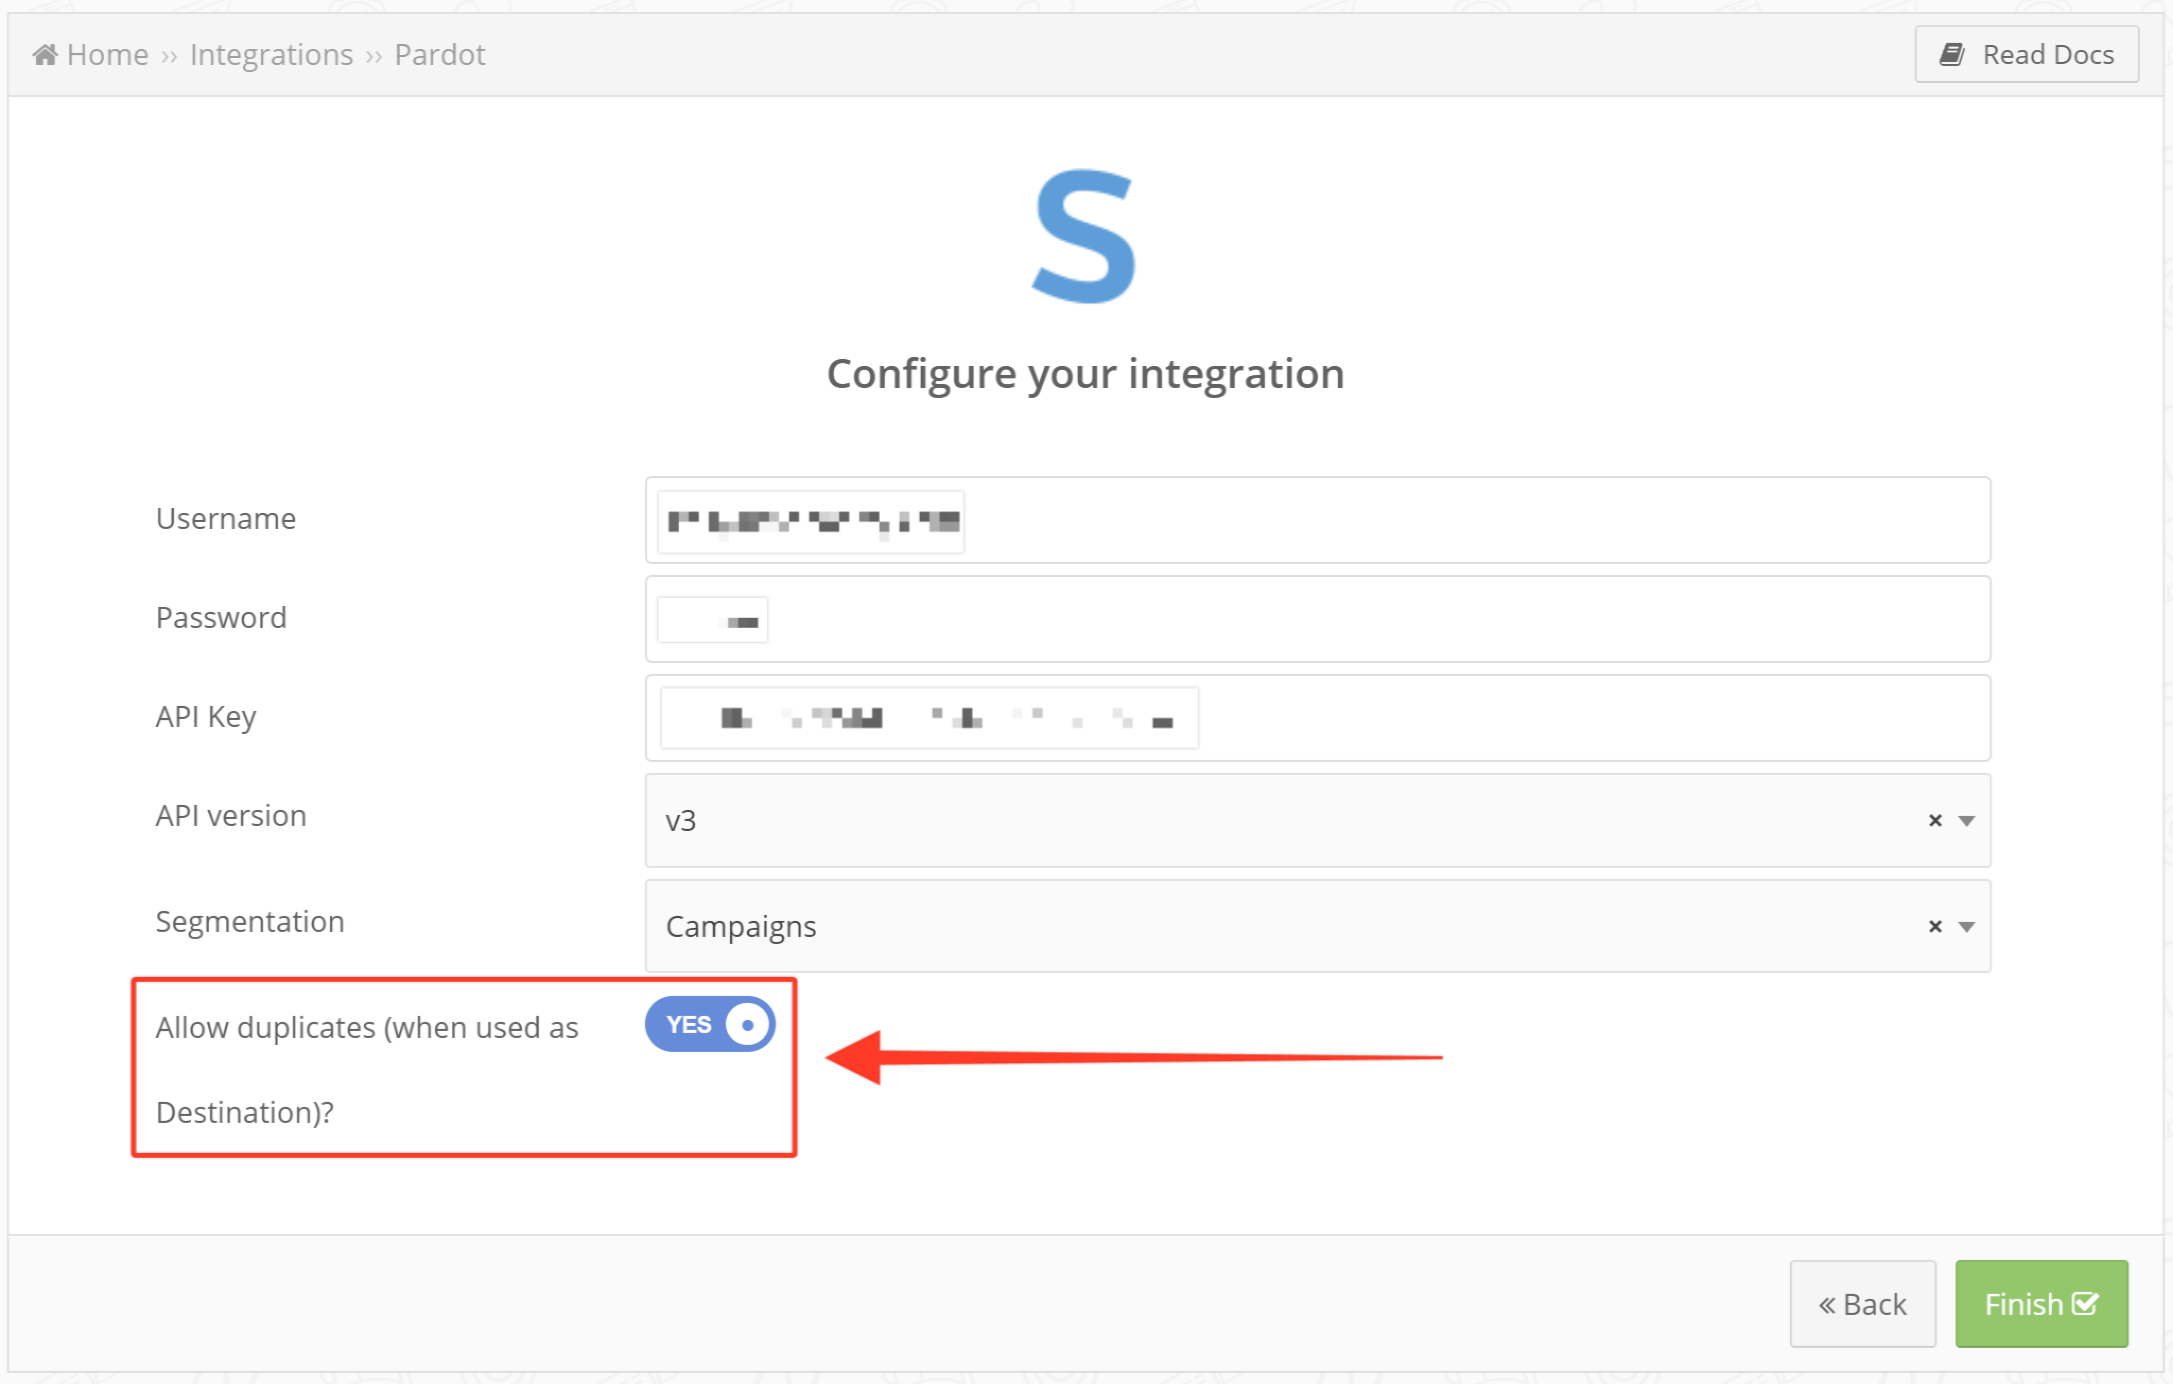
Configuration details for Pardot
Other Info
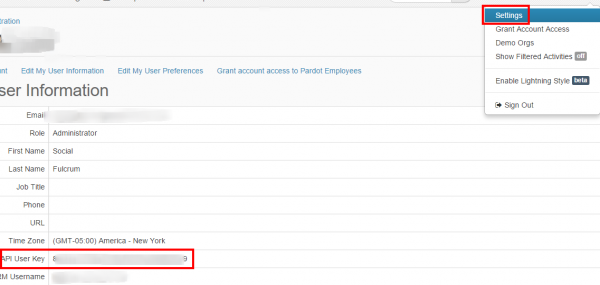
Then head to the "Settings" section and copy the "API User Key".
Which entity concepts we support for Pardot
With LeadsBridge you may use these entity concepts for Pardot.
Lead
A lead is a sales prospect and generally represents the first stage in the sales process. The lead is a person who has not yet been qualified and might be interested in your product or service.
Which segmentation concepts we support for Pardot
With LeadsBridge you may use these segmentation concepts for Pardot.
Dynamic List
The dynamic lists rule builder interface is similar to automation and segmentation rules – all the criteria and match options are available in dynamic list creation as well. The benefit of dynamic lists is that you can create a list of prospects that are tailored to specific criteria.Static List
Can be used as recipient lists or suppression lists for an email newsletter, to seed a drip nurturing program or used in further automation or segmentation criteria ("prospect list is…")Campaign
Pardot’s various marketing elements can be associated with a campaign. Pardot campaigns are typically thematic touchpoints (similar to "source" in others system). ( Learn more)
Common questions for Pardot
Can I configure LeadsBridge to create a new lead if a lead with the same email already exists?
I get a message stating "Unable to authenticate! Please check your credentials", how may I fix it?
Why I cannot see my custom fields?
Why use Pardot integration
Pardot can be integrated with various platforms including ads platforms, allowing you to synchronize and manage data. To simplify the data management process, it's recommended to automate the flow by configuring Pardot integrations.
For example, through integrations, you can get form submissions from your Lead ads back into your Pardot account. LeadsBridge can assist you with this.
Manually exporting the submissions from your advertising platform (as a CSV file in Campaign Manager) and then uploading the lead data into Pardot can be time-consuming. However, LeadsBridge can streamline this process by providing a data bridge that enables you to automate your Pardot lead management process.
Discover the best Pardot integrations powered by LeadsBridge.
( Learn more)How to create LinkedIn lead gen forms - Pardot integration
You can use LeadsBridge to connect LinkedIn lead gen forms to Partot automatically. The LeadsBridge LinkedIn Lead Generation Forms - Pardot integration is a useful tool for marketers who want to streamline their lead generation process. By incorporating pre-filled forms in their ads, this integration helps eliminate the need for users to manually fill out forms. Instead, the forms are populated with information from users' LinkedIn profiles, allowing for a single-click function. This integration can make it easier for potential leads to be uploaded into Pardot. Furthermore, the leads can be distributed to Sales in real-time as an MQL.
Learn how to set upLinkedIn lead gen forms - Pardot integration.
( Learn more)How to build LinkedIn - Pardot integration for other tools
Besides LinkedIn lead gen forms and Pardot integration, LeadsBridge offers even more LinkedIn - Pardot integrations, such as:
- Pardot and LinkedIn Matched Audiences integration: LinkedIn Matched Audiences is a feature that enables you to create custom audiences, upload a list of companies or contacts you want to target or retarget and integrate contacts from a third-party system. You can also create lookalike audiences. By connecting it with Pardot, you can retarget your CRM-segmented audiences and enhance conversions by using your first-party customer lists. Learn how to set up Pardot and LinkedIn Matched Audiences integration here.
- The LinkedIn Offline Conversions API is a tool that helps advertisers analyze the effectiveness of their campaigns by tracking offline performance data such as in-person transactions or product demos. This conversion tracking method enables marketers to obtain a better understanding of their LinkedIn marketing campaign performance, improve the accuracy of future campaigns, and optimize ad spend.
By connecting it to Pardot, this data can be efficiently organized, streamlined, and shared in real-time with your team, increasing lead conversions and ensuring continued lead nurturing. Learn how to set up Pardot and LinkedIn Offline Conversions API integration here.
How to integrate Facebook lead ads with Pardot
With the help of LeadsBridge, you can streamline your Facebook lead ads campaign and align all departments simultaneously. The integration of Facebook lead ads and Pardot allows you to receive leads directly into Pardot and integrate them into a marketing campaign. If the leads meet certain predetermined criteria, they are sent directly to your sales team as MQLs. All connections are processed in real-time, which can significantly increase your company's speed to lead and conversion rate.
See how tointegrate Facebook lead ads with Pardot through LeadsBridge.
( Learn more)How to integrate Pardot and Facebook Custom Audience
LeadsBridge offers a Custom Audience integration to retarget leads that are not MQL’s. By integrating Pardot Facebook Custom Audience, you can include or exclude leads at any stage of the funnel while keeping them updated. Additionally, LeadsBridge can assist you in creating a lookalike audience that targets users with similar characteristics to your existing customers and followers. This integration is a great way to continuously build your target audience and identify key buyer characteristics that you may not have been aware of previously.
See how tointegrate Facebook Custom Audiences with Pardot through LeadsBridge.
( Learn more)What is Pardot?
Pardot, now known as Marketing Cloud Account Engagement after a Salesforce rebranding in May 2022, is a targeted B2B marketing automation tool. It is purposefully crafted to harmonize marketing and sales operations, enhance conversion rates, drive lead generation, and nurture lasting customer relationships.
What is Pardot used for?
Enterprises operating at scale choose Pardot to streamline processes, boost interdepartmental synergy, and save time. While Pardot's capabilities span various functions such as lead qualification and prospect scoring, its primary application lies in automating email marketing.
In particular, Pardot empowers users to personalize extensive email campaigns through customer segmentation and engagement insights. These insights illuminate the audience's journey, facilitating refined alignment between marketing and sales strategies. The tool further enables tracking of key metrics to optimize campaign performance and resource allocation.
How does Pardot work?
Pardot's strength lies in its robust email automation engine and its seamless integration with various applications. This integration capability optimizes workflow efficiency, ensuring a cohesive approach across marketing, sales, and customer acquisition efforts.
By integrating with multiple apps, Pardot maximizes its features to synchronize advertising, marketing, sales activities, and lead management effectively. This alignment ensures a unified approach, enhancing overall business performance and customer interaction.
Discover more about Pardot’s LinkedIn Connector.
( Learn more)Do you need help?
Here some additional resources:
- LeadsBridge KNOWLEDGE BASE
- Contact support from your account clicking on the top right Support button


