As a marketer who manages digital marketing, you need a reliable, frictionless system that lets you share data across the platforms you use every day. One way to transfer info automatically and target your audience on Facebook with precision is to connect Klaviyo to Facebook ads.
- What does Klaviyo integrate with?
- How do I link my Klaviyo to Facebook lead ads?
- How to connect Facebook leads to Klaviyo via LeadsBridge (a step-by-step tutorial)
- How to connect Klaviyo lists to Facebook
- Automate retargeting campaigns with Facebook custom audiences
- Facebook integration with Klaviyo through Conversions API
- Build high-performing Facebook lead ads campaigns via automation
This tutorial will show you the step-by-step process to set up your Facebook-Klaviyo integration.
What does Klaviyo integrate with?
Klaviyo integrates with a variety of marketing platforms and tools, including Facebook lead ads.
However, to collect leads through Facebook advertising, send automated emails, and set up your email marketing on autopilot in Klaviyo, you’ll need to connect these two platforms.
Thanks to LeadsBridge’s user-friendly interface, setting up this integration is very easy and only takes a few simple steps. After generating leads, you’ll need tools to put this data to good use.
This is where Klaviyo comes in: a powerful marketing automation platform with a focus on delivering personalized experiences to your customers.
Instead of manually downloading or uploading data to and from Meta Ads Manager, automate the process. LeadsBridge integrations let you streamline your data management workflows and create flawless and efficient data transfers.
How do I link my Klaviyo to Facebook lead ads?
With just a few clicks, you can link Klaviyo to Facebook lead ads and start sending automated emails. For instance, these could be a welcome email sequence, or sending promotional emails to people who’ve already interacted with your ads.
All you need to do is use LeadsBridge to transfer data between lead ads and Klaviyo automatically.

This way, the overall processes are in automatic motion, including adding lead ad connections, triggering workflows based on your strategy, and building a robust lead ad management process. Learn more about why you should connect Klaviyo to Facebook lead ads.book Lead Ads.
How to connect Facebook leads to Klaviyo via LeadsBridge (a step-by-step tutorial)
To connect Facebook leads to Klaviyo automatically, all you have to do is follow these simple steps.
Before you start
LeadsBridge is designed in a way that allows you to set up any integration in a matter of minutes.
Before you start, log in to your LeadsBridge account. If you haven’t registered already, you can create one for free.

Here, you are presented with your personalized LeadsBridge dashboard.
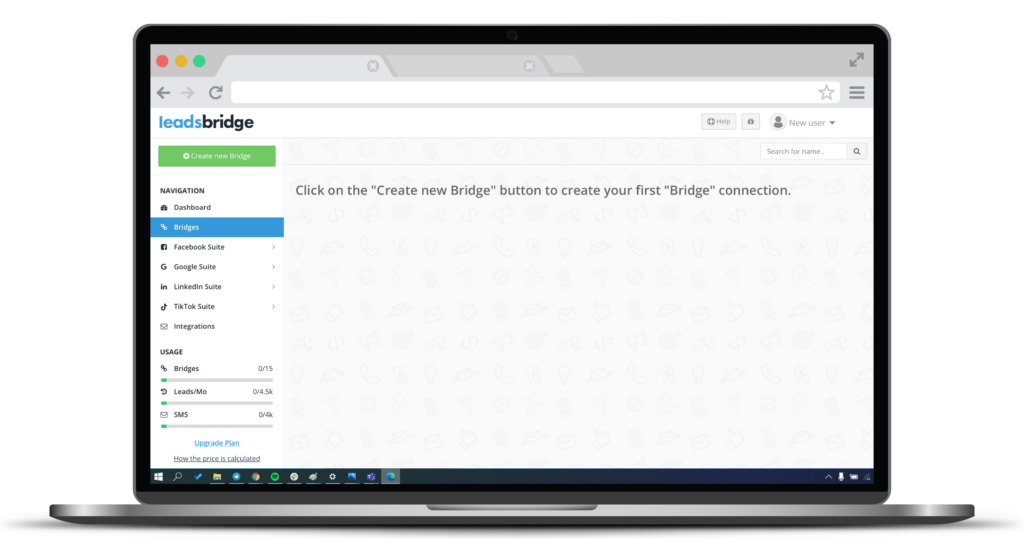
Step 1: Bridge’s main information
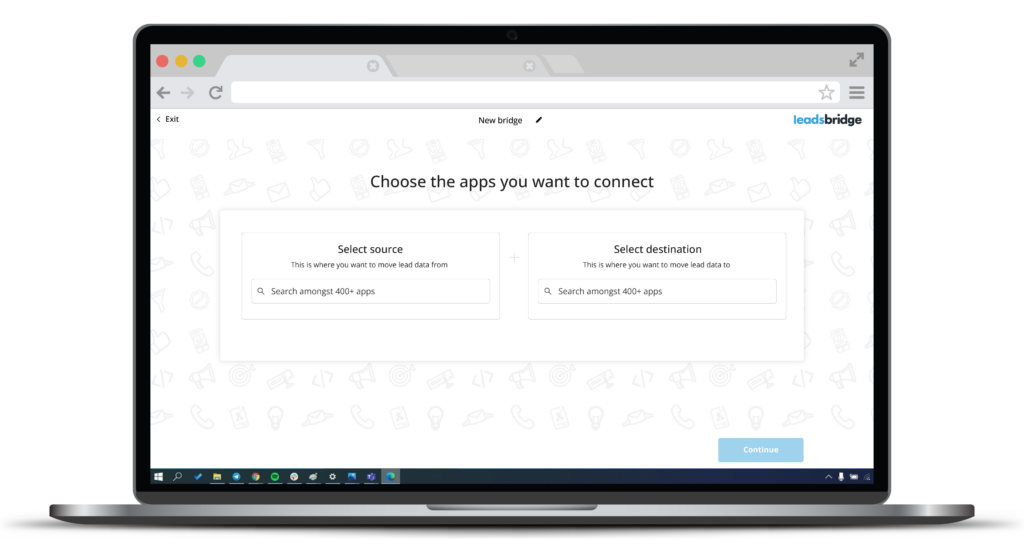
First, find and click on the “Create new Bridge” button in the top-left corner. Here, you’ll get to select the apps you want to connect:
- Select “Facebook Lead Ads” as the source for your bridge.
- Choose “Klaviyo” as the destination.
- Click “Continue“.
You’ll have the option to name your bridge by clicking on the edit pencil icon at the top. This’ll also make it easier for you to find any bridge on your LeadsBridge dashboard.
Step 2: Connect your accounts through LeadsBridge
Then, go ahead and link your accounts to access each platform via LeadsBridge.
First, log in to your Facebook Ads account. Here’s how to connect your Facebook Ads Account. After setting up the source, you’ll need to integrate your destination.

- Enter the API Key to connect Klaviyo by following these steps:
- Log in to your Klaviyo account. Find your User ID on your dashboard, and select Account from the drop-down menu.
- Find Settings and click on API Keys.
- Click on the blue button that says Create Private API Key.
- Copy the New Private API Key and then use it to fill in the field on your LeadsBridge dashboard.
Once complete, click “Continue“.
Step 3: Fields mapping
This step lets you map your source information with your destination fields to ensure the accuracy of the data transfer processes.
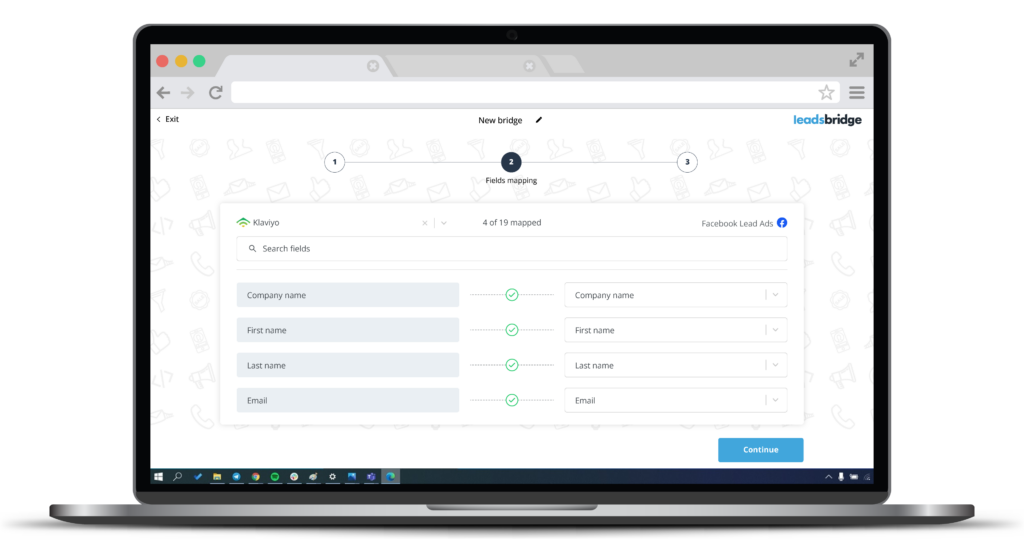
- You’ll need to verify all data fields are mapped correctly to have your Facebook-Klaviyo integration running without a hitch.
- First, double-check all the fields. You can type or edit information manually here.
- Click “Continue” to save your settings.
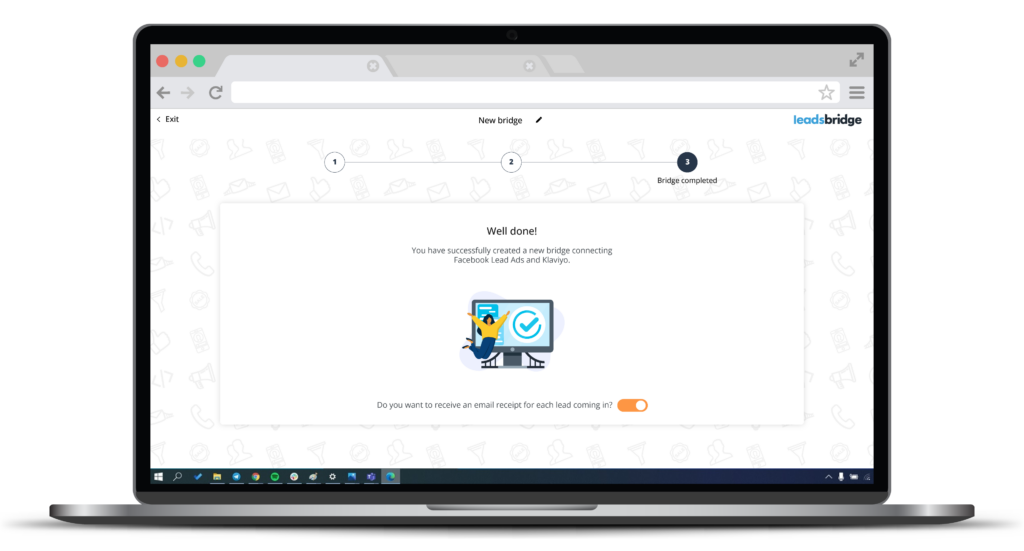
And you are all done! Your bridge is now active.
How to connect Klaviyo lists to Facebook
Seamlessly connecting the two platforms can cut out so many repetitive tasks and increase your team’s performance. However, you can still improve your lead management by connecting your list with Facebook.
Here’s how to connect your Klaviyo list to Facebook:
Step 1: Setting up the new bridge & connecting your accounts
Follow the steps above to add a new bridge. Then, connect your accounts through LeadsBridge: Choose Facebook as the source and Klaviyo as the destination, and authenticate both accounts to establish the connection. (See Step 1 & Step 2 above)
Step 2: Select the desired Klaviyo list
When setting up the destination by connecting your Klaviyo account, you can start configuring the integration.

Here, you’ll have the option to specify the Klaviyo list to which you want to send your new Facebook leads.
This connection ensures that leads collected through your Facebook campaigns are automatically added to the selected Klaviyo list.
Remember, you have the option to edit your bridge to your LeadsBridge dashboard at any time and modify the bridge in order to change your Klaviyo lists.
Step 3: Fields mapping and finalizing
Fine-tune your integration by mapping the fields manually and double-checking all the data to create a smooth data transfer between the two platforms. (See Step 3 above).
Click “Save” to complete your bridge.
And that’s it! You have successfully connected your Klaviyo list to Facebook.
Automate retargeting campaigns with Facebook custom audiences
So why should you connect your Klaviyo list to Facebook?
One of the standout features of integrating Klaviyo lists with Facebook is the ability to automate your retargeting efforts.
Streamlining data transfer between the two platforms helps you create audience segments based on your Klaviyo list. Then, you can craft highly targeted retargeting campaigns that resonate with your leads’ preferences and behaviors.
For example, if you have segmented your Klaviyo list based on purchase history, interests, or level of involvement, you may use these segments to build custom audiences.

This tailored strategy increases the likelihood that your ads will be well-received by the target demographic. And as a result, it boosts your click-through rates, conversions, and ROI.
Facebook integration with Klaviyo through Conversions API
Use LeadsBridge to pipe Klaviyo events to the Conversions API. This connection allows Meta to receive server-side signals like Lead, Subscribe, and Purchase even when browsers block pixels.
The integration also improves Event Match Quality by sending hashed identifiers from Klaviyo profiles (email, phone, name) with consent flags, boosting attribution accuracy and resilience when practicing cookieless tracking.
Facebook integration with Klaviyo through Conversion leads
Connect Conversion leads optimization via LeadsBridge to feed back real outcomes from Klaviyo, like qualified, booked, or purchased, back to Meta. So Facebook optimizes lead ads for quality instead of focusing on higher numbers.

It’s great if you map lifecycle or score properties in Klaviyo to Meta’s lead-stage schema. For instance, include timestamps and revenue where it’s relevant. Doing so lets delivery optimization performance goal reduce the number of low-quality leads.
If you pair Conversion Leads with custom audiences, you can further re-engage unqualified leads differently from high-intent segments, which also means lowering your Facebook ad spend.
Build high-performing Facebook lead ads campaigns via automation
LeadsBridge enables you to connect Klaviyo to Facebook ads and make sure you’re not letting your leads fall through the cracks.
LeadsBridge integrations essentially bridge the data gap between these two platforms. It adds seamless automation to your marketing mix so that you can better leverage your customer data and ultimately increase conversions.
Read this article to learn more about how to connect Klaviyo to Facebook leads via LeadsBridge.