Running Facebook ads for a client is often one of the first big projects freelancers and new agencies take on. This kind of project can be very rewarding, both in terms of finance and experience.
For example, a client might want to get more customers. They may have even gone as far as running ads on their own before, only to find them too costly for the returns they had. So they decide to leave the matters (and all the stress that comes with it) to professionals.
Before we jump into how to run Facebook ads for clients, it’s important to address one factor: the campaigns’ outcome. And that depends on the client’s existing strategy and offer.
Facebook ads can only improve what’s already there. They can’t make a bad ad strategy great. Setting realistic expectations with your clients is a must if you want to avoid problems later on.
In this article, we’ll talk about how to start running Facebook ads for clients, along with the tools and strategies you need to know beforehand.
For instance, you can set up a streamlined data management system in order to avoid losing those hard-earned leads using automated data bridges.

How to start running Facebook ads for clients: A step-by-step guide
Facebook ads can be very effective, but their success depends on several things. These include:
- How comfortable the client is with promoting their brand aggressively;
- Whether their products or services are profitable enough;
- And, most importantly, how well you have set up your ads.
Running successful Facebook ad campaigns for clients depends on these factors. Here’s what you need to get started with your very first campaign.
Step 1: Study your client’s business and audience
You might have received a rough outline of your clients’ KPIs, products, and objectives, especially in terms of marketing ROI (return on investment) related to your services.
It can seem time-consuming and tedious to fully understand your client’s business, so it’s often rushed or skipped. However, this shouldn’t be the case.
Before you create any ad, you must get a complete sense of your client’s business objectives and target audience. Here’s what you can do:
- Research your client’s business industry, its impact on the sector, and its competitors.
- Take a deep dive into your client’s business culture, voice, and product.
- Understand your client’s customer base, their pain points, and how the product or service addresses them.
- Use this data to plan your upcoming initiatives.
You can also use tools like Semrush to increase your research’s granularity.

Step 2: Set up your Business Manager account
If you haven’t already, set up a Meta Business Manager account. This is important for managing multiple ad accounts and clients.
- Go to Meta Business Manager.
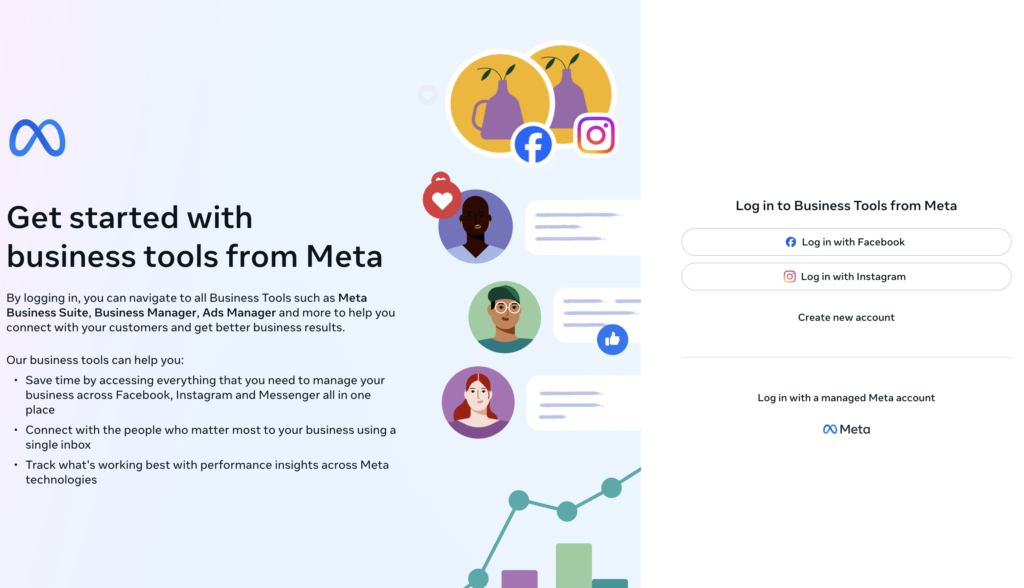
- Click on “Create an account” and follow the instructions.
- Add your clients’ ad accounts and pages to your Meta Business Manager.
Step 3: Create an Ad account on behalf of your client
- In Business Manager, navigate to “Ad Accounts” and click on “Add New Ad Account.”
- Choose “Create a New Ad Account” and fill in the required details.
- Then, assign your client’s business page to this ad account.
Step 4: Install the Facebook Pixel
The Meta Pixel is a piece of code that you place on your client’s website. Later on, this will help you track conversions and optimize your ads.
- In the Meta Business Manager, go to “Pixels” and click “Add.”
- Follow the setup instructions to install the pixel on your client’s website.
Step 5: Create your first campaign
- Go to Meta Ads Manager and click on “Create.”

2. Choose the objective that aligns with your client’s goals. Meta now uses six campaign objectives: Awareness, Traffic, Engagement, Leads, App Promotion, and Sales. Pick the one that matches the real goal:
- Leads: for lead forms, calls, or quote requests
- Sales: for purchases and checkout-based funnels
- Traffic: when tracking is not ready yet (temporary choice). Then, set your campaign name, budget, and schedule.
Learn more about how to create your first Facebook lead ad campaign here.
Step 6: Configure your Ad Set
- Define your audience based on demographics, interests, and behaviors.

- Choose the placements where you want your ads to appear (Facebook Feed, Instagram, etc.). Your ads may also run on the Threads feed as a placement now.
- Set your budget and schedule for the ad set. Use a test budget that can buy enough data to learn (remember that small budgets learn slowly).
Step 7: Create your ad
- Select the ad format (single image, carousel, video, etc.).
- Upload your creative assets (images, videos).
- Write compelling ad copy and add a strong call to action.
- Review your ad and click “Publish.”
Step 8: Manage your lead data
Facebook stores your incoming lead data. However, you’ll need to download your Facebook lead data within 90 days, or it’ll be automatically deleted.
A lead that’s 3 months old is usually cold. So much of successful advertising is about lead nurturing, which should ideally happen within 5 minutes of the first contact.
So how do you do that for every single incoming lead? By defining workflows that trigger automated responses when a conversion milestone is met.
Discover how to create a Facebook Ads funnel that converts.
Treating Facebook ads as a test or trial campaign is a smart approach since there’s no guarantee you’ll get it right immediately.
This testing phase is valuable because it helps clients figure out if they should invest more in Facebook ads or try other marketing channels that might suit them better.
For marketers and freelancers, offering Facebook ad services can also become a long-term source of recurring income, especially when paired with automation tools, retainer clients, or scalable ad funnels.
How to set up Facebook ads for a client
Most ad problems are rather basic. Anything from wrong access, messy tracking, leads going nowhere, or the client taking 2 days to respond to new leads.
You can avoid all this if you treat the setup before moving ahead. Here’s what you need to look for:
1. Establish access settings
Have the client invite you through their Meta Business settings as a Partner or give you the correct role.
You want to avoid ‘just log into my Facebook’ situations. Shared logins cause bans from Facebook occasionally. They also create confusing situations, and if something goes wrong, it will be difficult to find out who did what.
This is to say, if you don’t need full admin, don’t take it. It protects you and the client.
2. Set up tracking and run a test
Install tracking, then open Events Manager and confirm events are being synced. Click the site yourself and trigger the key action (lead, purchase, booking) and confirm that it actually shows up.
If you can’t see the correct event data, you may be missing data that you are working so hard to get in the first place.
3. Have better lead delivery
Again, do a test lead and follow it all the way through. Ask yourself, does it hit the CRM, email tool, Google Sheet (especially if you are using it as a CRM), Slack, or wherever it needs to go?
Then test the follow-up message. If the client can’t respond quickly, set up an auto-text and email that explains what happens next and includes a booking link.
This single step can double results without changing a single ad.
4. Use simple ad structures but diversify
Start with one campaign and one clear objective, like Leads or Sales. After that, run a couple of ads that target the same intent from different angles.
For instance, one should be a proof-providing ad using a review, or share service-use results.
Here’s an example by Apexresinuk:

Another option is a demo ad that shows the product or service, using interesting storytelling and plain language. Lola Speak does this using a simple video ad:

Also, offer ads are another great angle, including a clear deal and deadline if it’s real. Simple words, straightforward offer, and clear expectation settings; this ad by Sweet Pea Machine Embroidery has it all.

Keep targeting simple at first so you can tell what’s actually driving performance.
Add these to your existing Facebook advertising foundation, and they are going to make a great difference in how you set up Facebook ads for a client.
How much does it cost to run Facebook ads for clients
So, how much should you charge for your Facebook ads?
When deciding on this matter, it’s important to keep a few key things in mind.
Below are some simple tips that could help you figure out your pricing.
1. Understand the workload
You should first understand exactly what the client needs before estimating a price for them.
Here are some questions to ask:
Will you be creating content?
Are there Facebook pixels already set up?
Will you be managing multiple ad platforms like Instagram and Messenger?
The more work involved, the higher you should charge.
2. Choose a pricing model
There are a few ways you can go about your pricing model:
- Flat Fee: Ideal for one-time campaigns with a clear start and end date.
- Ad spend percentage: Charge a percentage (usually 10-20%) of the client’s monthly ad budget. This works well with bigger budgets.
- Retainer: Clients pay a fixed amount each month, useful for ongoing work but less common if you’re just starting out.
- Hourly rate: Charge based on the hours you work. This is straightforward but requires you to track your time carefully.
Depending on the circumstances, you should adopt a model that best works for you.
3. Consider your experience
If you’re new to Facebook ads, you might want to start with lower rates to build up your portfolio. As you gain experience and show results, you can increase your fees.
4. Be transparent
You should be clear with your clients about what your services include and how much they cost right from the start. If you’re managing ads across multiple platforms or doing content creation as well, make sure they know this and factor it into your price. This also includes being upfront about how you bill clients, whether through invoices or pay stubs, especially for ongoing or retainer-based work.
Some agencies provide a detailed report of what they offer, the potential results as well as the prices they can expect to pay.
5. Location and market
Where you’re working and who your clients are should also be a factor in deciding how much you can charge. If you’re working with small businesses, your rates might be lower than if you’re handling ads for larger companies.
The general idea is that your pricing should reflect the value you bring to your clients. Start by understanding their needs. Then, choose a pricing model that suits your work style and adjust your rates as you gain more experience and skills.
How to successfully run Facebook ads for clients: Top tips
You’ve learned how to run ads for clients on Facebook. Now, put your knowledge into action! It’s time to apply what you’ve learned and start scaling your Facebook advertising.
Keep in mind that running ads is a constantly changing process. You’ll need to stay proactive in tuning and optimizing your campaigns, as well as gathering piles of data for your future Facebook ads.
1. Continuously monitor and optimize your ads
Once your ads are live, you should monitor their performance regularly. Use Meta Ads Manager to track key metrics like CTR (click-through rate), CPC (cost per click), and conversions.
Don’t forget to be vigilant about Facebook scams, such as phishing attempts and fake support messages, which can compromise your account and ad performance.
Additionally, Facebook Conversions API integrations help monitor and optimize your ads by;
- Providing accurate data tracking
- Improving ad targeting
- And supporting your optimization efforts.
These lead to better attribution, more effective audience targeting, and improved ad performance overall. Once you have gathered enough data-based insights, adjust your targeting, ad creative, or budget.
Here’s more on how to optimize your Facebook ads.
2. Improve your targeting
Targeting options on Facebook are the real deal when it comes to lead generation. They help advertisers reach people interested in their offering or who have recently searched for related content. Your options include:
- New customers: Target based on interests, location, and behaviors.
- Custom audiences: Target users who have visited your website, used your app, are on your customer list, or engaged with your content.
- Lookalike audiences: Use custom audiences to find new people similar to your existing customers with Advantage lookalike.
To do this effectively, you can connect your CRM to custom audiences. This integration provides the platform with enough information to optimize campaigns and even become sharper in audience targeting.
When creating a lead ad, you’ll be given the option to set your performance goal. Conversion leads performance goal lets you share data from your CRM to target higher-quality leads.
Even if your CRM already gets lead info, connect it to send data back to Meta to improve your campaign’s targeting precision. However, you’ll need to implement the Facebook Conversions API before using this feature.
3. Know your client’s goals
Before launching any campaign, sit down with your client to understand their business goals. Are they looking to increase brand awareness? Or do perhaps want to drive traffic to their website? Are they focused on boosting sales?
Knowing these aspects will guide your ad strategy and help you create more effective ads.
4. Create compelling ad content
Eye-catching visuals and an on-point copy are key to grabbing attention on Facebook. Make sure your ads are visually appealing and clearly convey your client’s message. Test different versions to see which ones perform best.
5. Report results
Keep your clients in the loop by providing regular reports on their ad performance. Highlight key metrics like click-through rates, conversions, and return on ad spend (ROAS) to show the value you’re delivering.
You can also create this by automating your communications using the right integrations.
6. Manage multiple clients effectively
If you’re running ads for multiple clients, using Facebook’s Business Manager is a must. Start by asking for access to your clients’ ad accounts through Business Manager.
This allows you to work directly within their accounts while they handle the payment. This approach keeps things clear and ensures they retain ownership of their data and ad spend.
Alternatively, you can set up client accounts under your own Business Manager. This gives you control over the data, but it’s important to communicate this clearly to your clients, as they won’t have direct control over their accounts.
Whichever method you choose, you should let your clients know how you manage their accounts and who owns the data. This builds trust and helps avoid misunderstandings down the line.
Also, for security reasons, you should strongly push 2FA requirements inside the business portfolio.
7. Implement automation
Connect your CRM with Meta. This setup sends the lead data from your client’s ad campaigns to Meta. Consequently, it helps you optimize for better quality leads instead of just a high quantity.
The automatically synced lead data can be sorted by interest level, demographics, and interaction history, making your management and marketing much more effective.
This integration basically automates all your data transfers between Meta and your marketing platforms, which makes your lead management as easy as it can get.
So anything from building automated email lists to scoring your leads becomes effortless.
How to create Facebook ad reports for clients
Managing Facebook ads for clients is one thing, but what about reporting on them? That can be a whole different aspect with its own best practices and steep learning curve.
You could go on spending hours pulling data, formatting reports, and trying to make sense of ad performance. But fortunately, creating Facebook ad reports doesn’t have to be as time-consuming. With the right approach, you can craft insightful, polished reports that keep your clients happy and informed.
Here’s how to create Facebook ad reports for clients without headaches:
1. Know what your Client actually cares about
Your clients run different businesses and naturally have different ideas about what is ‘important’. Some want every metric on the face of the Ads Manager, while others just want a revenue-focused summary.
Before anything else, just ask your client what they would want you to focus on.
For example:
- A marketing manager with a strong SEO background might want detailed campaign metrics (click-through rates, conversions, cost per click).
- A business owner may just want to know if that math makes sense and if they are getting a good return on their ad spend.
Making your report in a way that focuses on what matters to your Facebook ad clients saves you time and offers more value to them.
2. Focus on key Facebook ad metrics (and not everything)
Meta Ads Manager offers over 300+ metrics. Are all of those useful to you and your client? An important part of data integration is considering the advertising strategy while doing so.
Just to give you an idea, let’s go through some of the ones that usually matter most brands:
- Impressions & Reach: How many people saw the ad?
- Click-Through Rate (CTR): Are people engaging with the ad?
- Conversions: Are clicks turning into actual results (leads, sales, sign-ups)?
- Cost Per Click (CPC) & Cost Per Conversion: Is the campaign cost-effective?
- Return on Ad Spend (ROAS): For every dollar spent, how much revenue is being generated?
Learn how to reduce your ad costs here.
3. Visuals are your friend: Use them to narrate the report
A list of numbers is just hard to comprehend. Charts, graphs, and visual breakdowns make data much more digestible.
Instead of saying, “click-through rate increased by 15%,” show a simple line graph that moves upwards and shows the trend. Alternatively, use a side-by-side comparison chart to show a particular ad set that outperformed others.
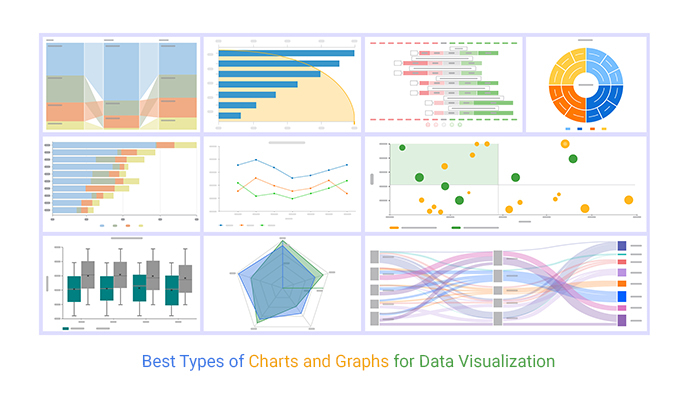
The point is that visuals make insights more impactful and easier to understand.
4. Add context to your numbers
Metrics are significant for everyone running ads to generate leads and revenue. But they don’t say much without context. If your ad spend increased but conversions stayed the same, you need to fill in the ‘why’. Was it due to a seasonal trend? Did it happen because of a competitor’s trend? Has Meta changed its algorithm?
Then, offer any details and tips about campaign optimizations or tests that you’re running to improve results. Clients appreciate transparency and explaining the ‘why’ and ‘how’ behind the numbers.
5. Keep it short, sweet, and actionable
Clients are busy (aren’t we all?). The fact is no one appreciates a 10-page report filled with every metric added to their already busy schedules. Those reports are overwhelming and sometimes may even push clients to look for other solutions.
For short but rich reports, consider replacing data lists with:
- A few visual highlights (charts, graphs, tables)
- Using headings and bullet points to separate sections (for scalability)
- Clear next steps based on the data (e.g., “instead of across-the-board approach, we’ll reallocate budget to the top-performing ad set next month.”)
6. Automate the process
Creating Facebook ad reports for clients can be resource-intensive. Want to save hours of work? Avoid manually pulling data from Facebook. Platforms like LeadsBridge let you integrate your Facebook ads data into your favorite marketing tools.
Having a unified data technology stack gives you full visibility over all your data, which you can use to generate complete and up-to-date reports in a much shorter time.
Benefits of automation:
- No more CVS file downloads from Facebook Ads Manager
- Better data management with connected silos that update in real-time
- Integrating data back to Meta to help your ad perform better
- Running better follow-ups to get better results
Set it up once, and your future self will thank you.
Takeaways
Facebook ads are attractive for two main reasons: Meta’s comprehensive advertising toolkits and the high-performing ecosystem in terms of engagement and conversion.
Running Facebook ads for clients requires a clear understanding of their goals, careful planning, and ongoing optimization. By following this step-by-step guide and implementing the tips provided, you’ll be well-equipped to create successful ad campaigns for your clients.